Handi Quilter National Educator, Superior Threads Certified Educator
Author: Lana
I learned to sew at age 11 at my local Singer store. I was so intrigued by all of the supplies in my friend's sewing tote box I spotted while playing at her house that I rode my bicycle home and told my mom I wanted to take sewing lessons. I found my niche. I made most of my clothes through high school and even made room for my sewing machine (in cabinet) in my tiny college dorm room. I bought my first quilt book when in my early 20"s at the St. Louis arch gift shop. It was a book about the Cathedral Window and I was intrigued with how that was put together. I played around with it, but continued to sew garments for my kids while they were young. I got back into quilting when my son and daughter were in middle school, feeding my need for continued creativity. I took various classes locally, and eventually made my way to Syracuse, NY for Quilting by the Lake, and Carmel, CA for Empty Spools. It wasn't until I took Betty Cotton's Cotton Theory Class at Camp Cotton in Osseo, WI, in July, 2012, that I found what I was looking for. Everything just clicked for me and I felt like I now knew this "secret" that made everything so much easier and more fun and had to share it with other quilters. "Quilt first, then assemble" means no more getting down on my hands and knees on the living room floor and pinning the quilt back, batting and pieced quilt top together and then trying to get it through my machine's throat area or, worse, paying someone big bucks to do it for you. And no handwork. I'm in.
December brings another month to embark on our own project, regardless of its size, theme, or technique!
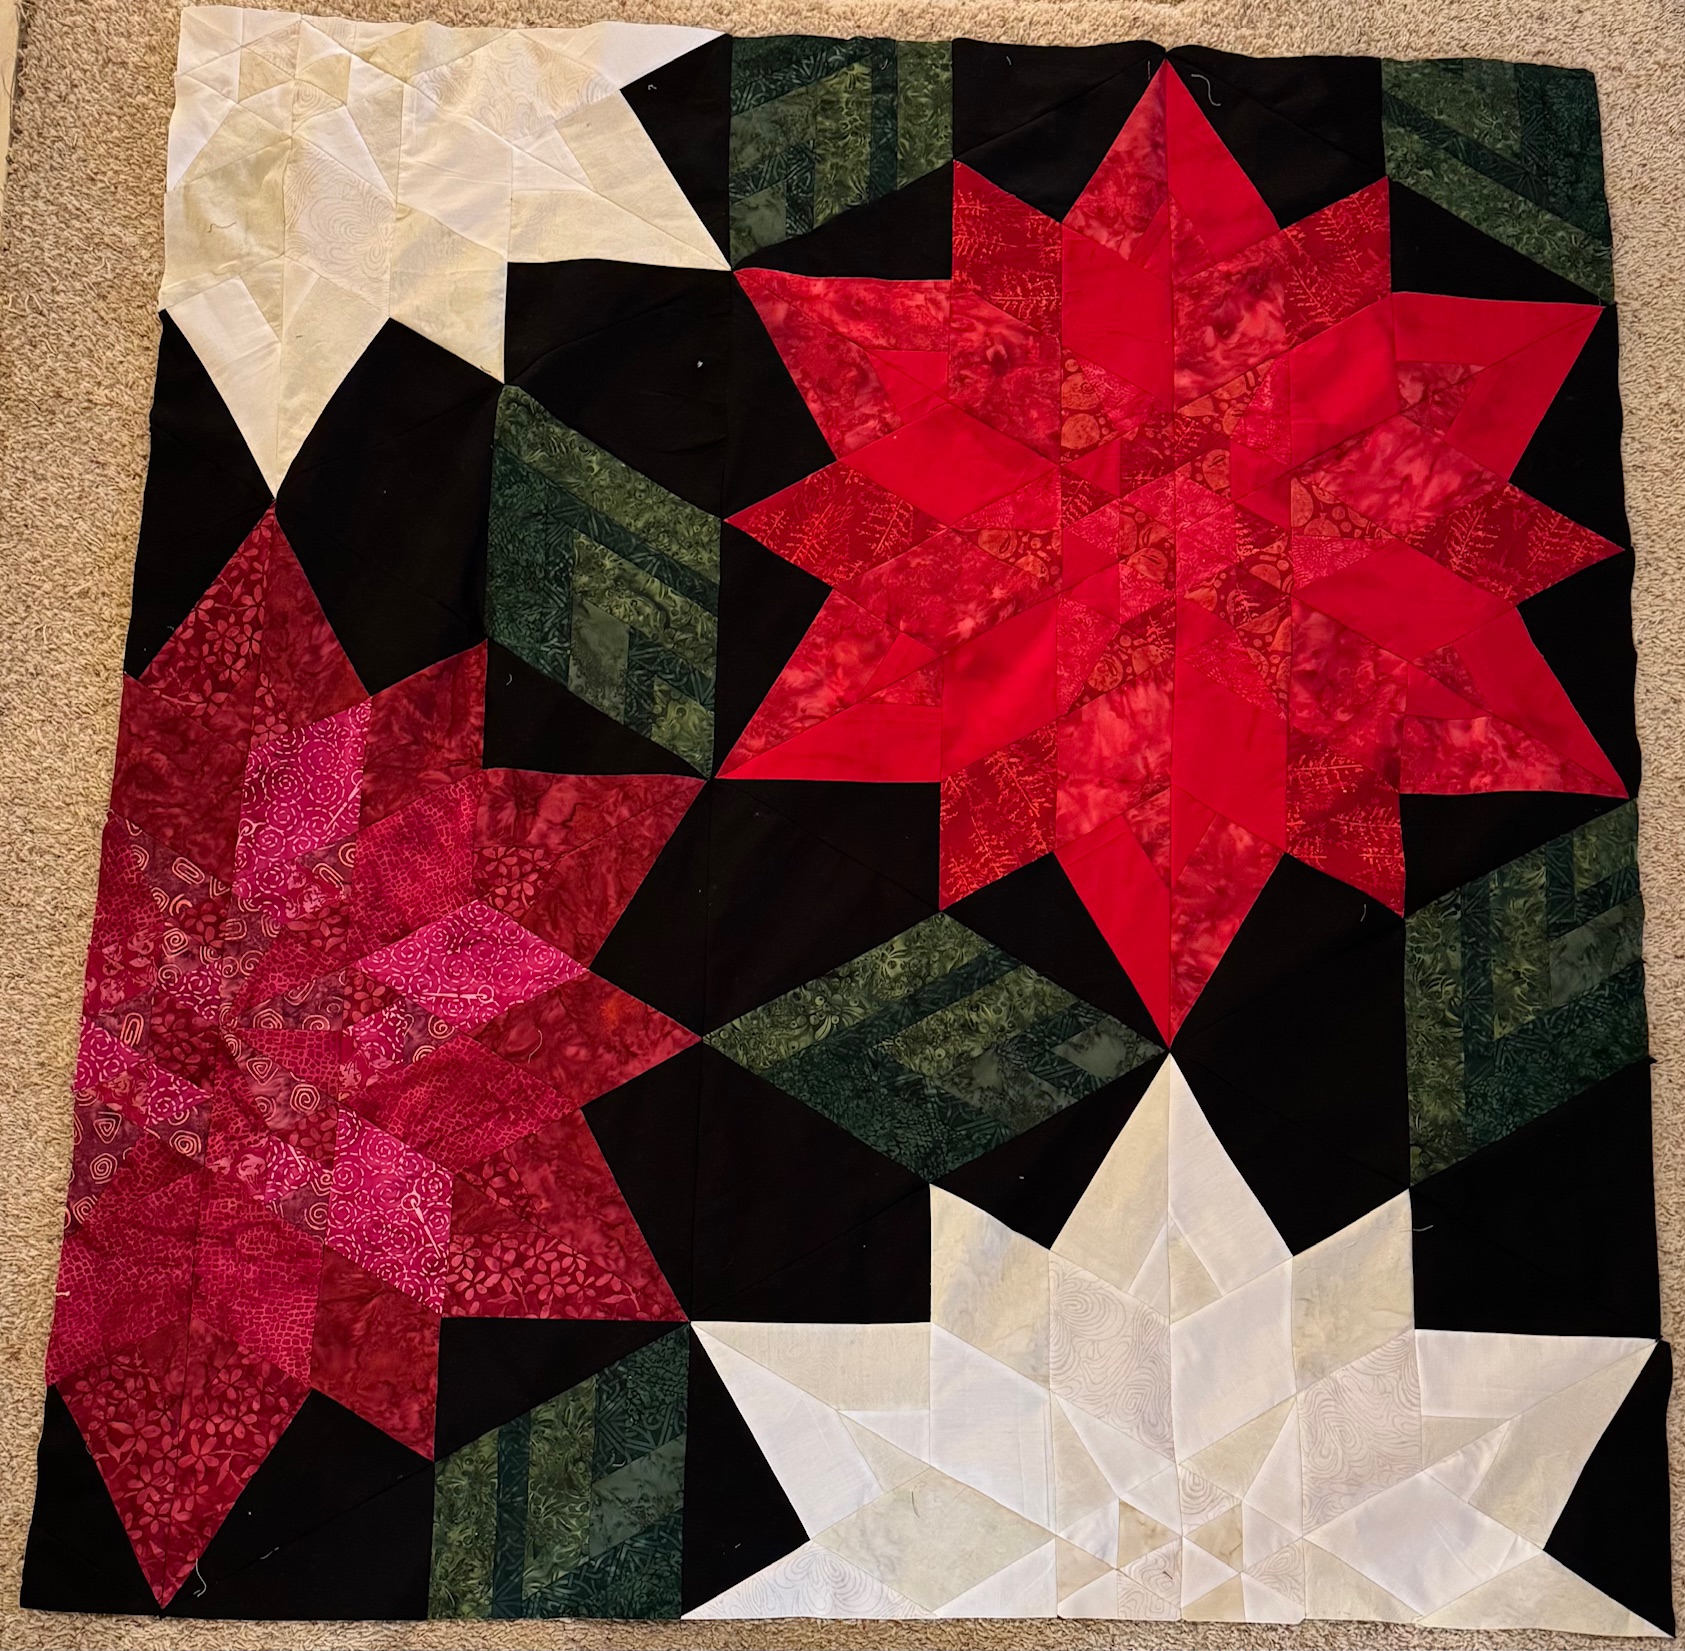
I’ve been going to a lot of retreats lately. I love them so much! It’s a way to meet new quilting friends and I’ve been searching for my new tribe since moving across the country a couple years ago. I began my December quilt at the retreat I attended last month. I joined the Crimson Christmas Quilt Along with Krista Moser. Once I saw her Crimson Christmas quilt pattern, I knew I had to make it! I had some Island Batik scraps that worked great for this challenge.
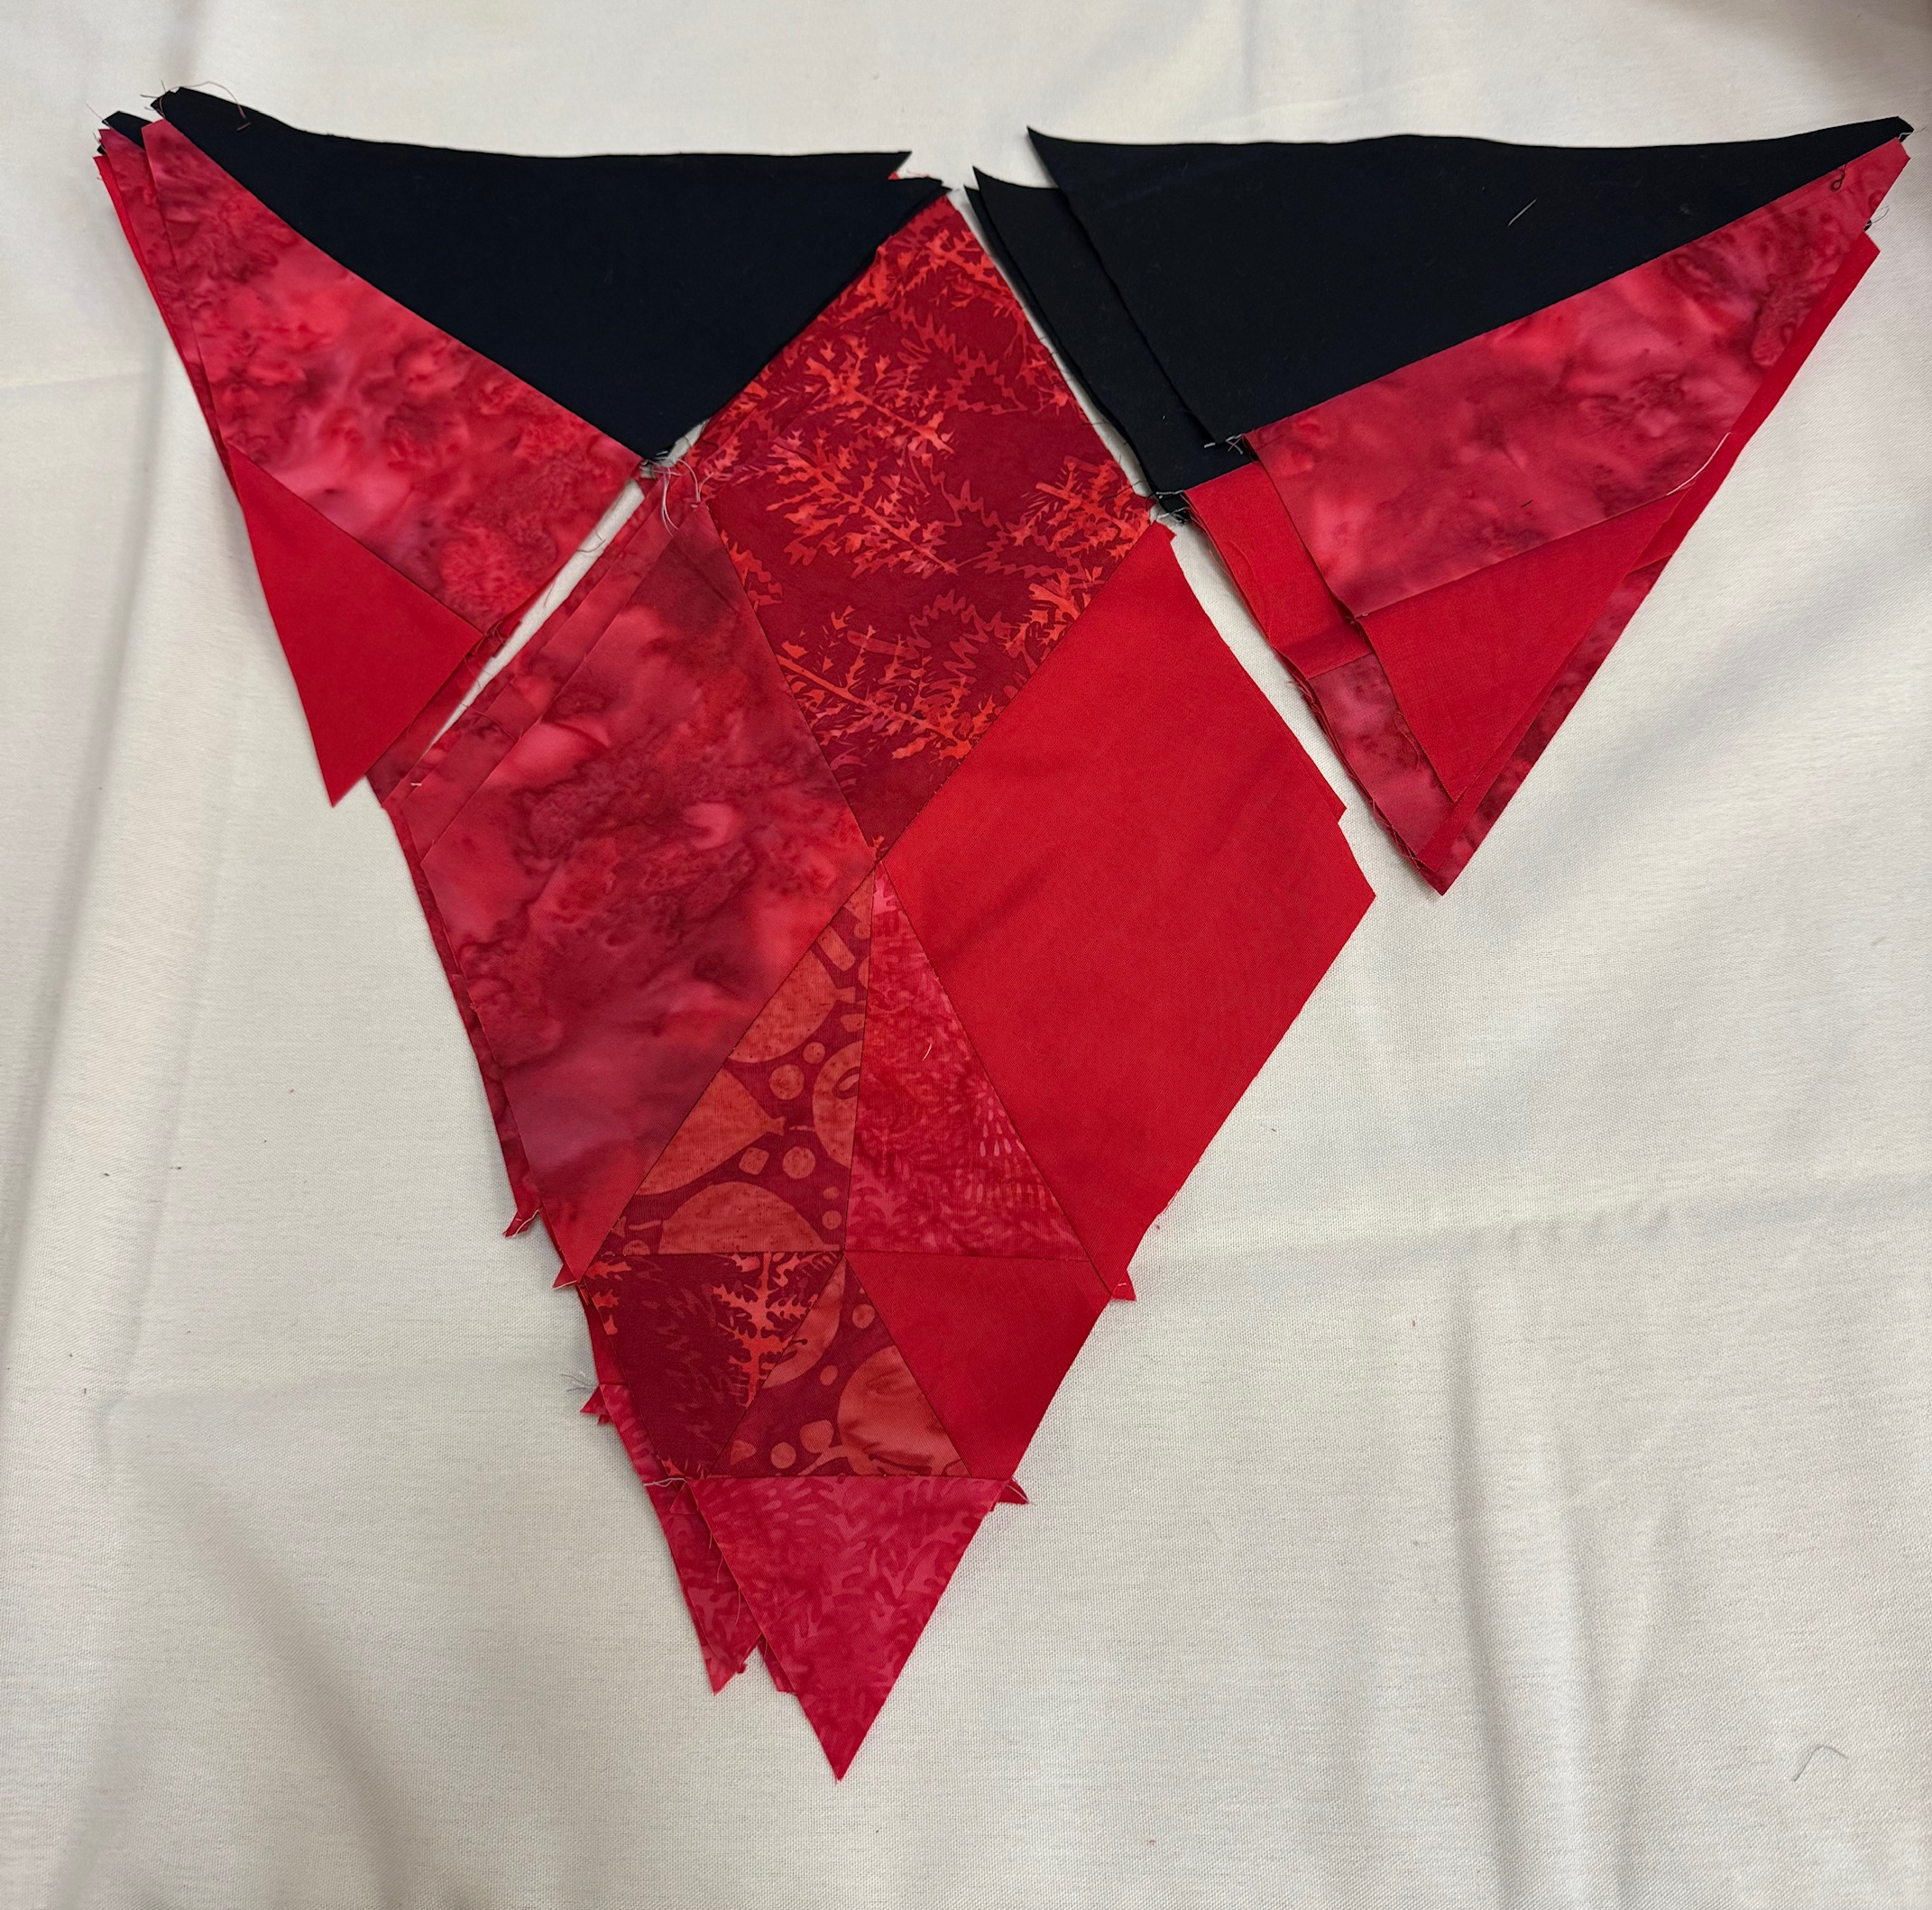
The beginning process is getting all the 60-degree pieces together before being able to put them on the design wall to see it coming together. A fresh Schmetz 80/12 needle begins the piecing process every time.
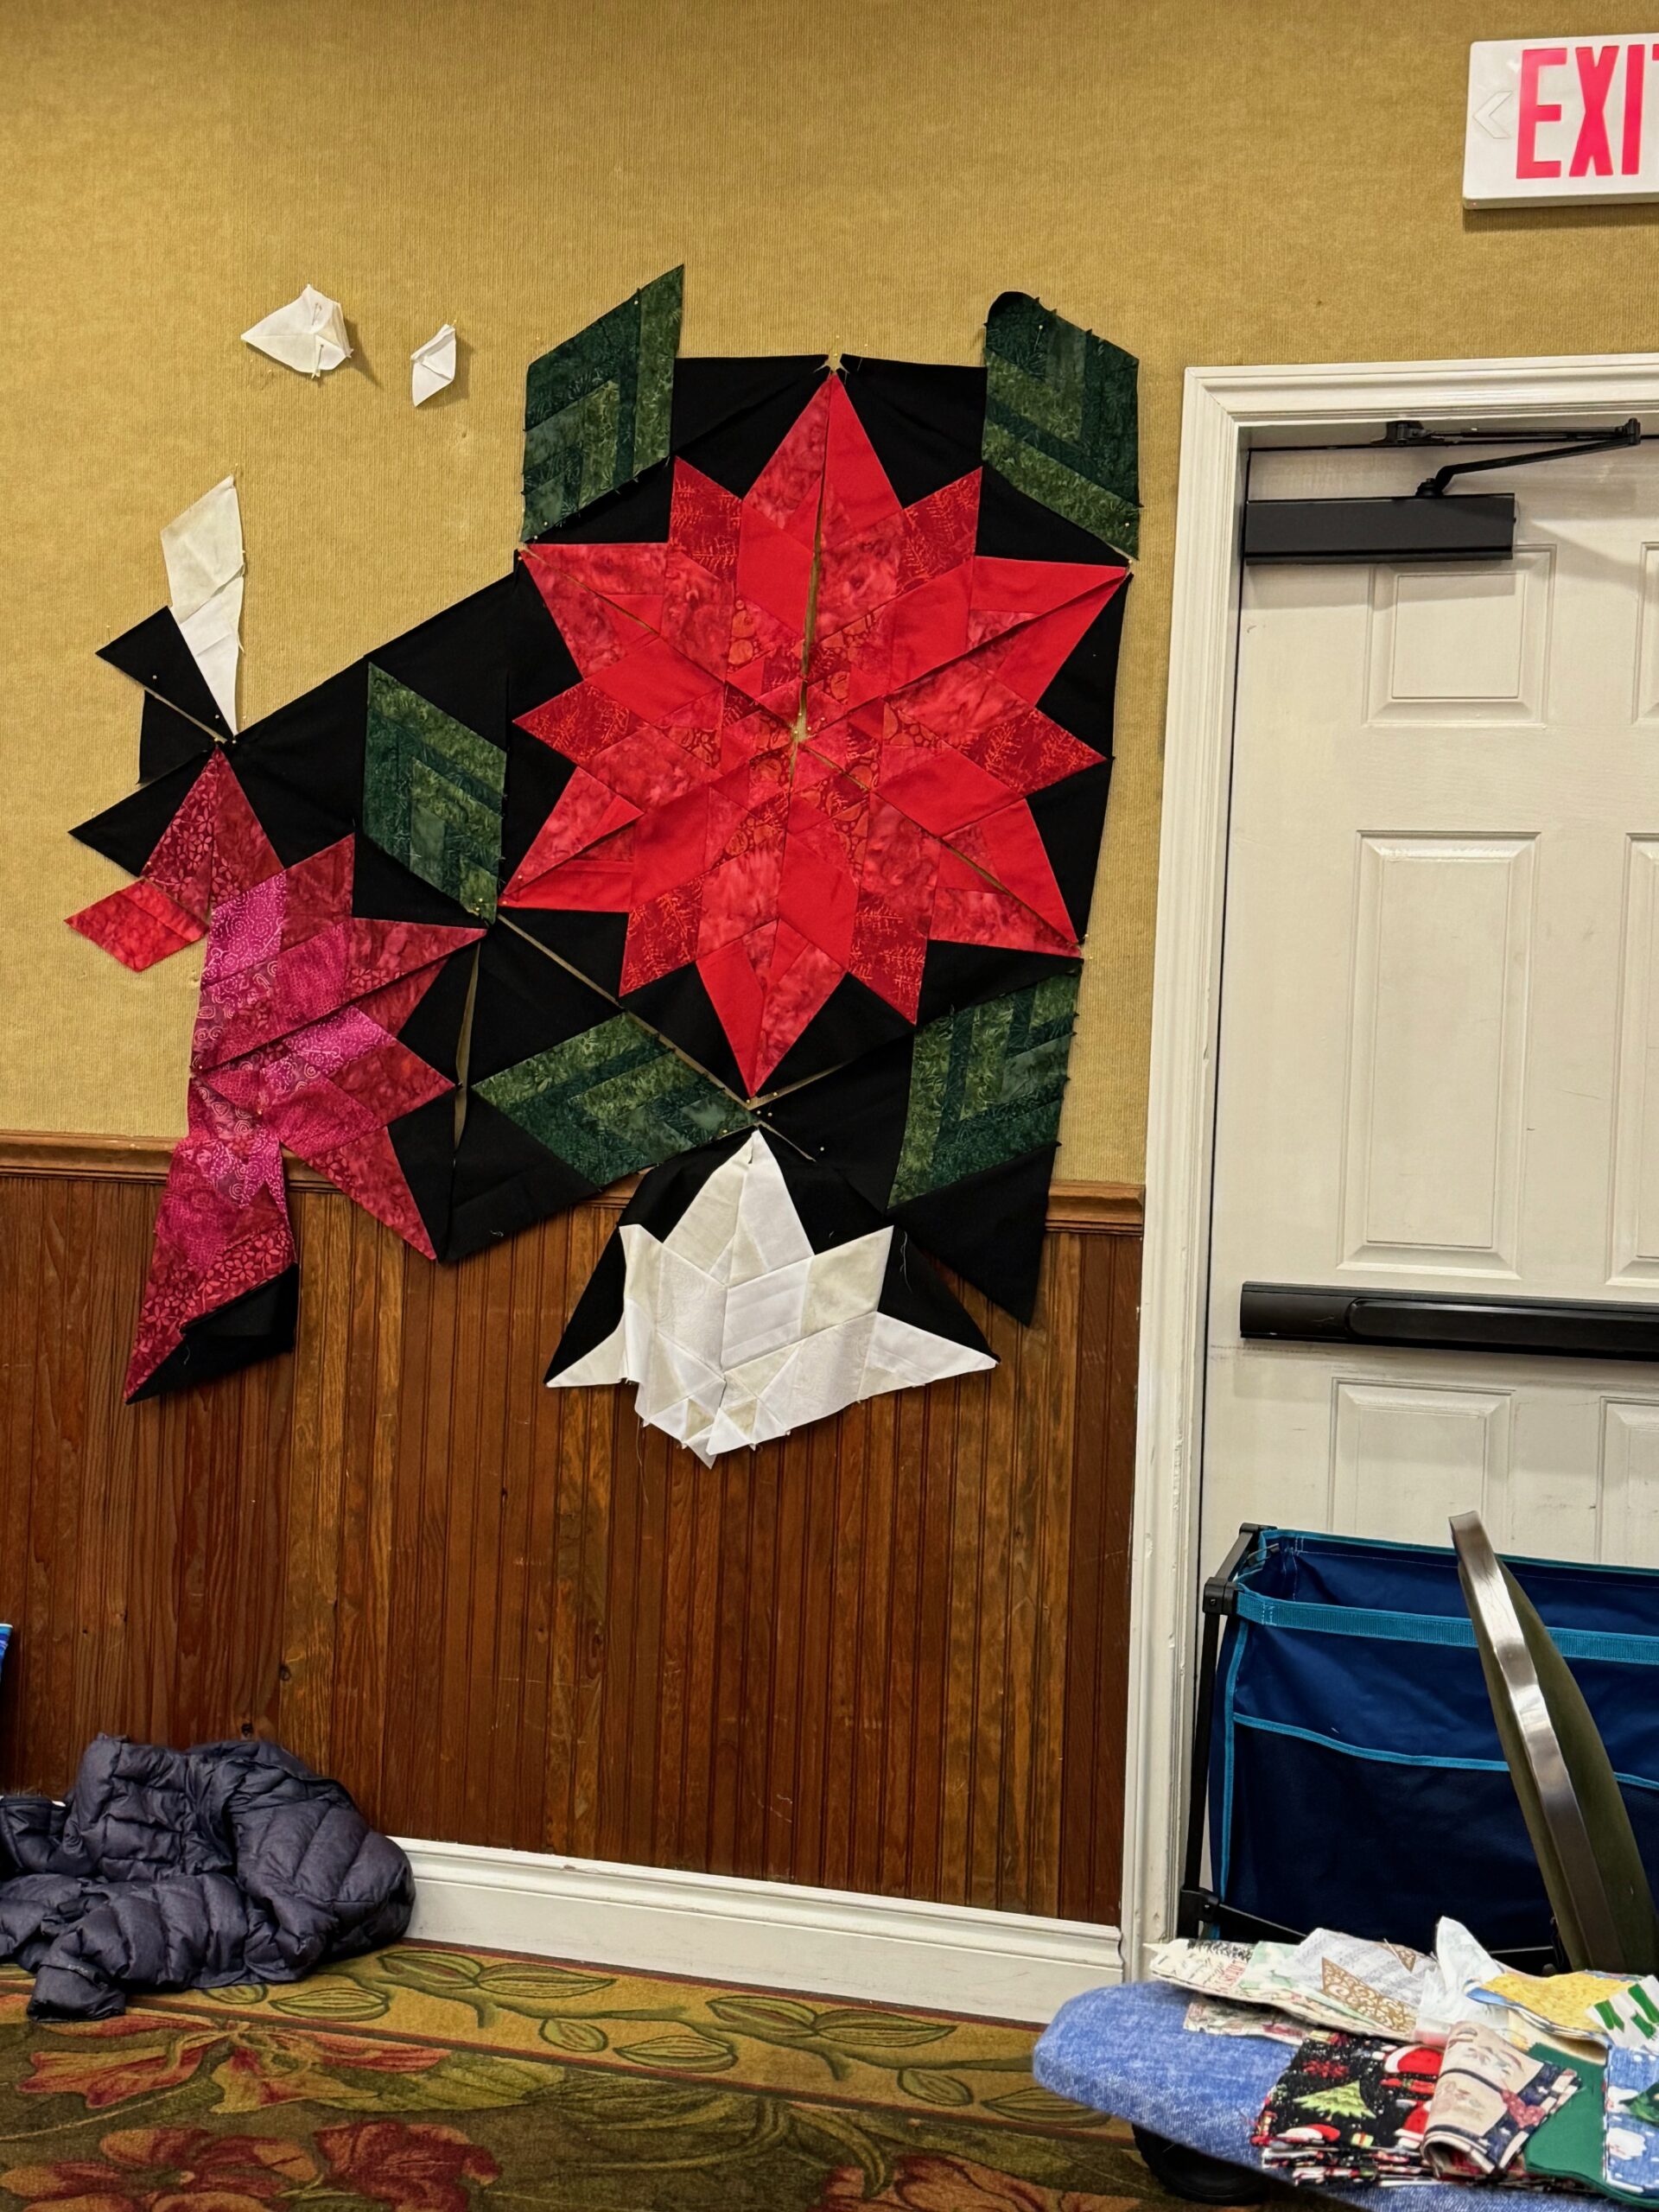
It’s beginning to come together here.
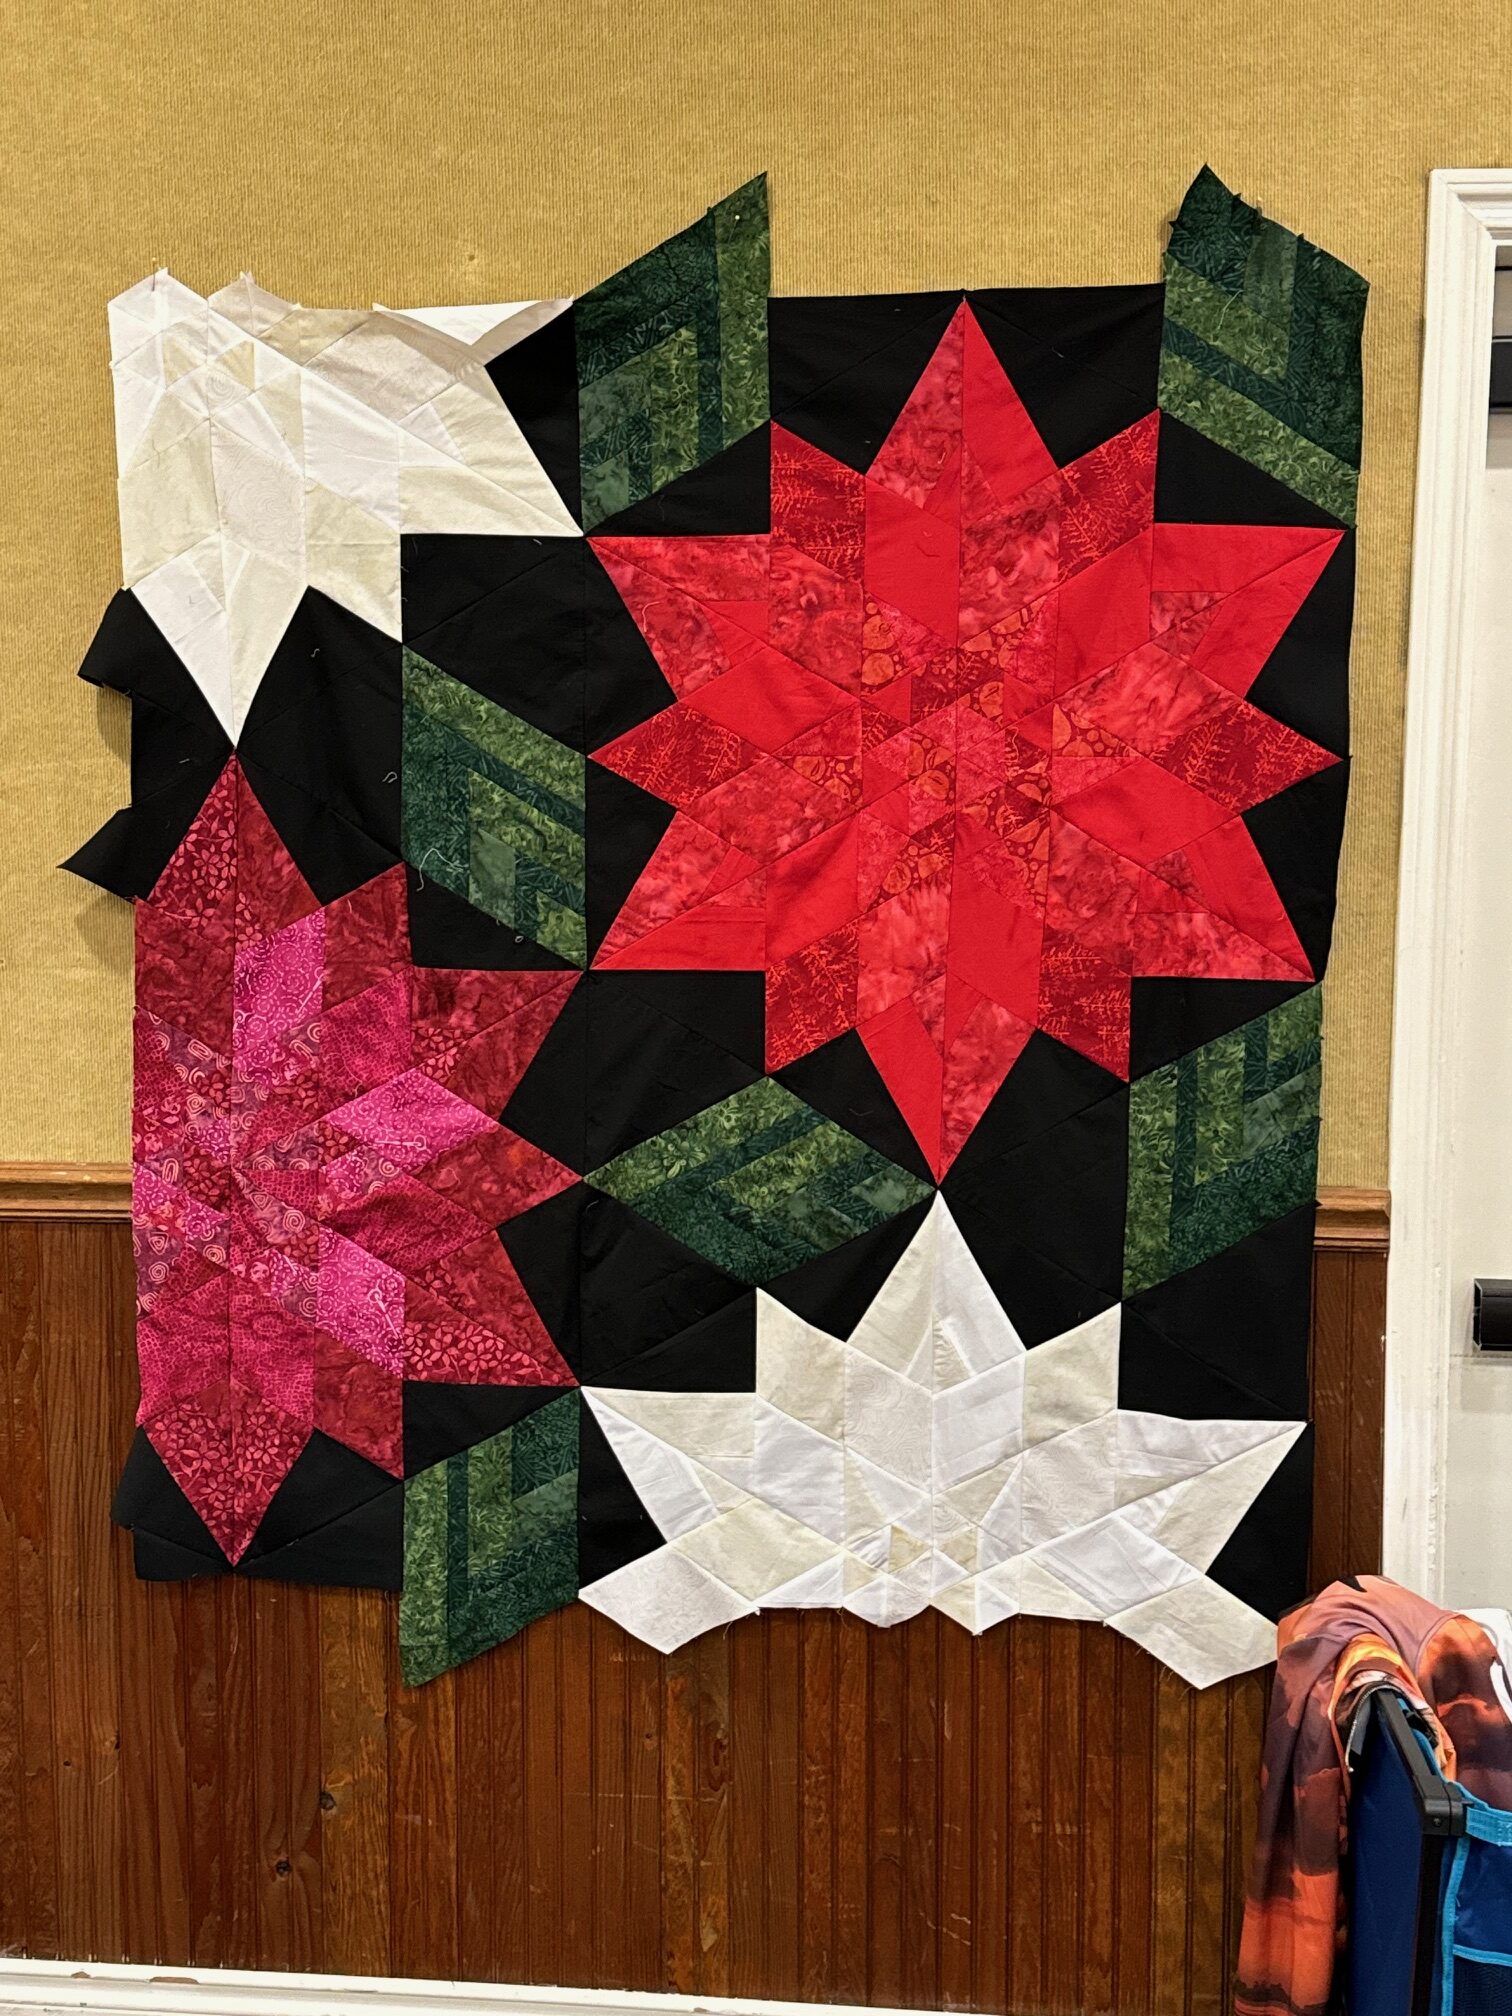
And finally it is together after day 2 of the retreat. It just needs to be trimmed at the edges.
After trimming.
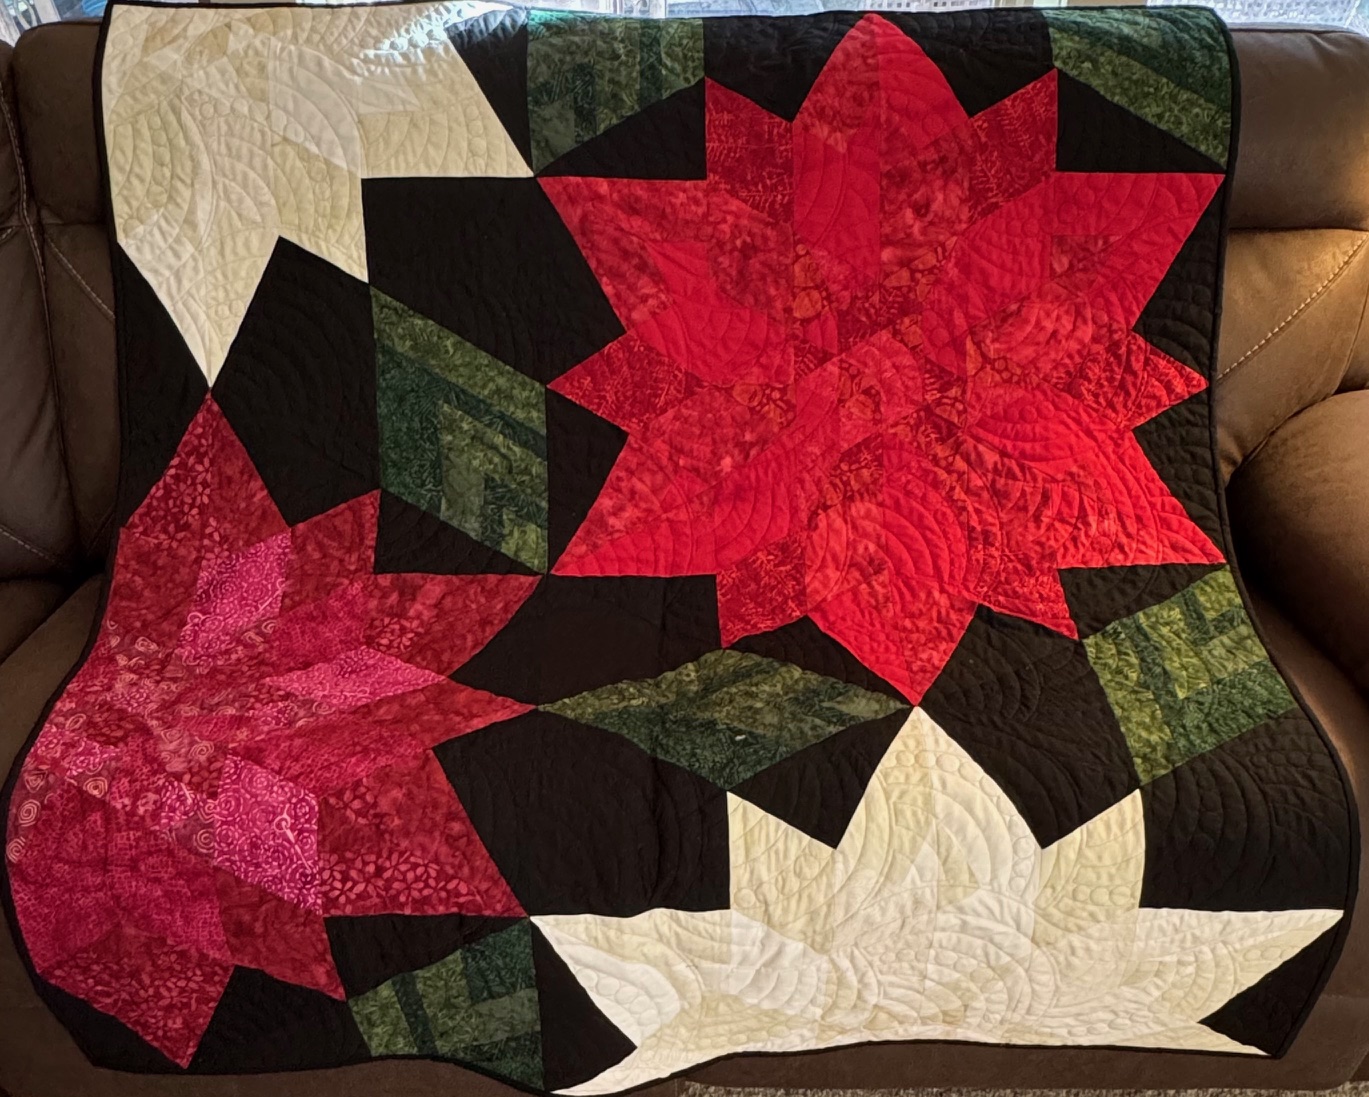
I quilted it on my Handi QuilterForte 24 (Amara 24) using Chrisy Dillon’s Radiate digital pattern for Pro-Stitcher. I was able to audition it using Pro-Stitcher Designer by bringing in a picture of the quilt using the Backdrop tool and auditioning different digital designs until I found one I liked. I used Hobbs 80/20 batting and Superior Thread’s Monopoly in smoke for the top thread for longarming so the thread wouldn’t show, just the lovely texture.
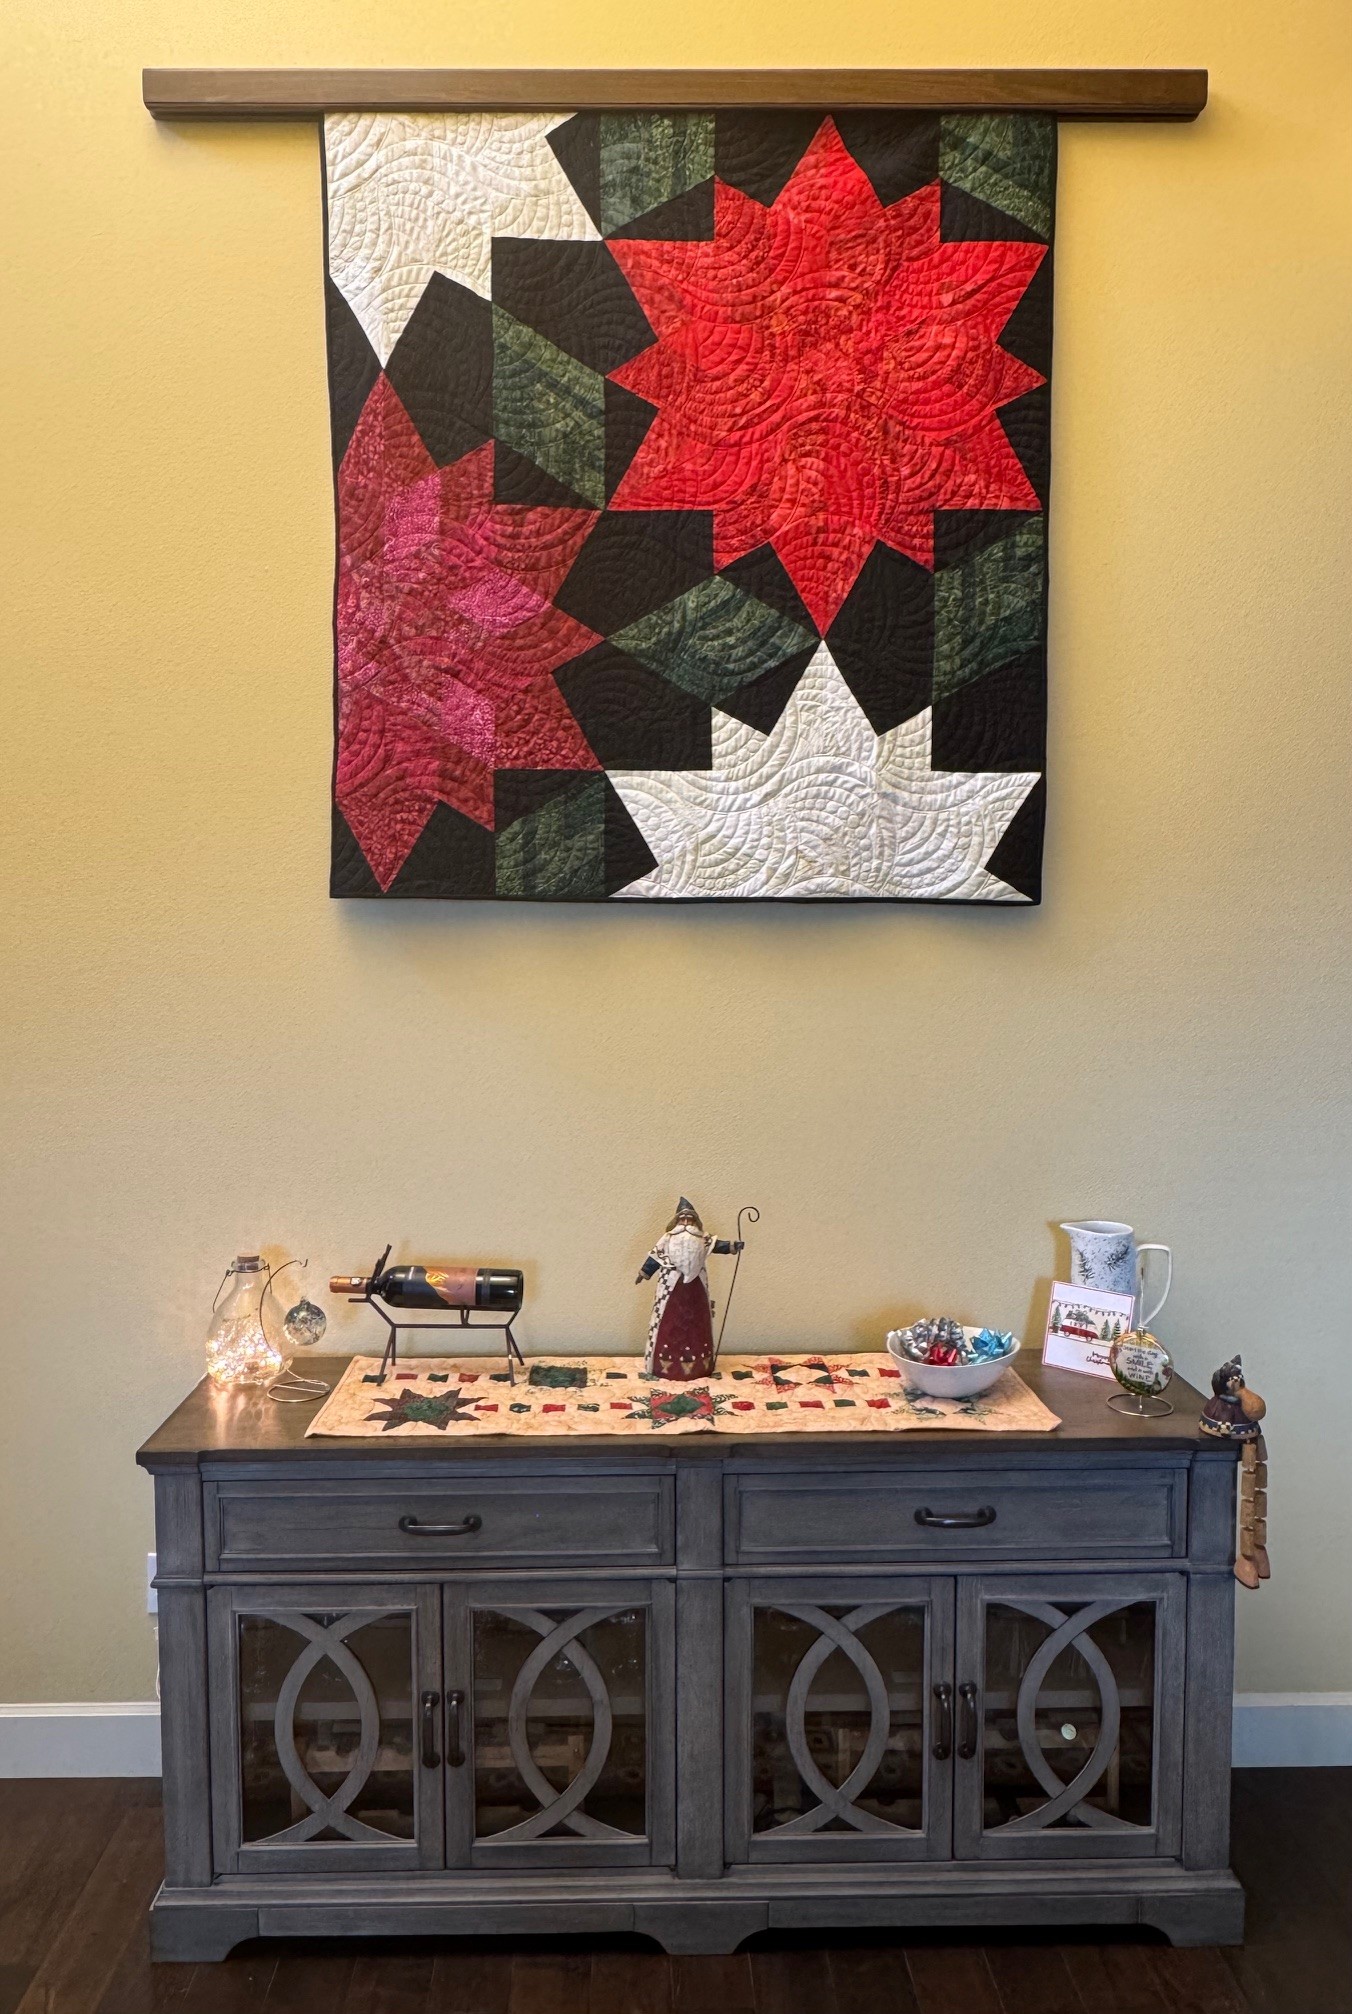
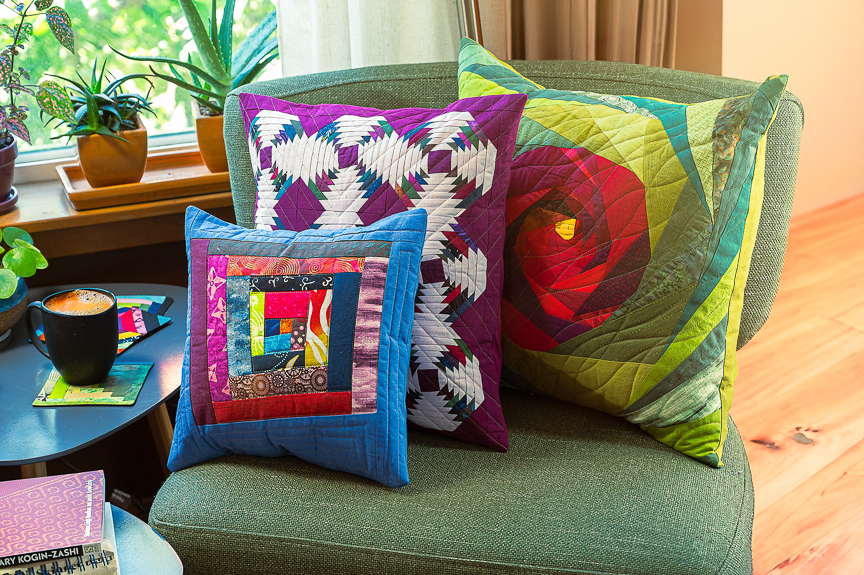
After taking it for show and tell at my guild, I hung it in my entry for the holiday. I’m very happy with it!
This is my last post as an Island Batik Ambassador as life is taking me other directions. I have loved this opportunity so very much and it enriched my life for its duration. Island Batik is so generous and supportive of its ambassadors! I would encourage others to apply!!
Please take a look at what the other ambassadors have chosen to do for their It’s All Up to You Challenge:
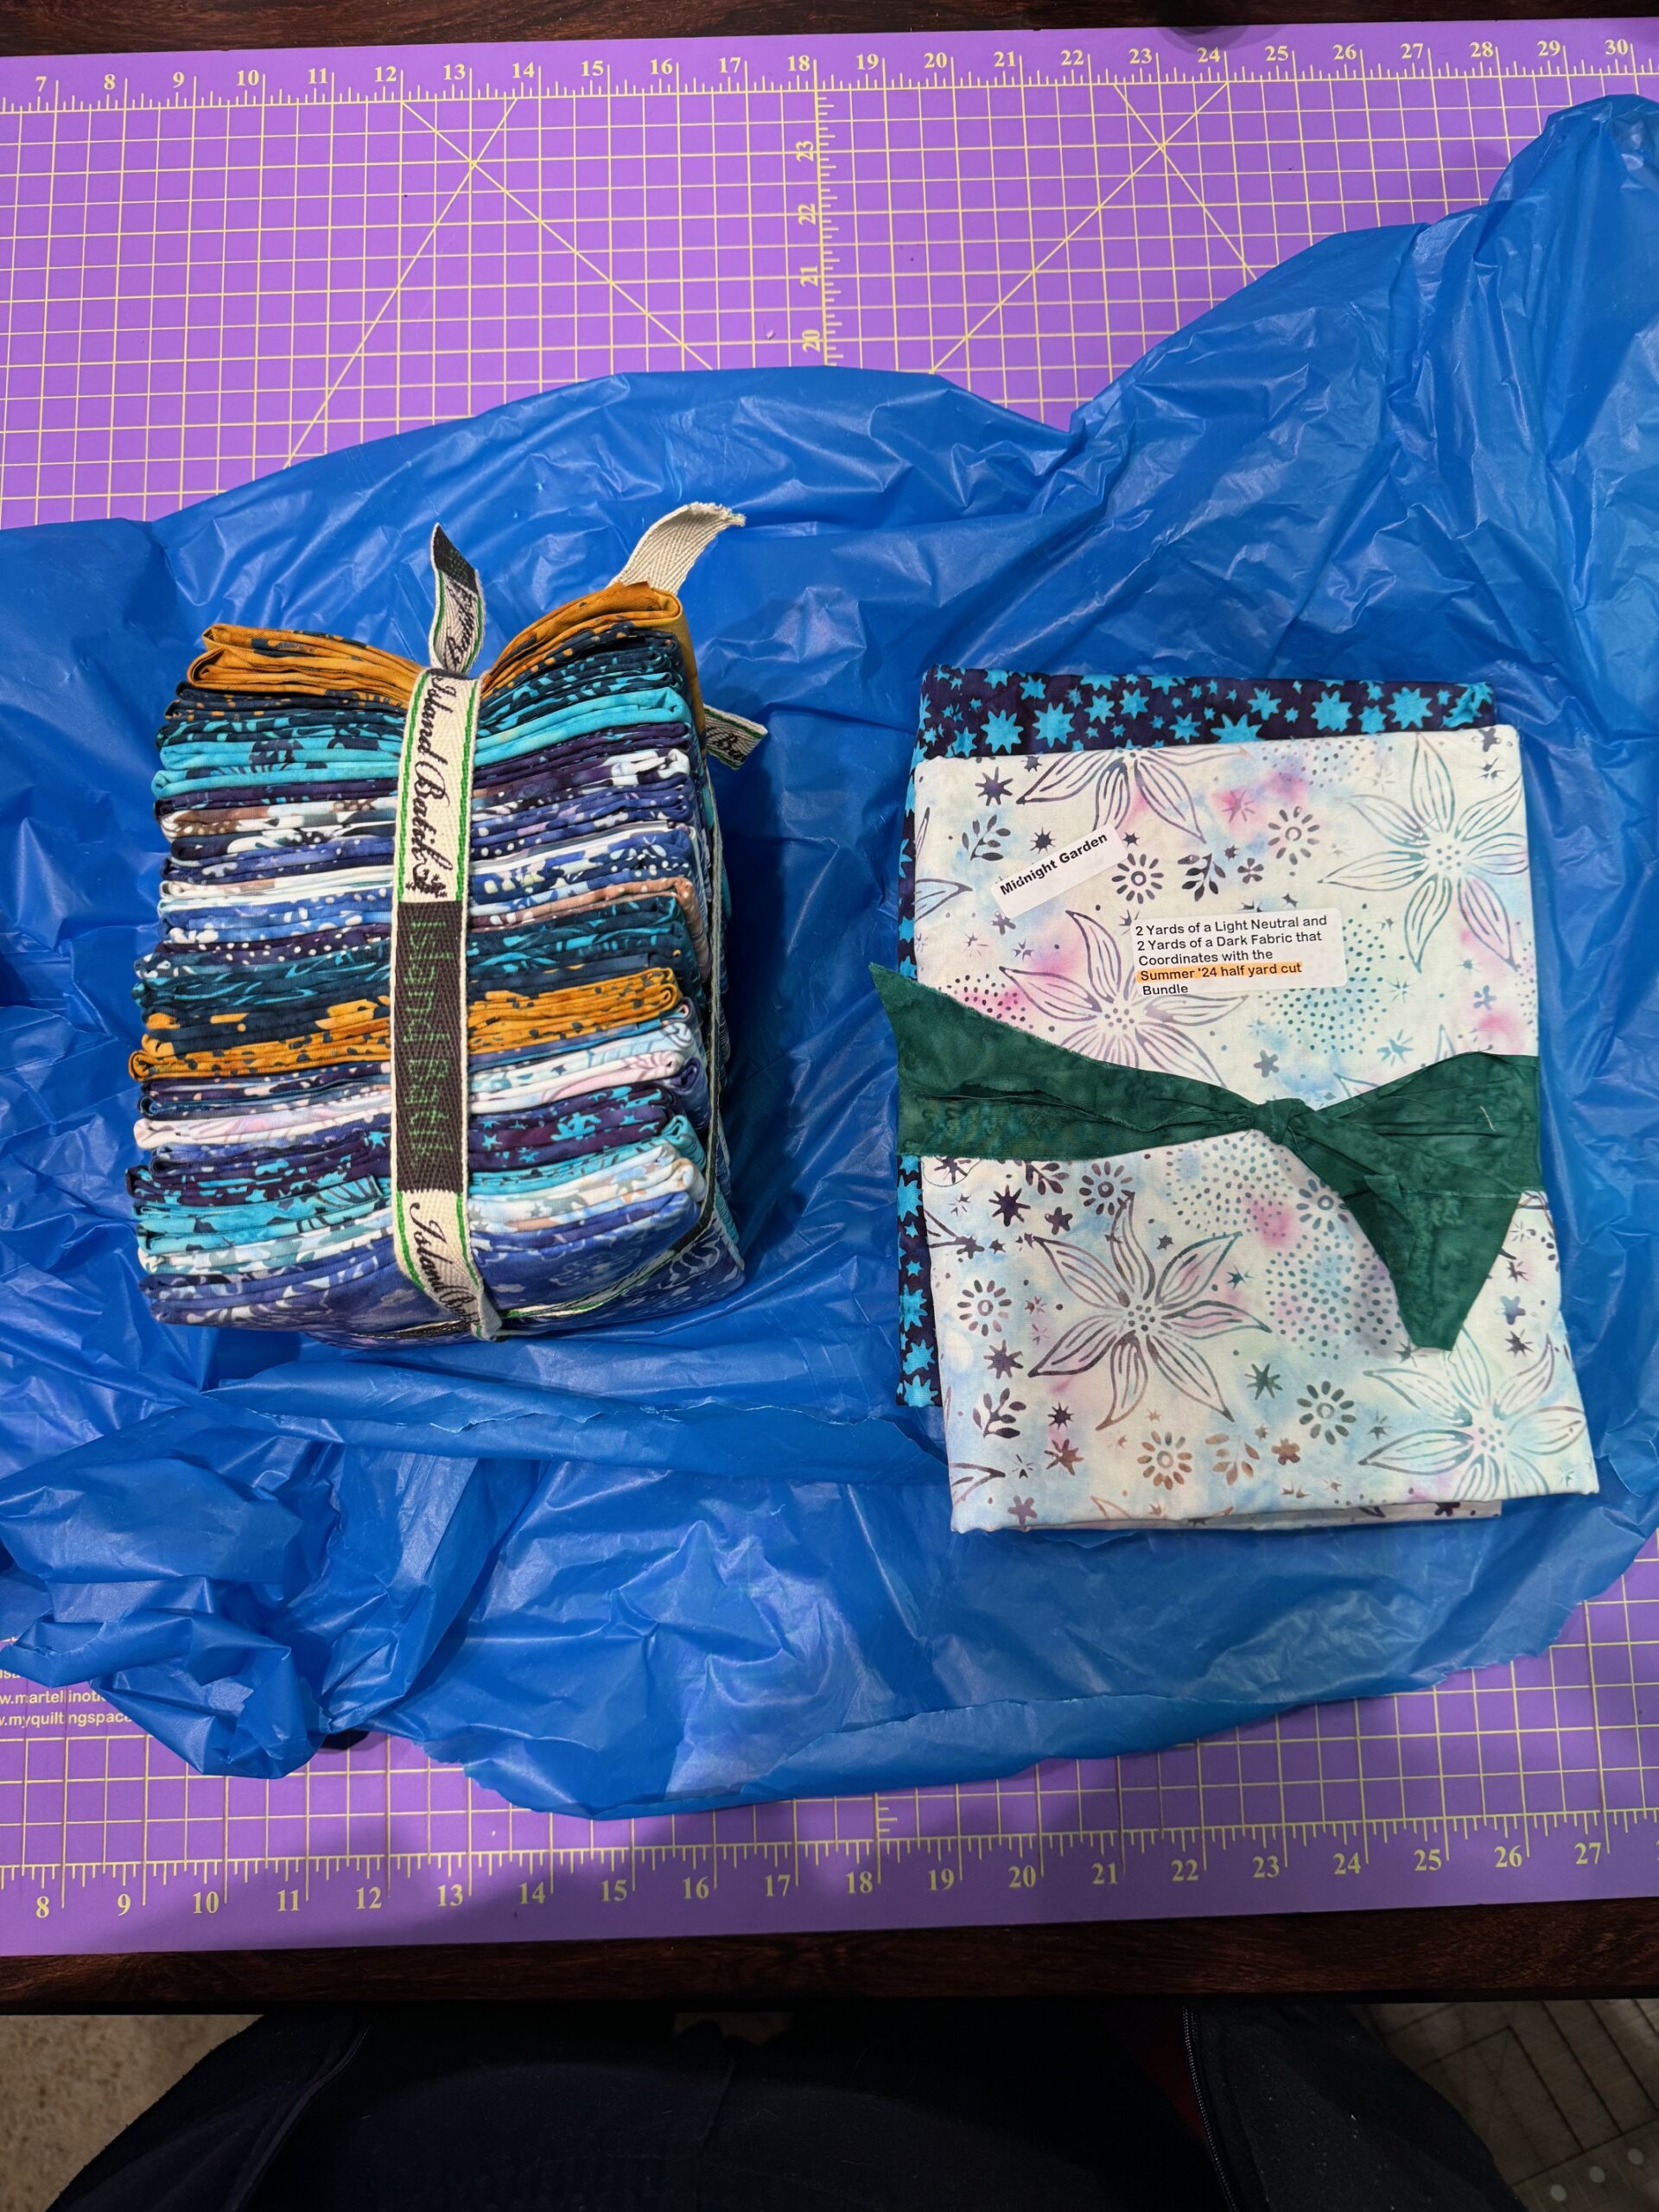
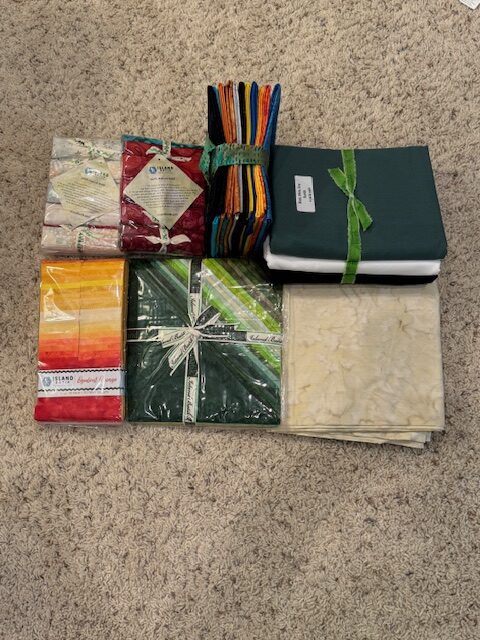
This month’s challenge was to make a Dresden quilt lap size or larger using the Surprise Bundle we received from Island Batik.
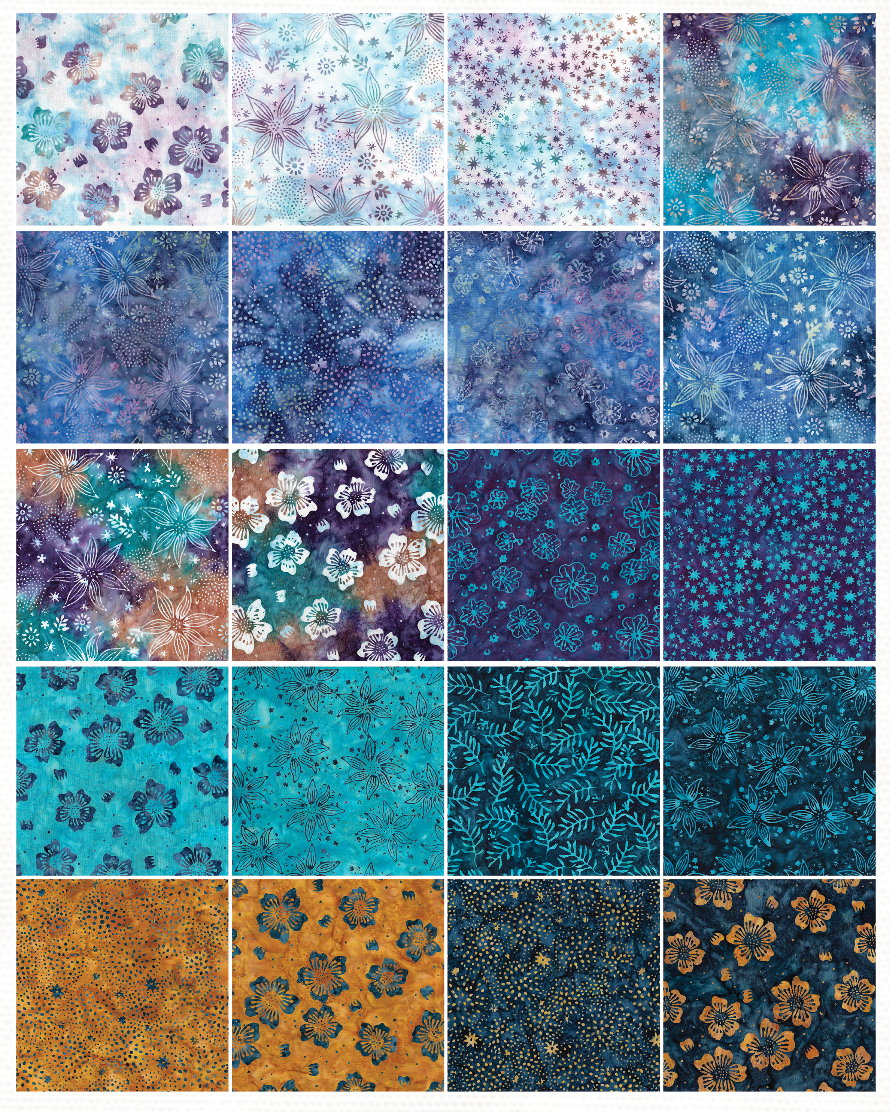
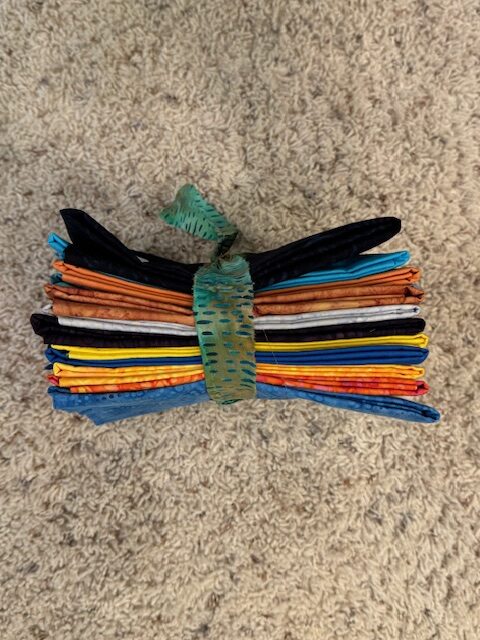
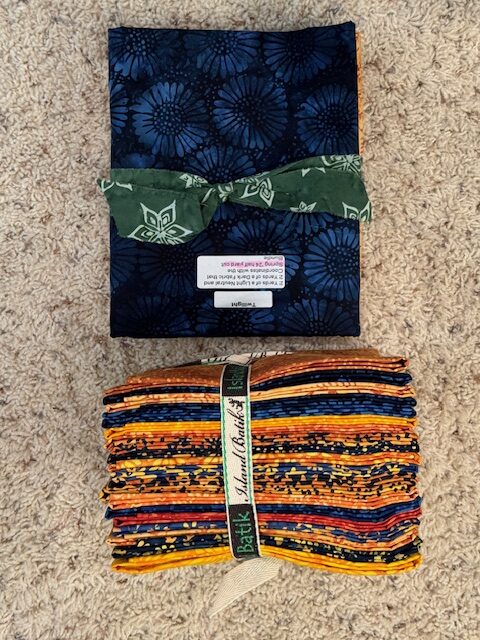
My Surprise Bundle was Midnight Garden, a beautiful collection of blues, purples, and a bit of gold. This was designed by Jerry Khiev as a Spring/ Summer collection and will be shipping to shops beginning next month. Ask for it at your local quilt shop.
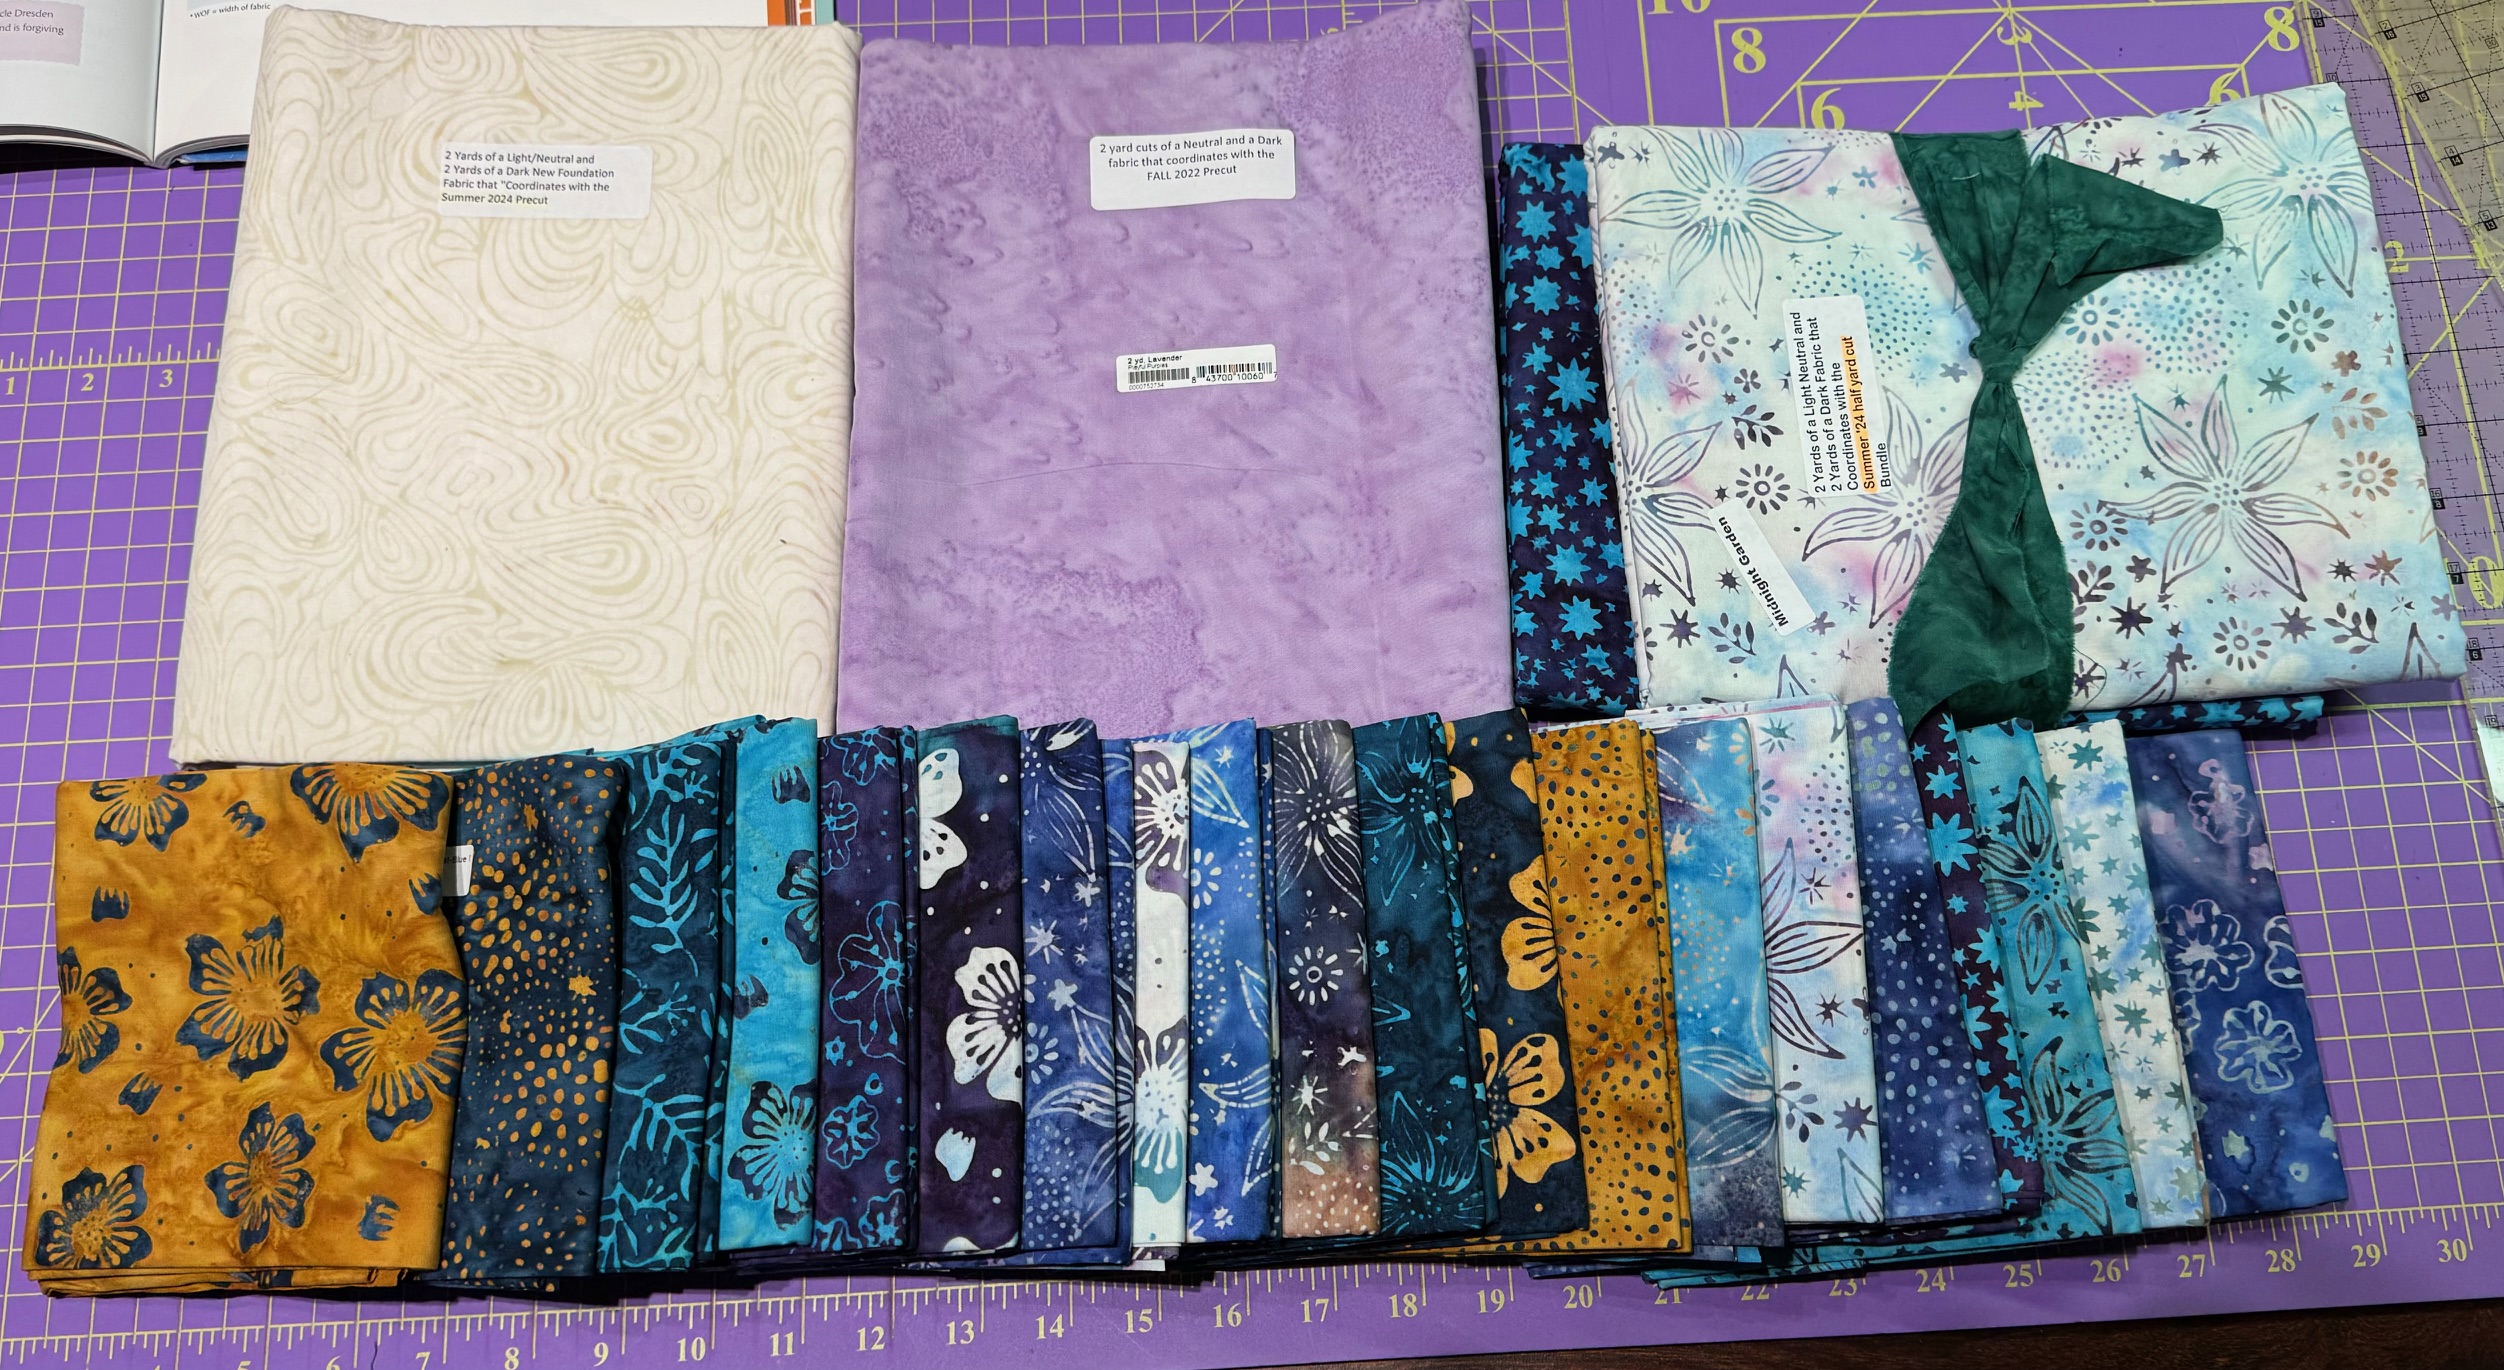
Here is my 1/2 yard bundle along with 2 yards each of two coordinating fabrics, a light and a dark shown in the upper right. I added two background fabrics previously supplied by Island Batik.
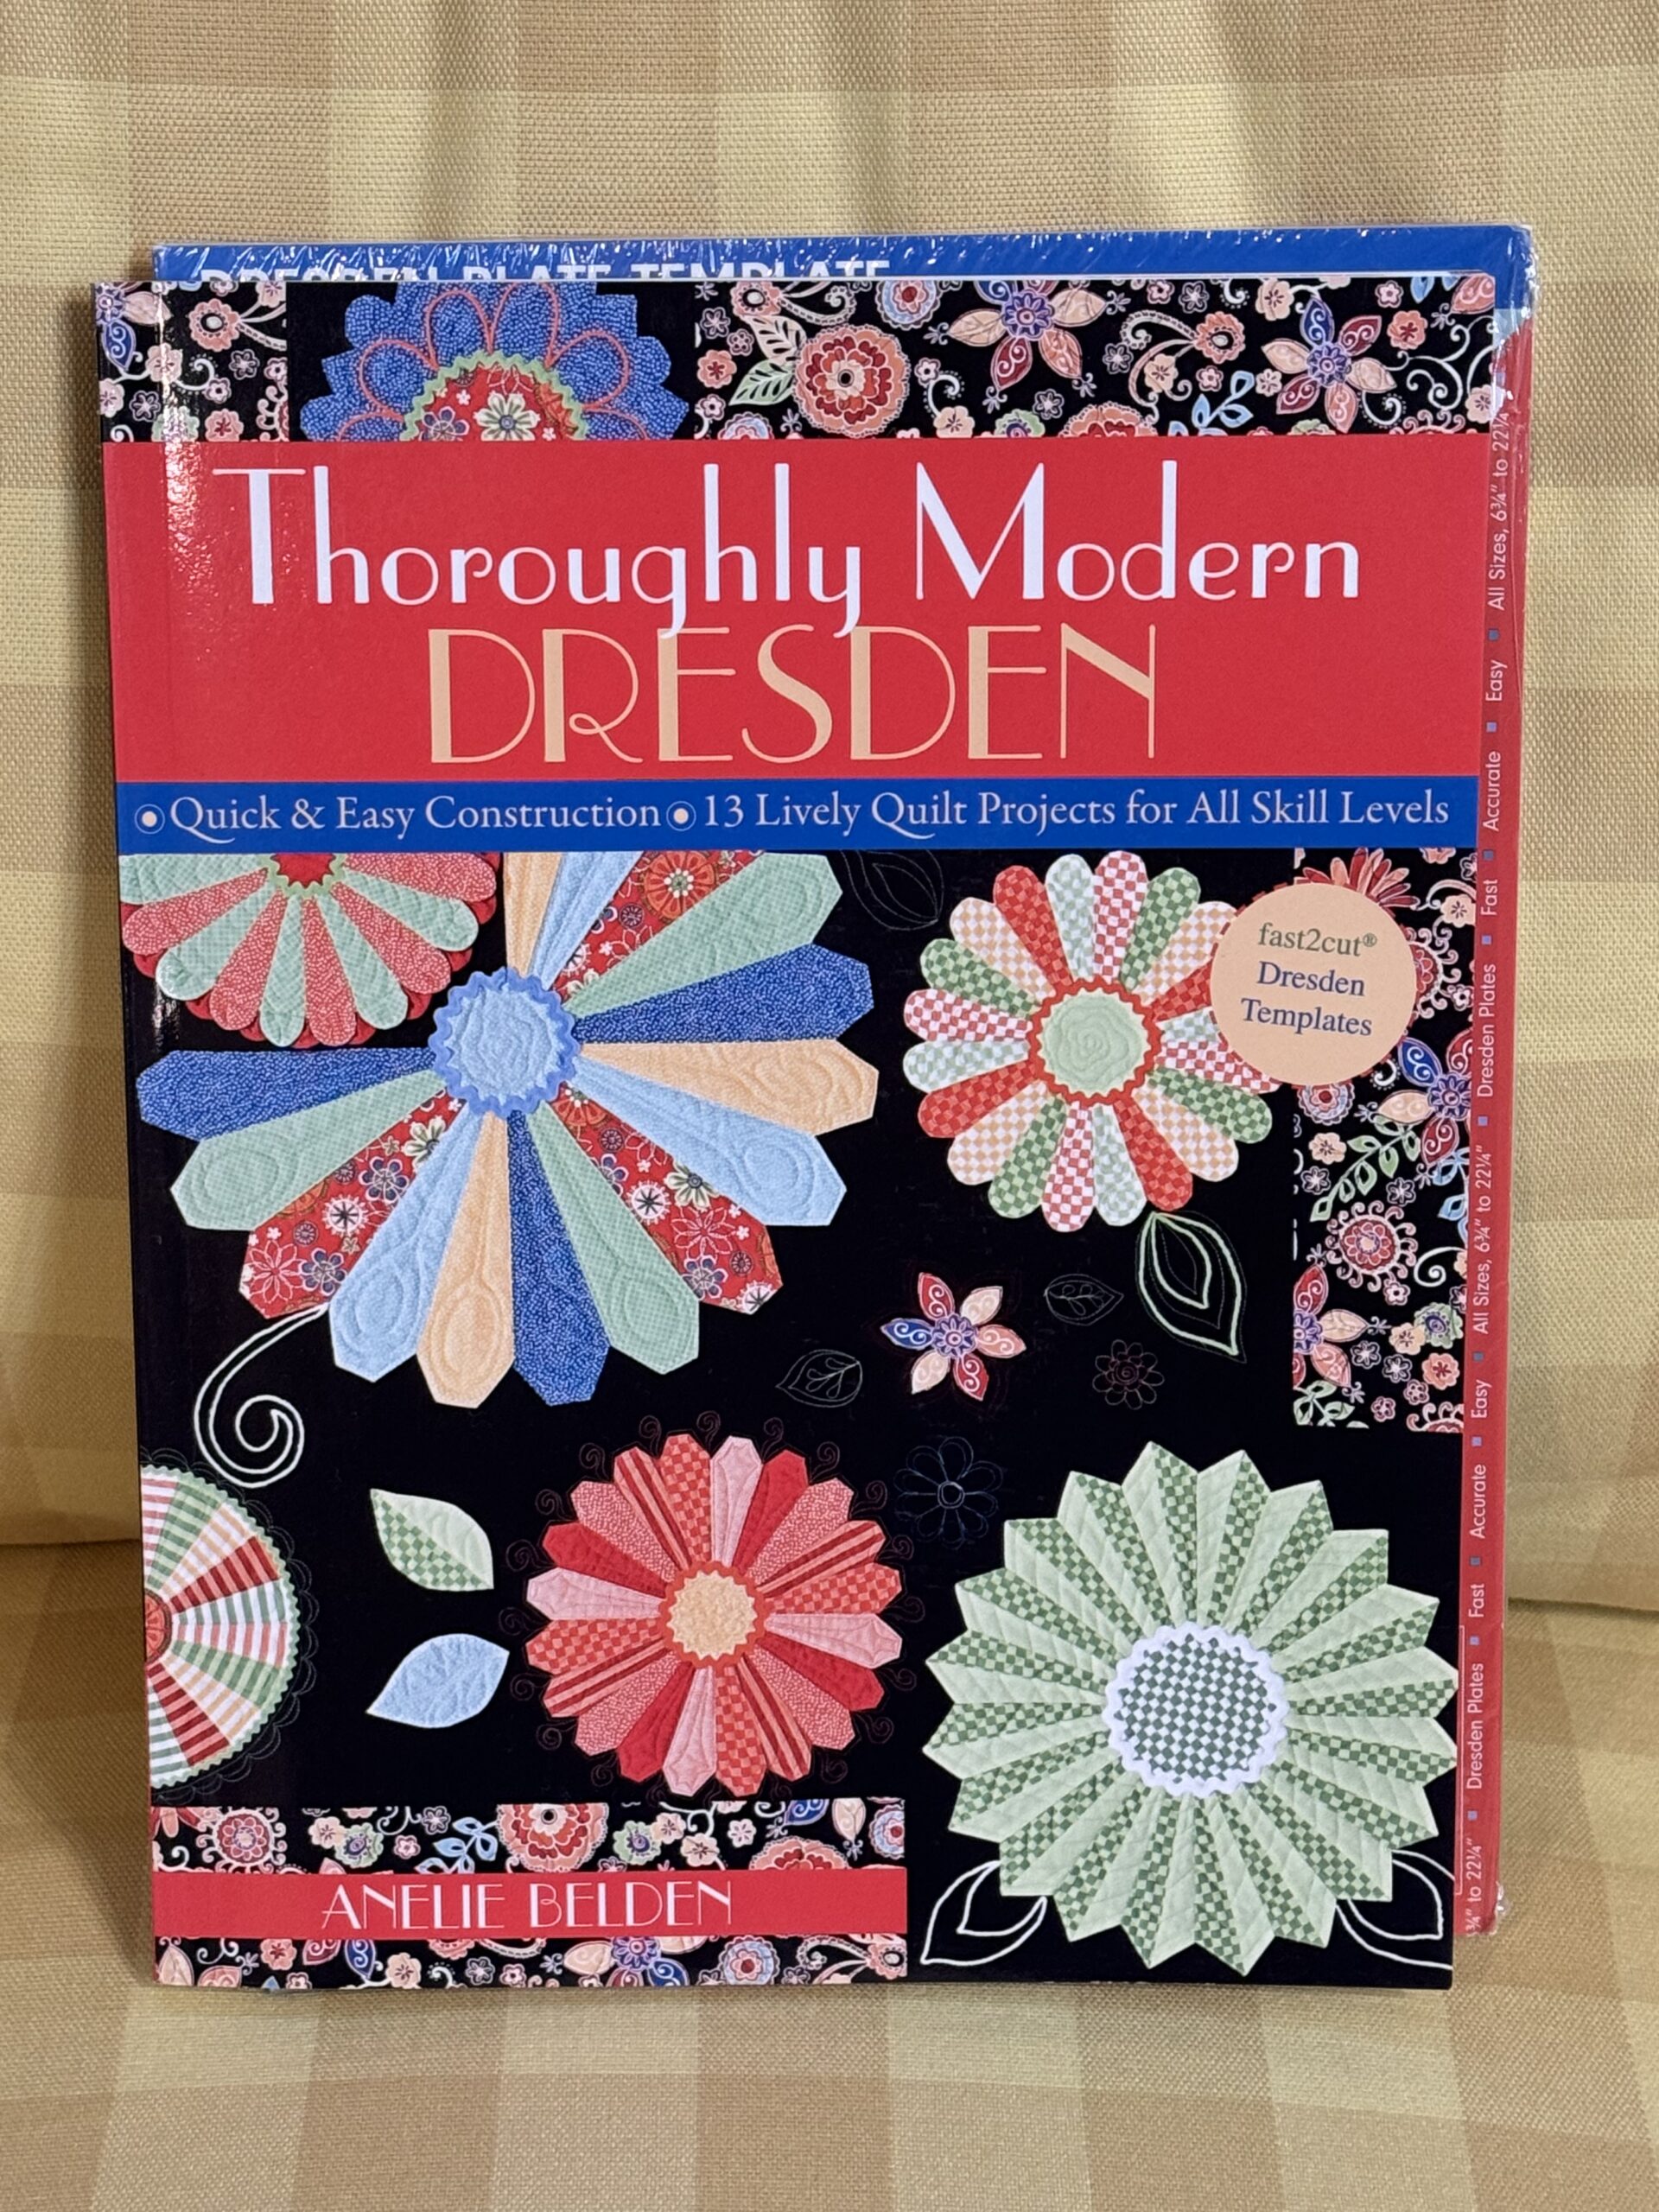
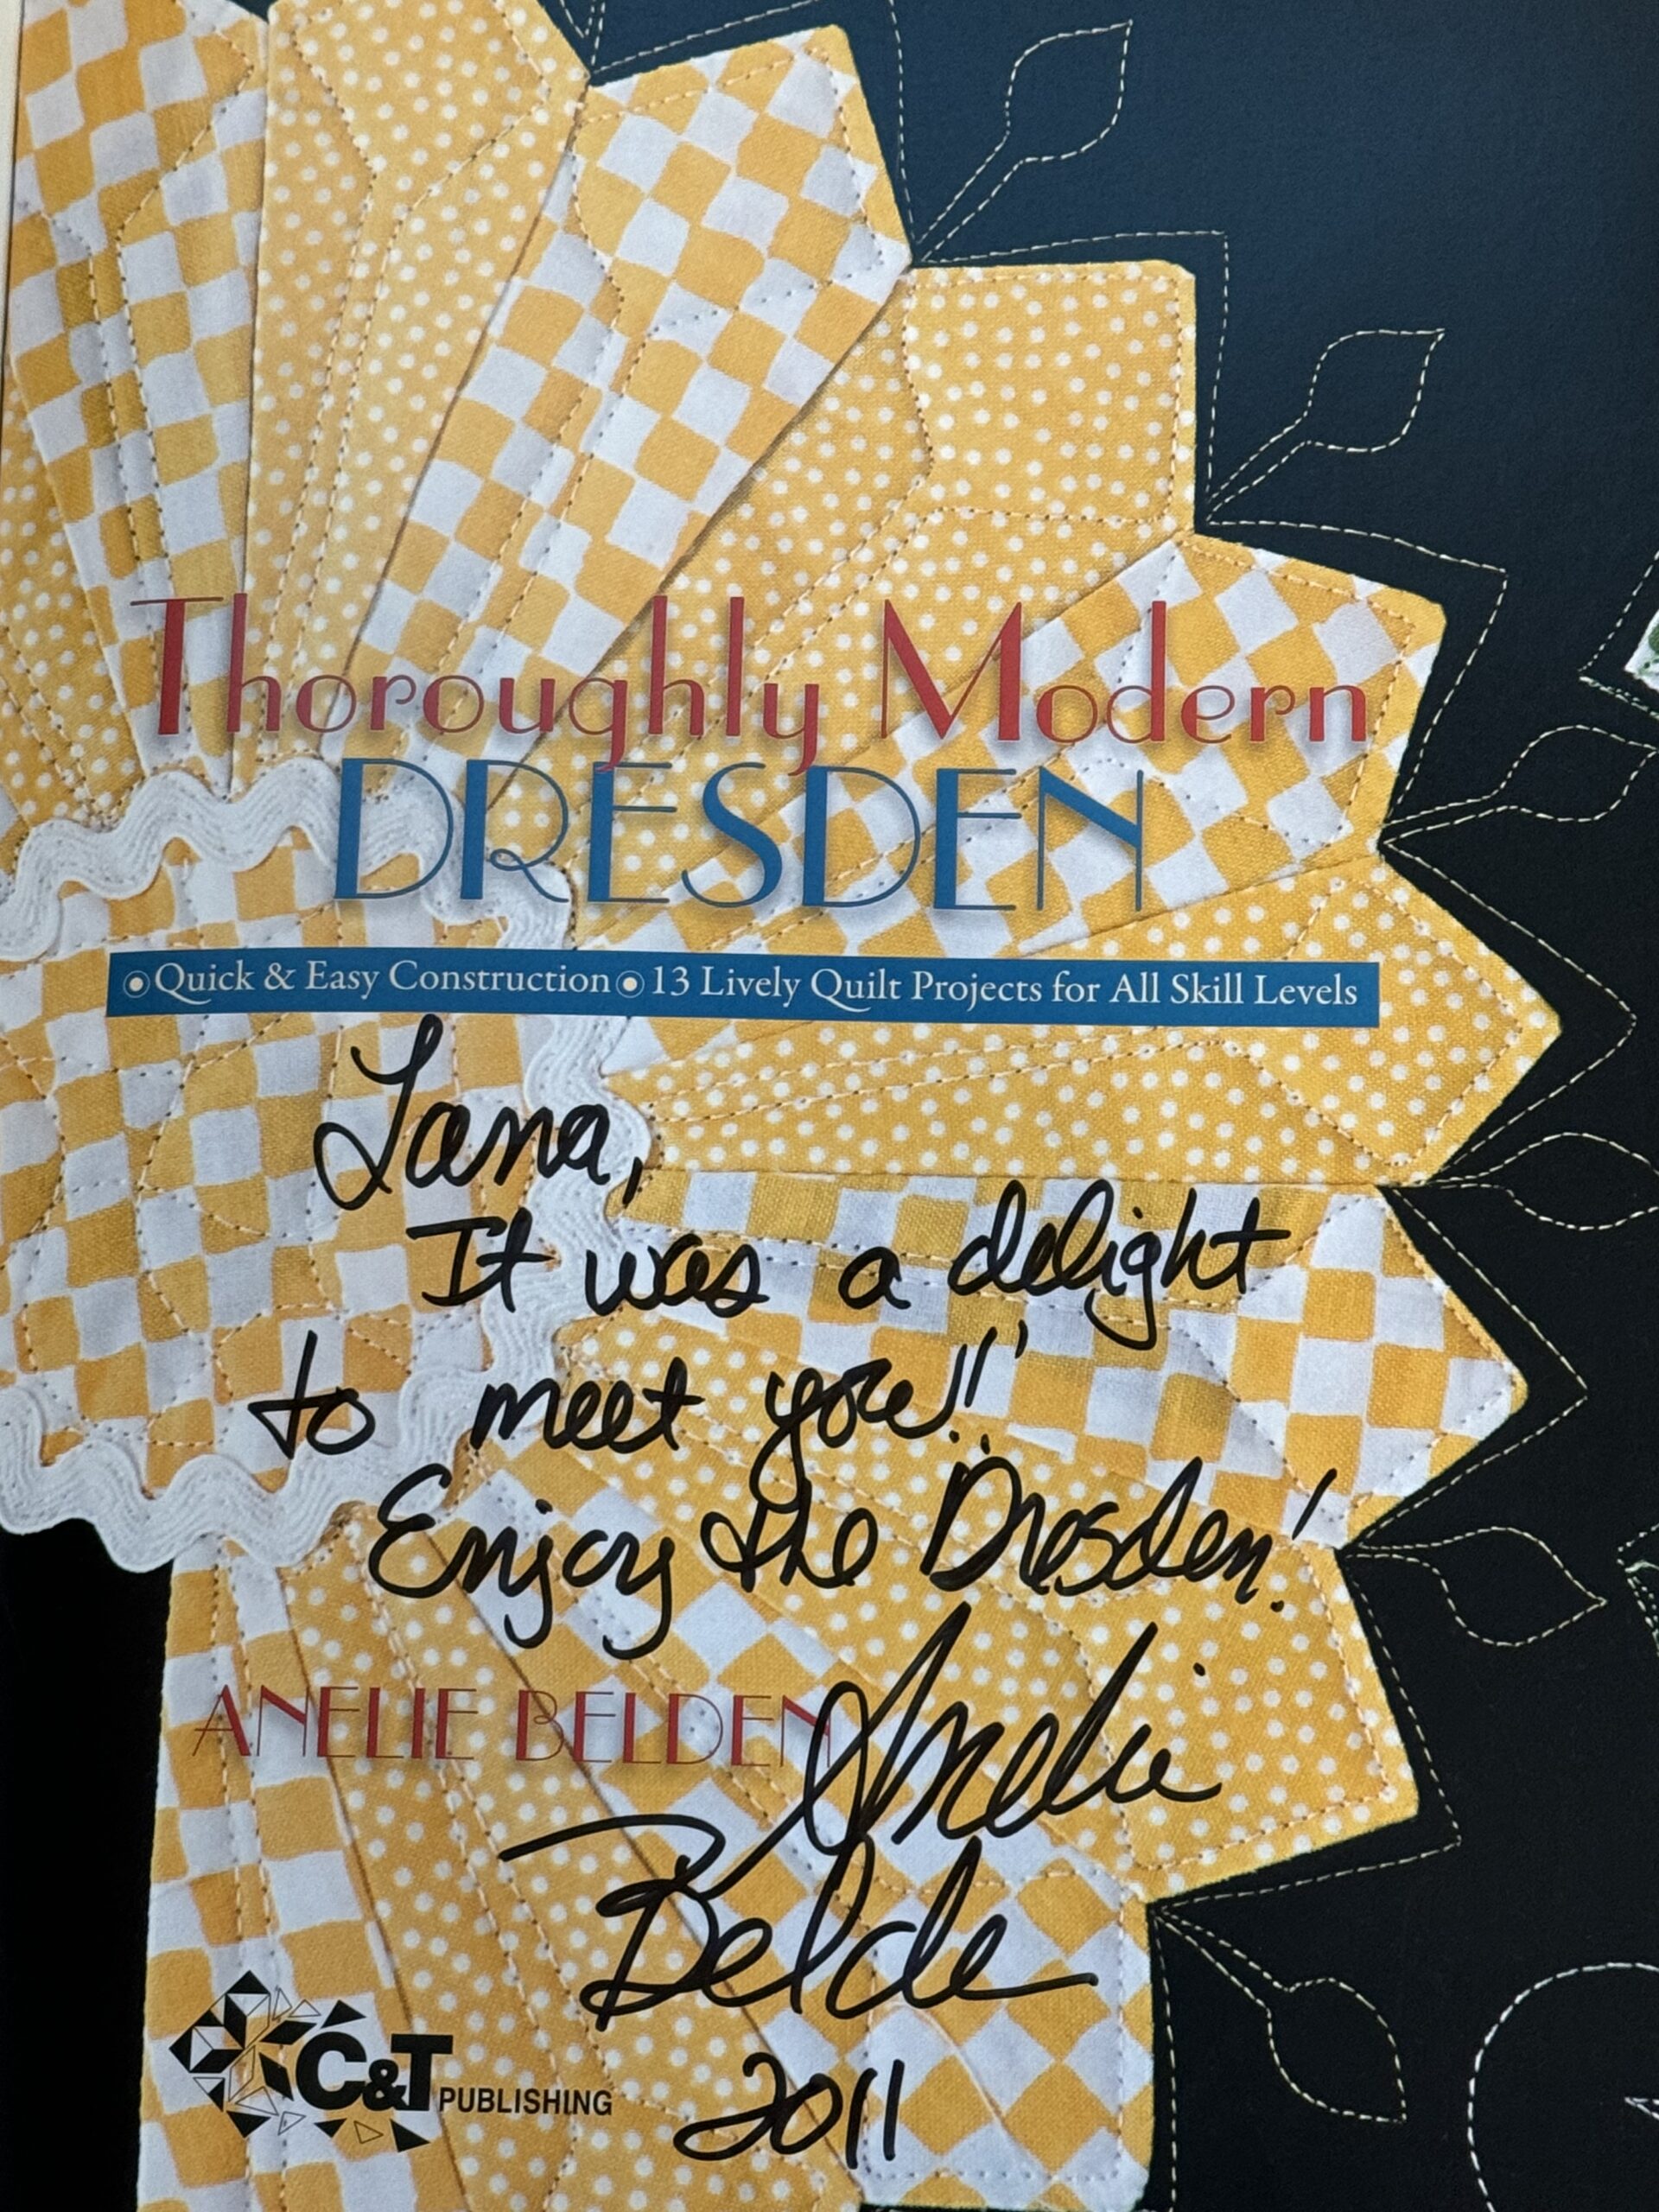
I had never made a Dresden Quilt before, but remembered I met a girl the first time I attended the Empty Spools Seminar who had written a book with patterns for Dresden Quilts. I purchased the book and template from her, Amalie Belden, so I perused through the book and chose a pattern that appealed to me. I preferred the pointed top blade, so I made that change.
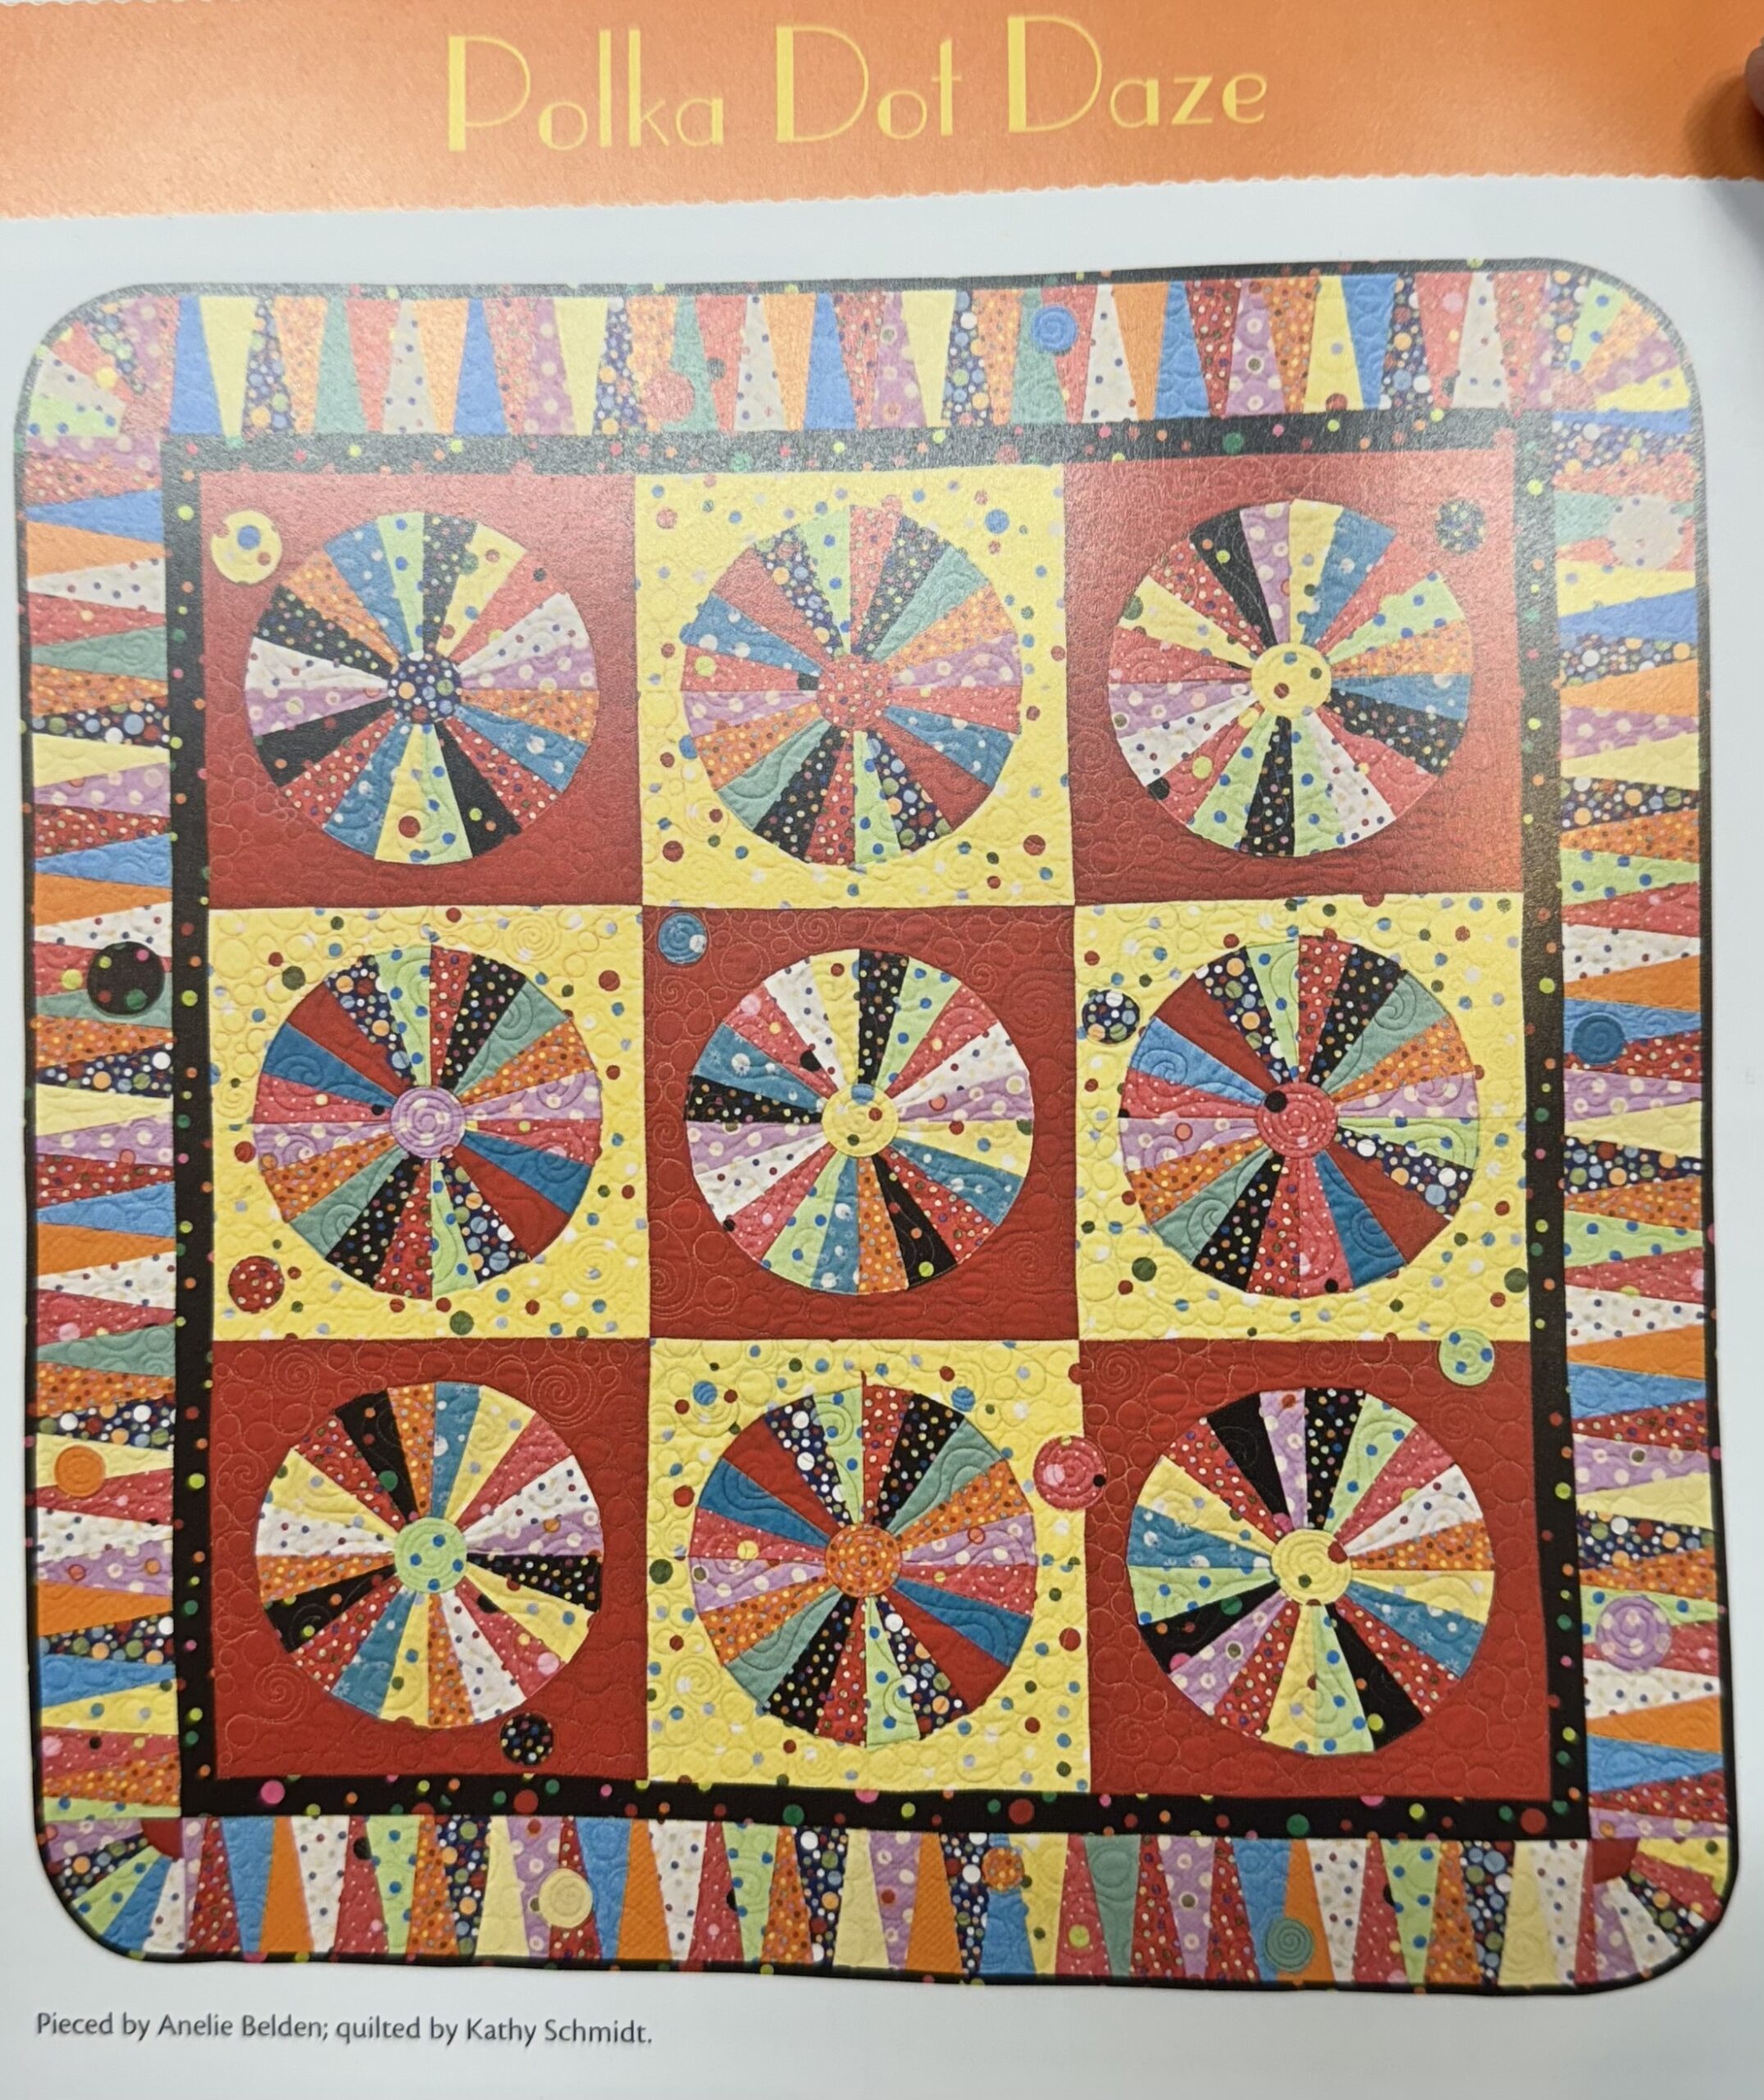
I thought this was adorable. Of course, I’m a sucker for polka dots. But I did change the blades to a pointed top instead of the flat top.
I took this project with me to a quilt retreat. Here I’m just getting started making 180 Dresden blades! Yum, those colors! I used Aurifil 50 weight for piecing.
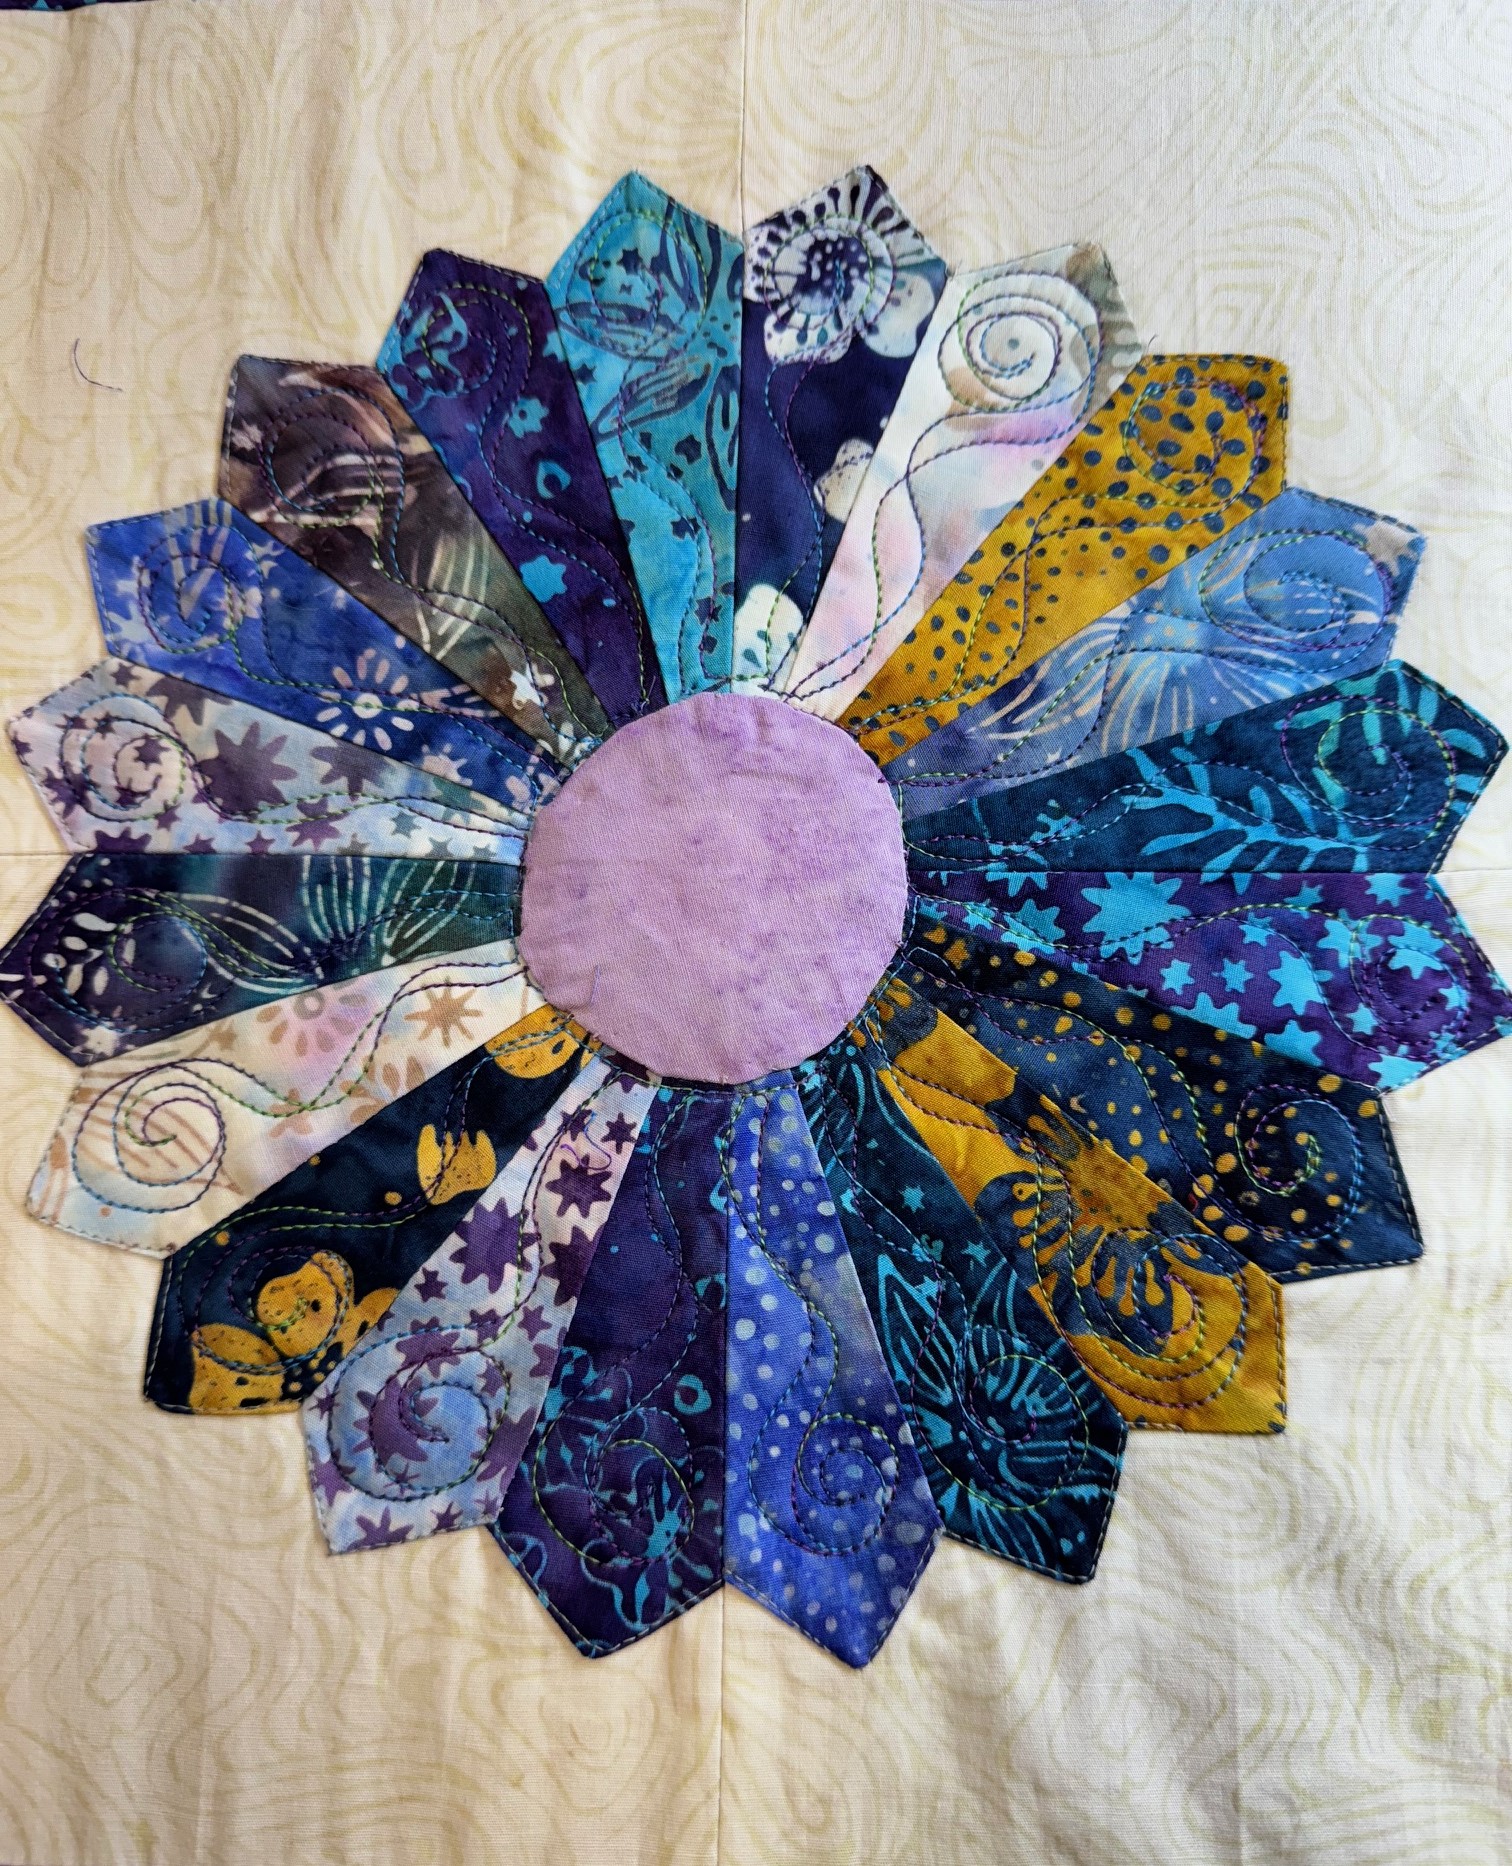
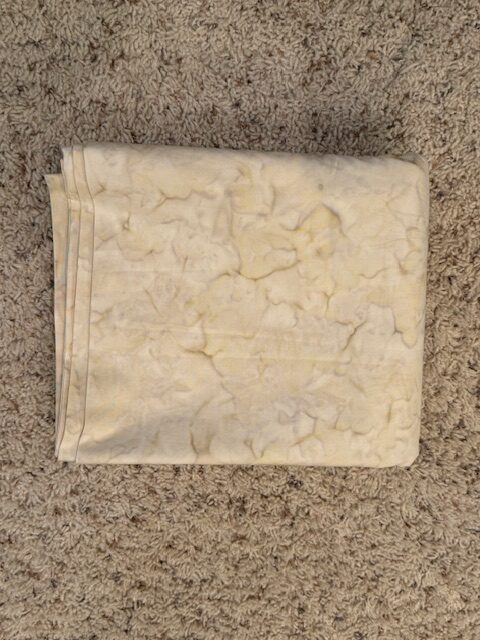
I like the movement this background fabric provides! It’s Moo Milk!
I so enjoyed quilting the blades by freemotioning the swirls on my Handi Quilter Forte 24. Too fun!
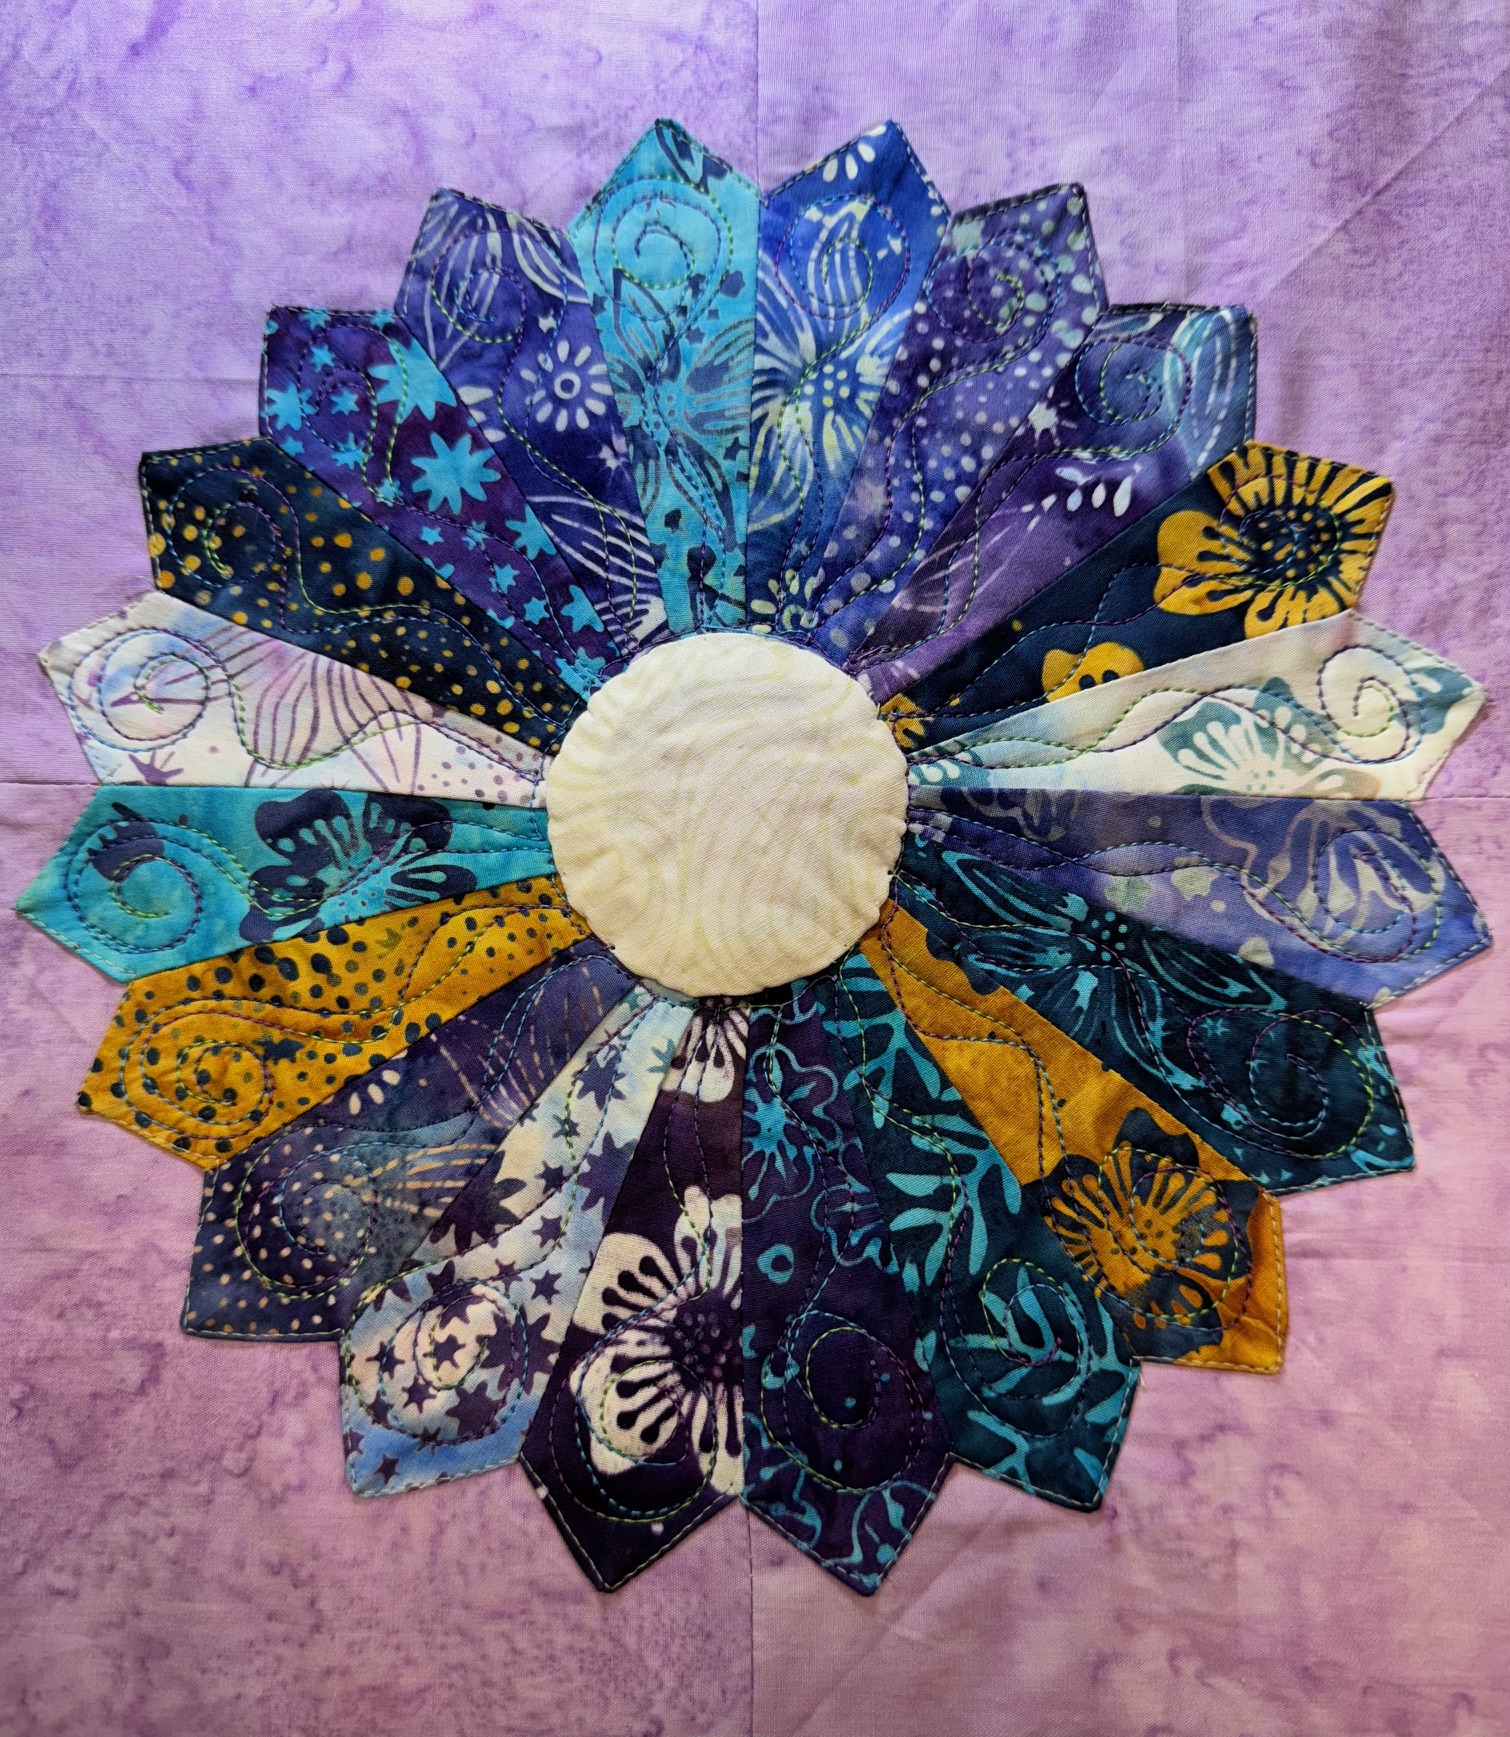
This background is lavender and I love how it brings out the purples.
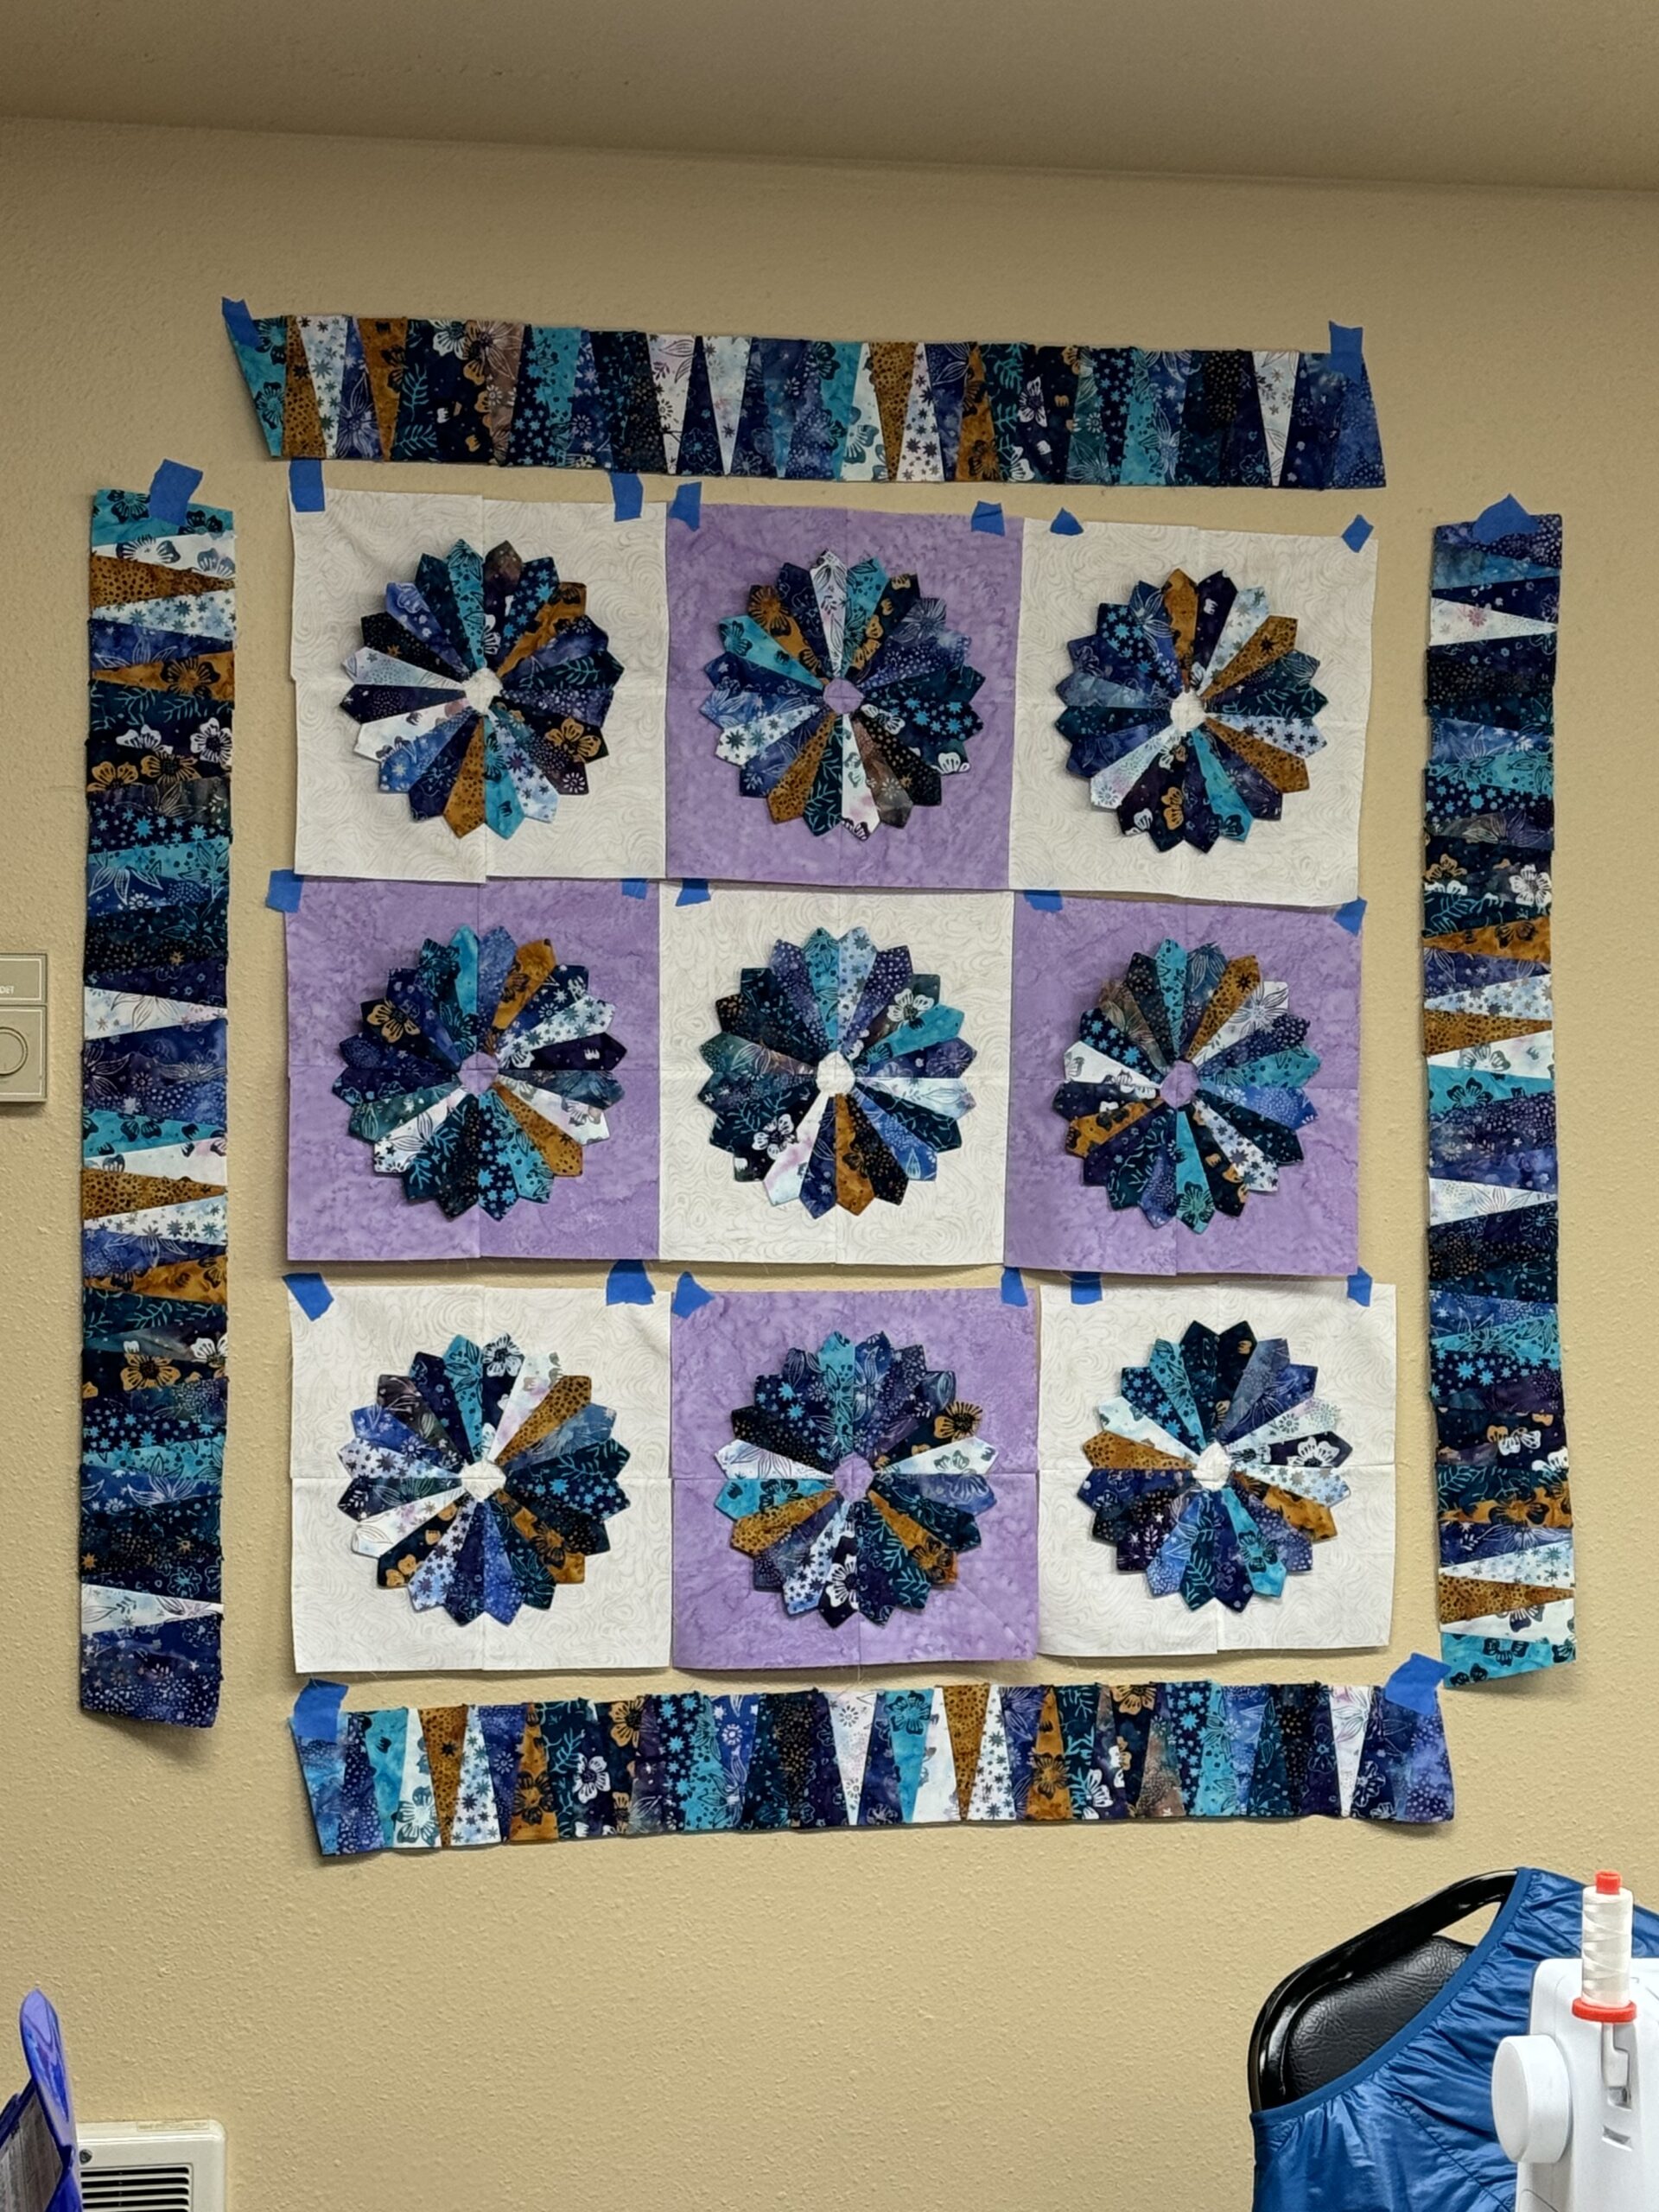
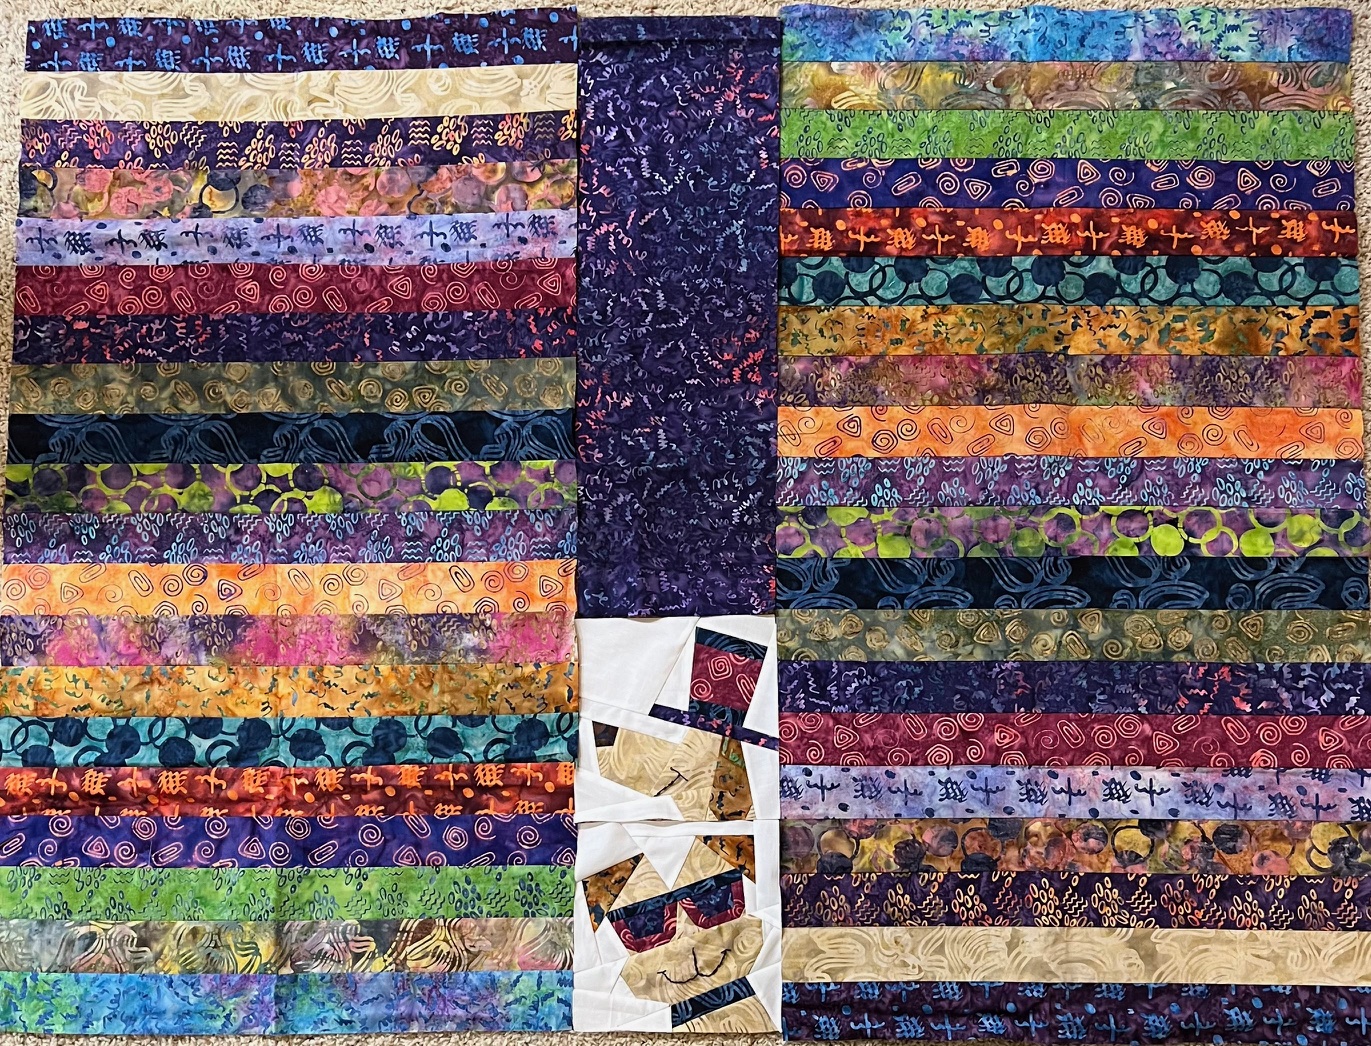
It’s always exciting to see it all come together, even if it is using blue tape on a wall to make it happen.
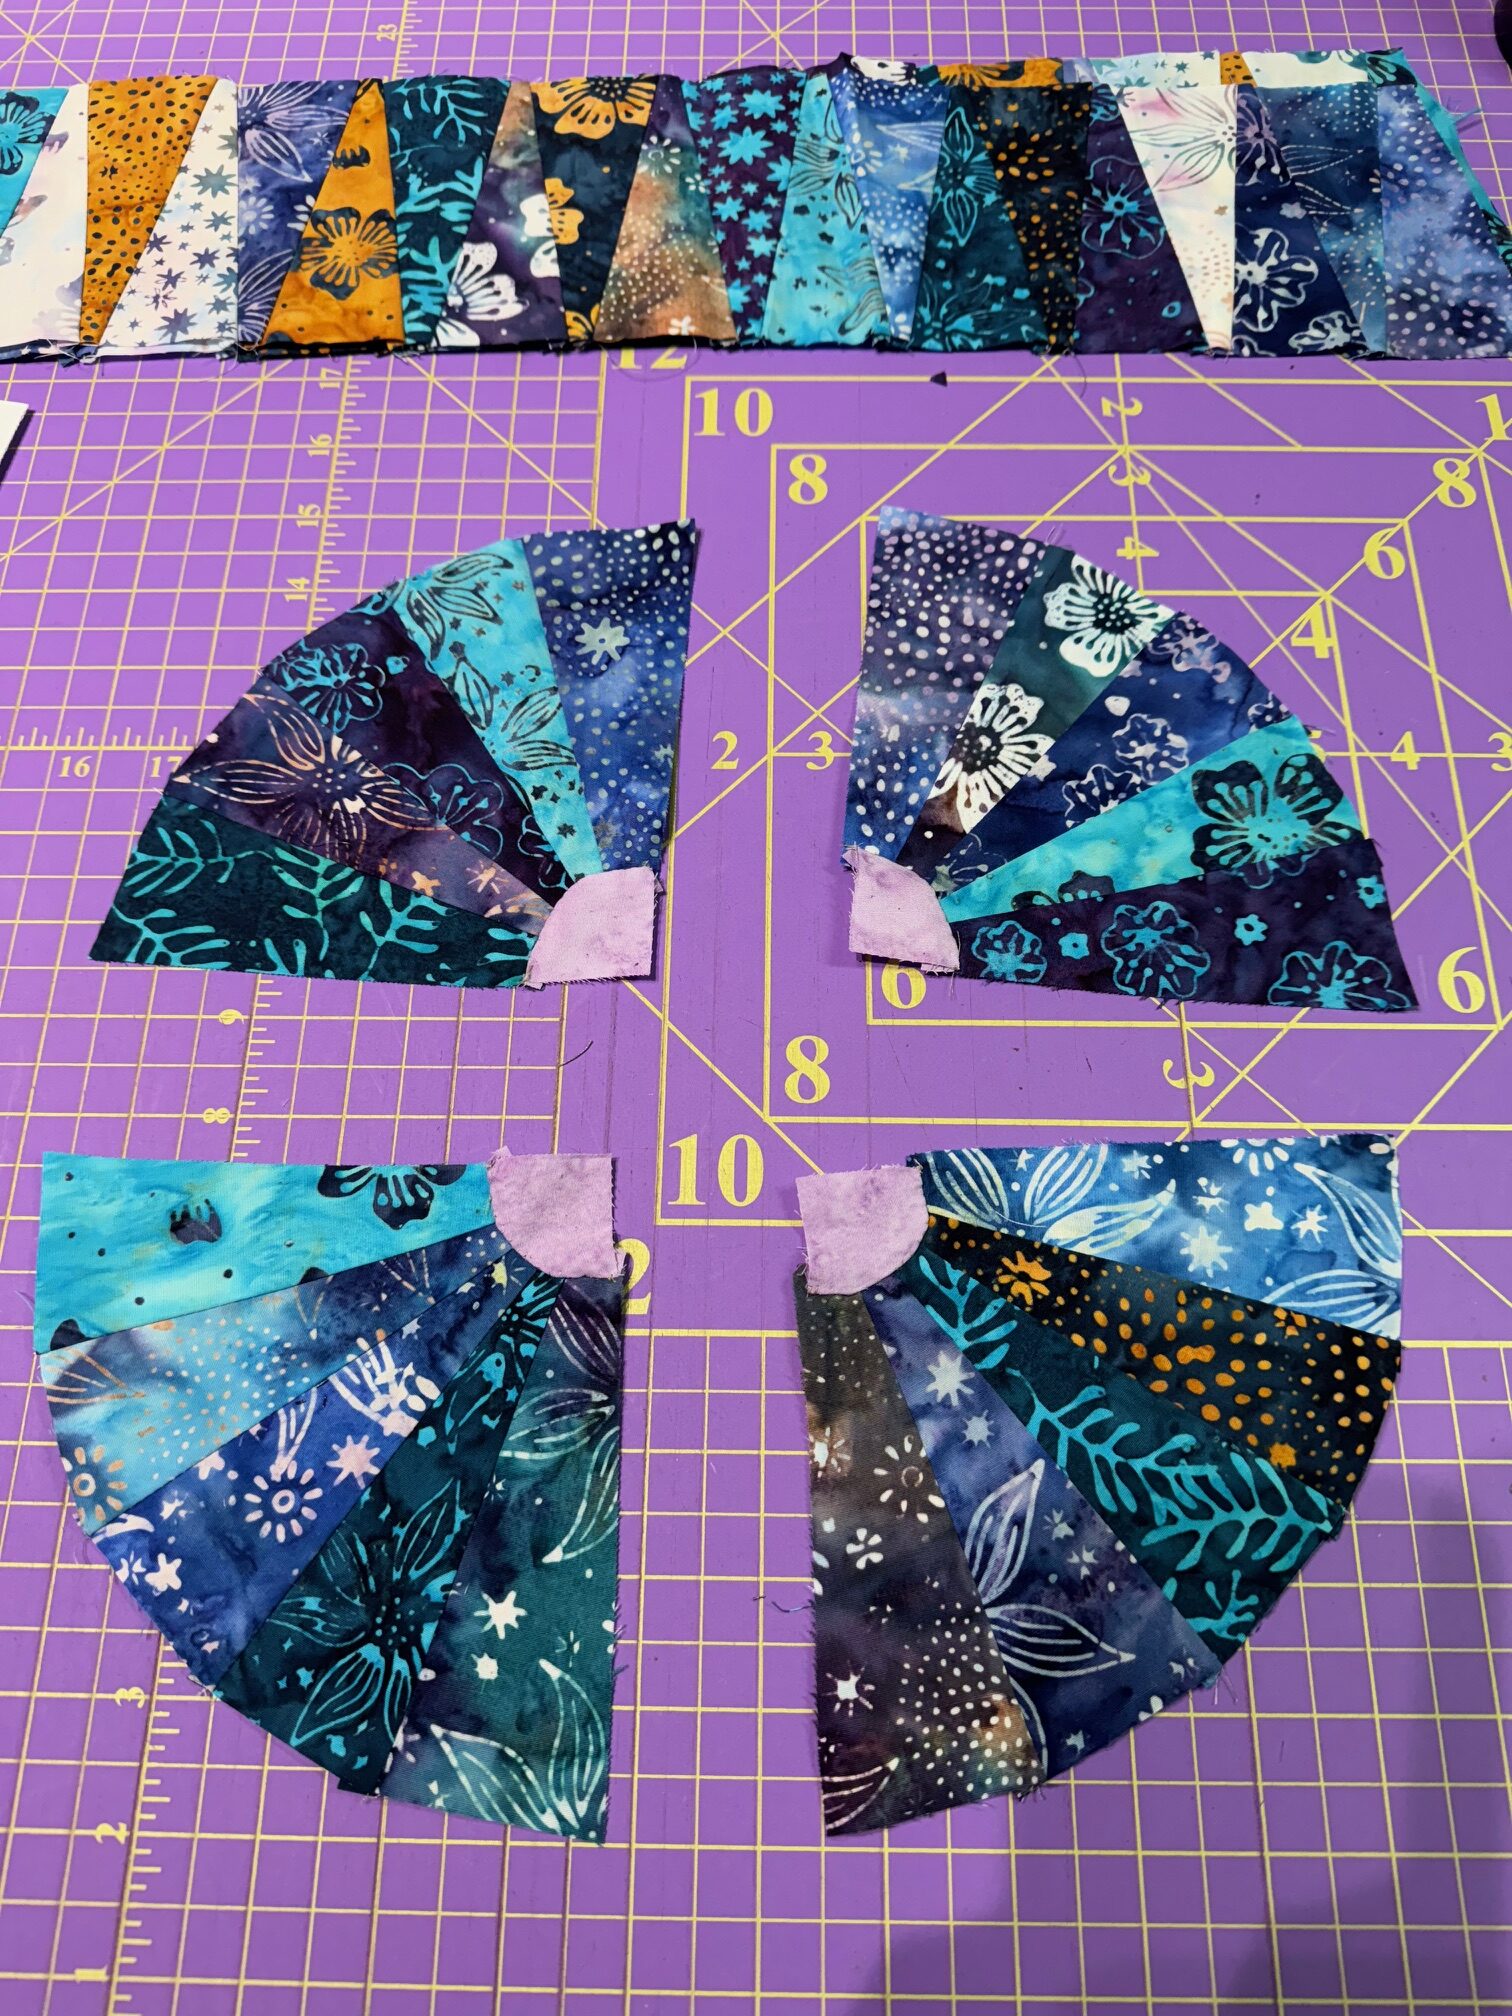
These are the four corners, the last part of the puzzle.
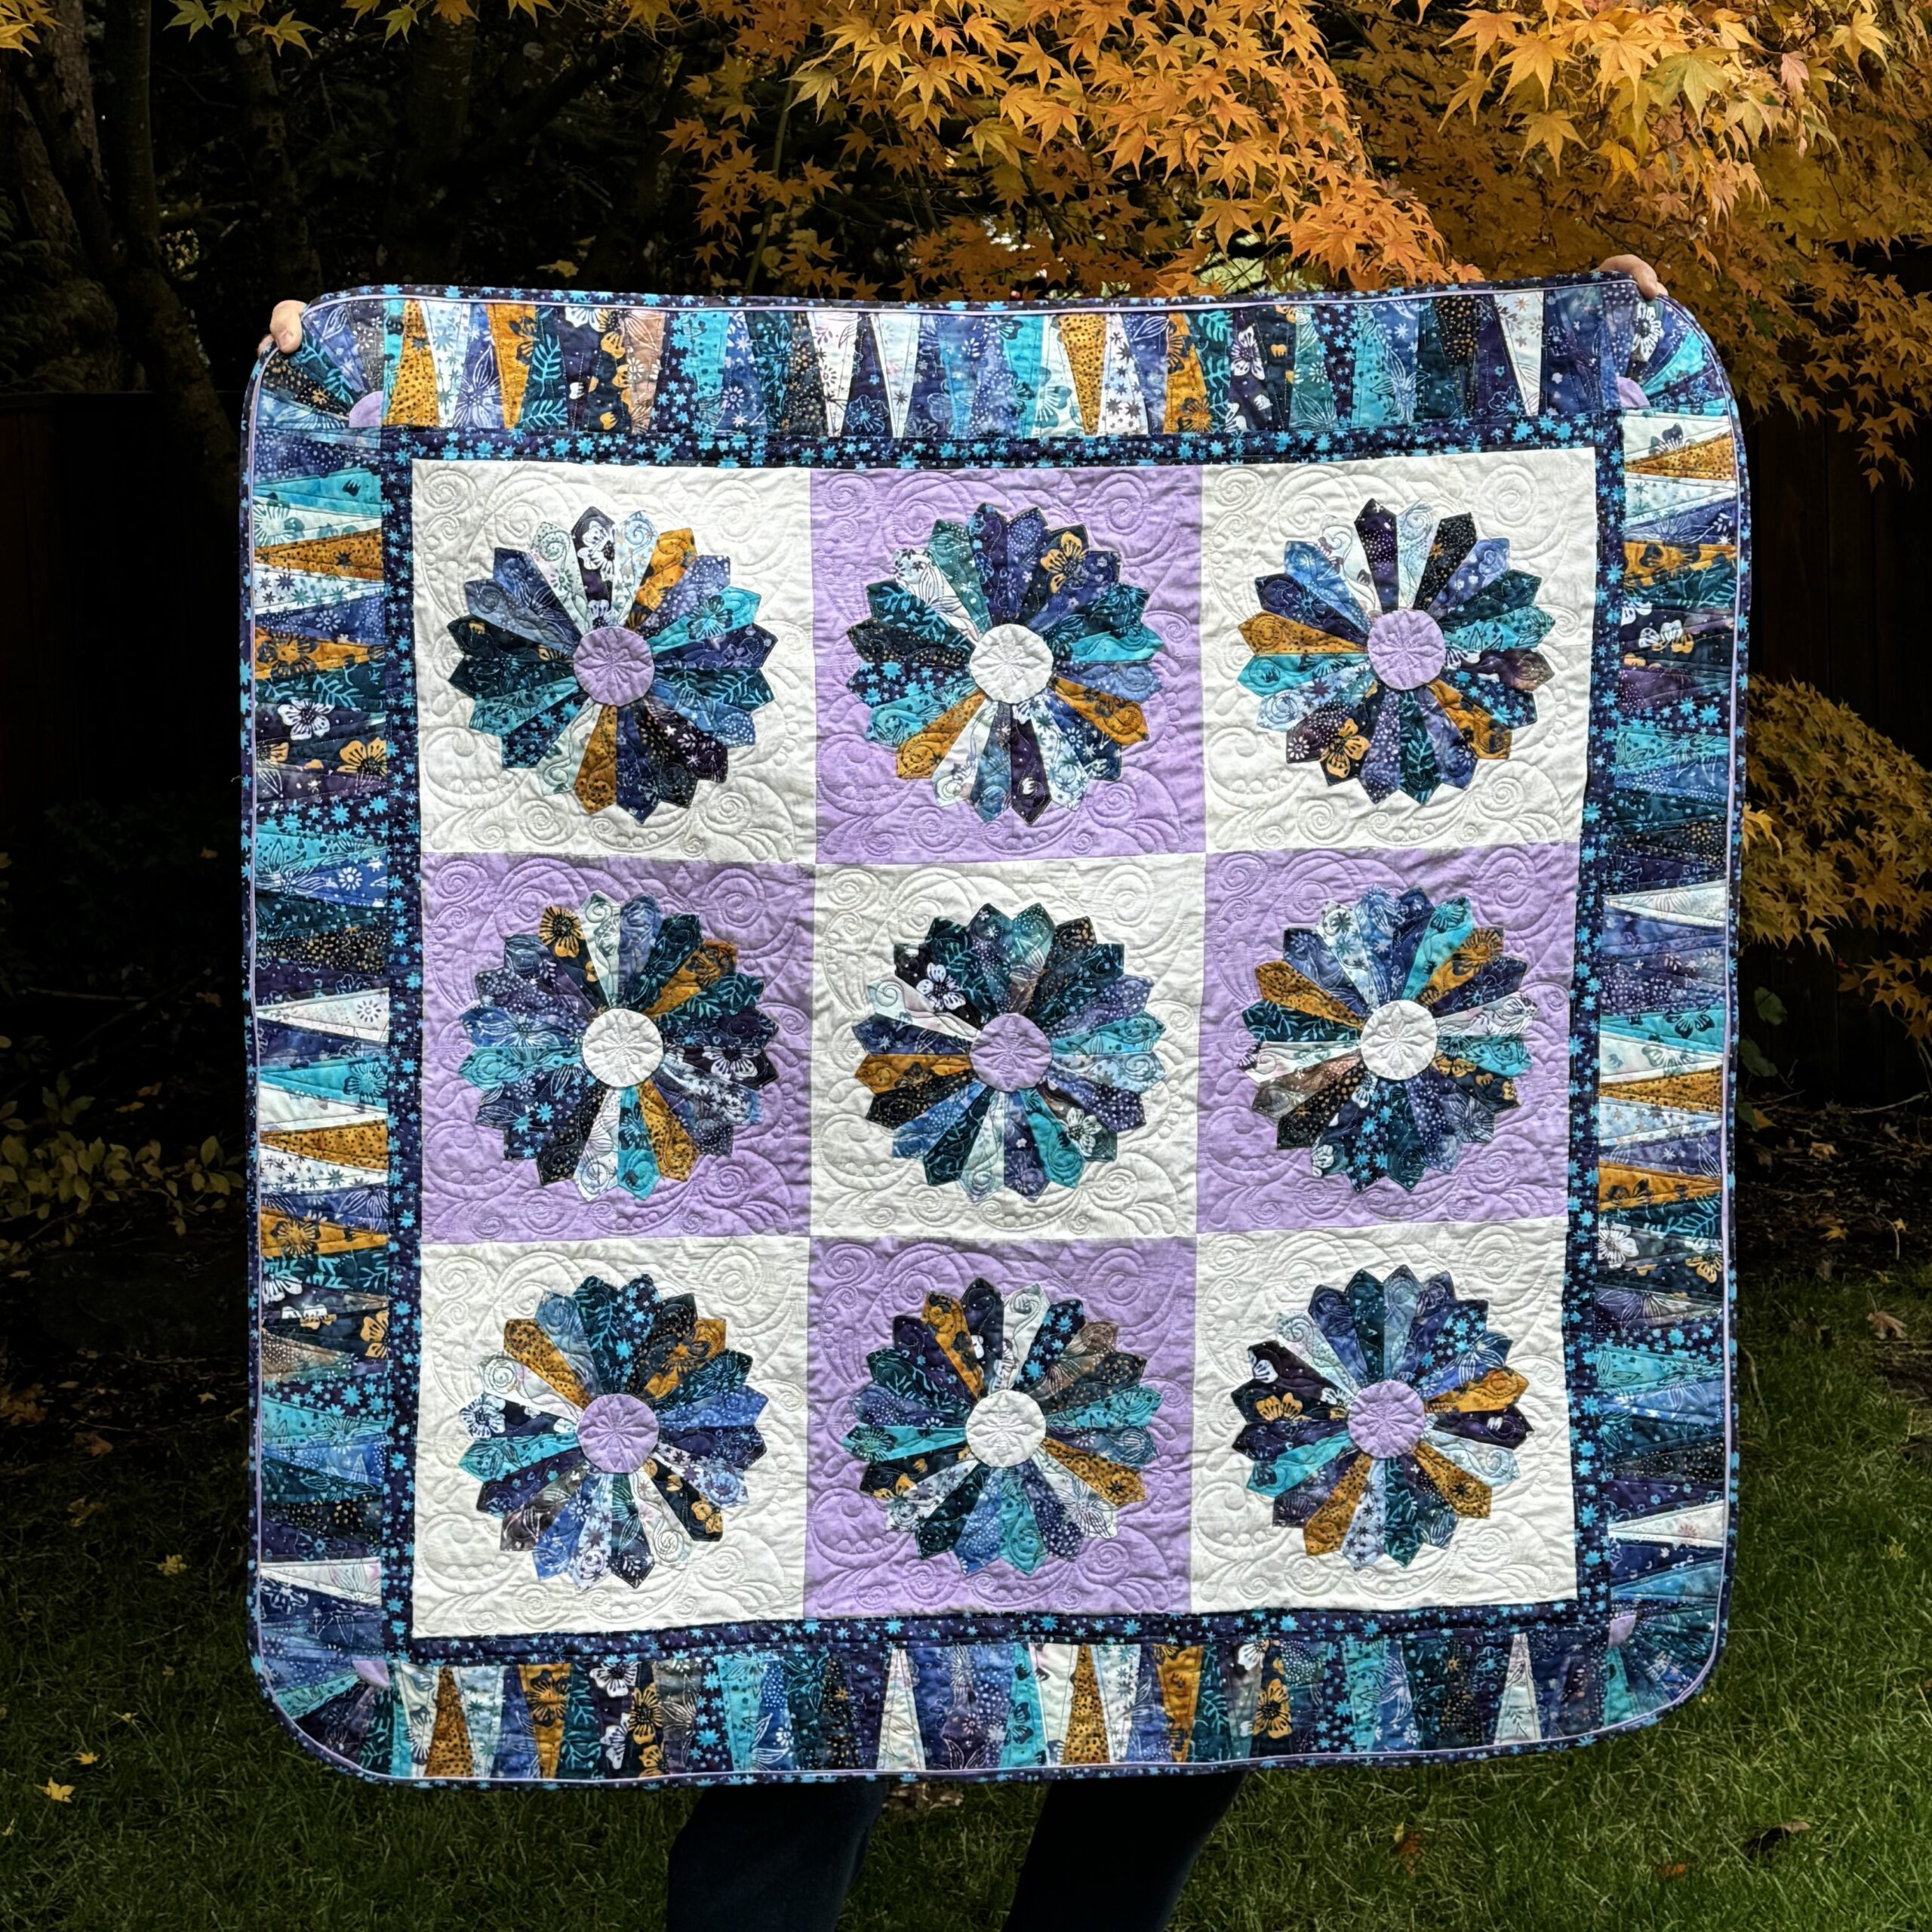
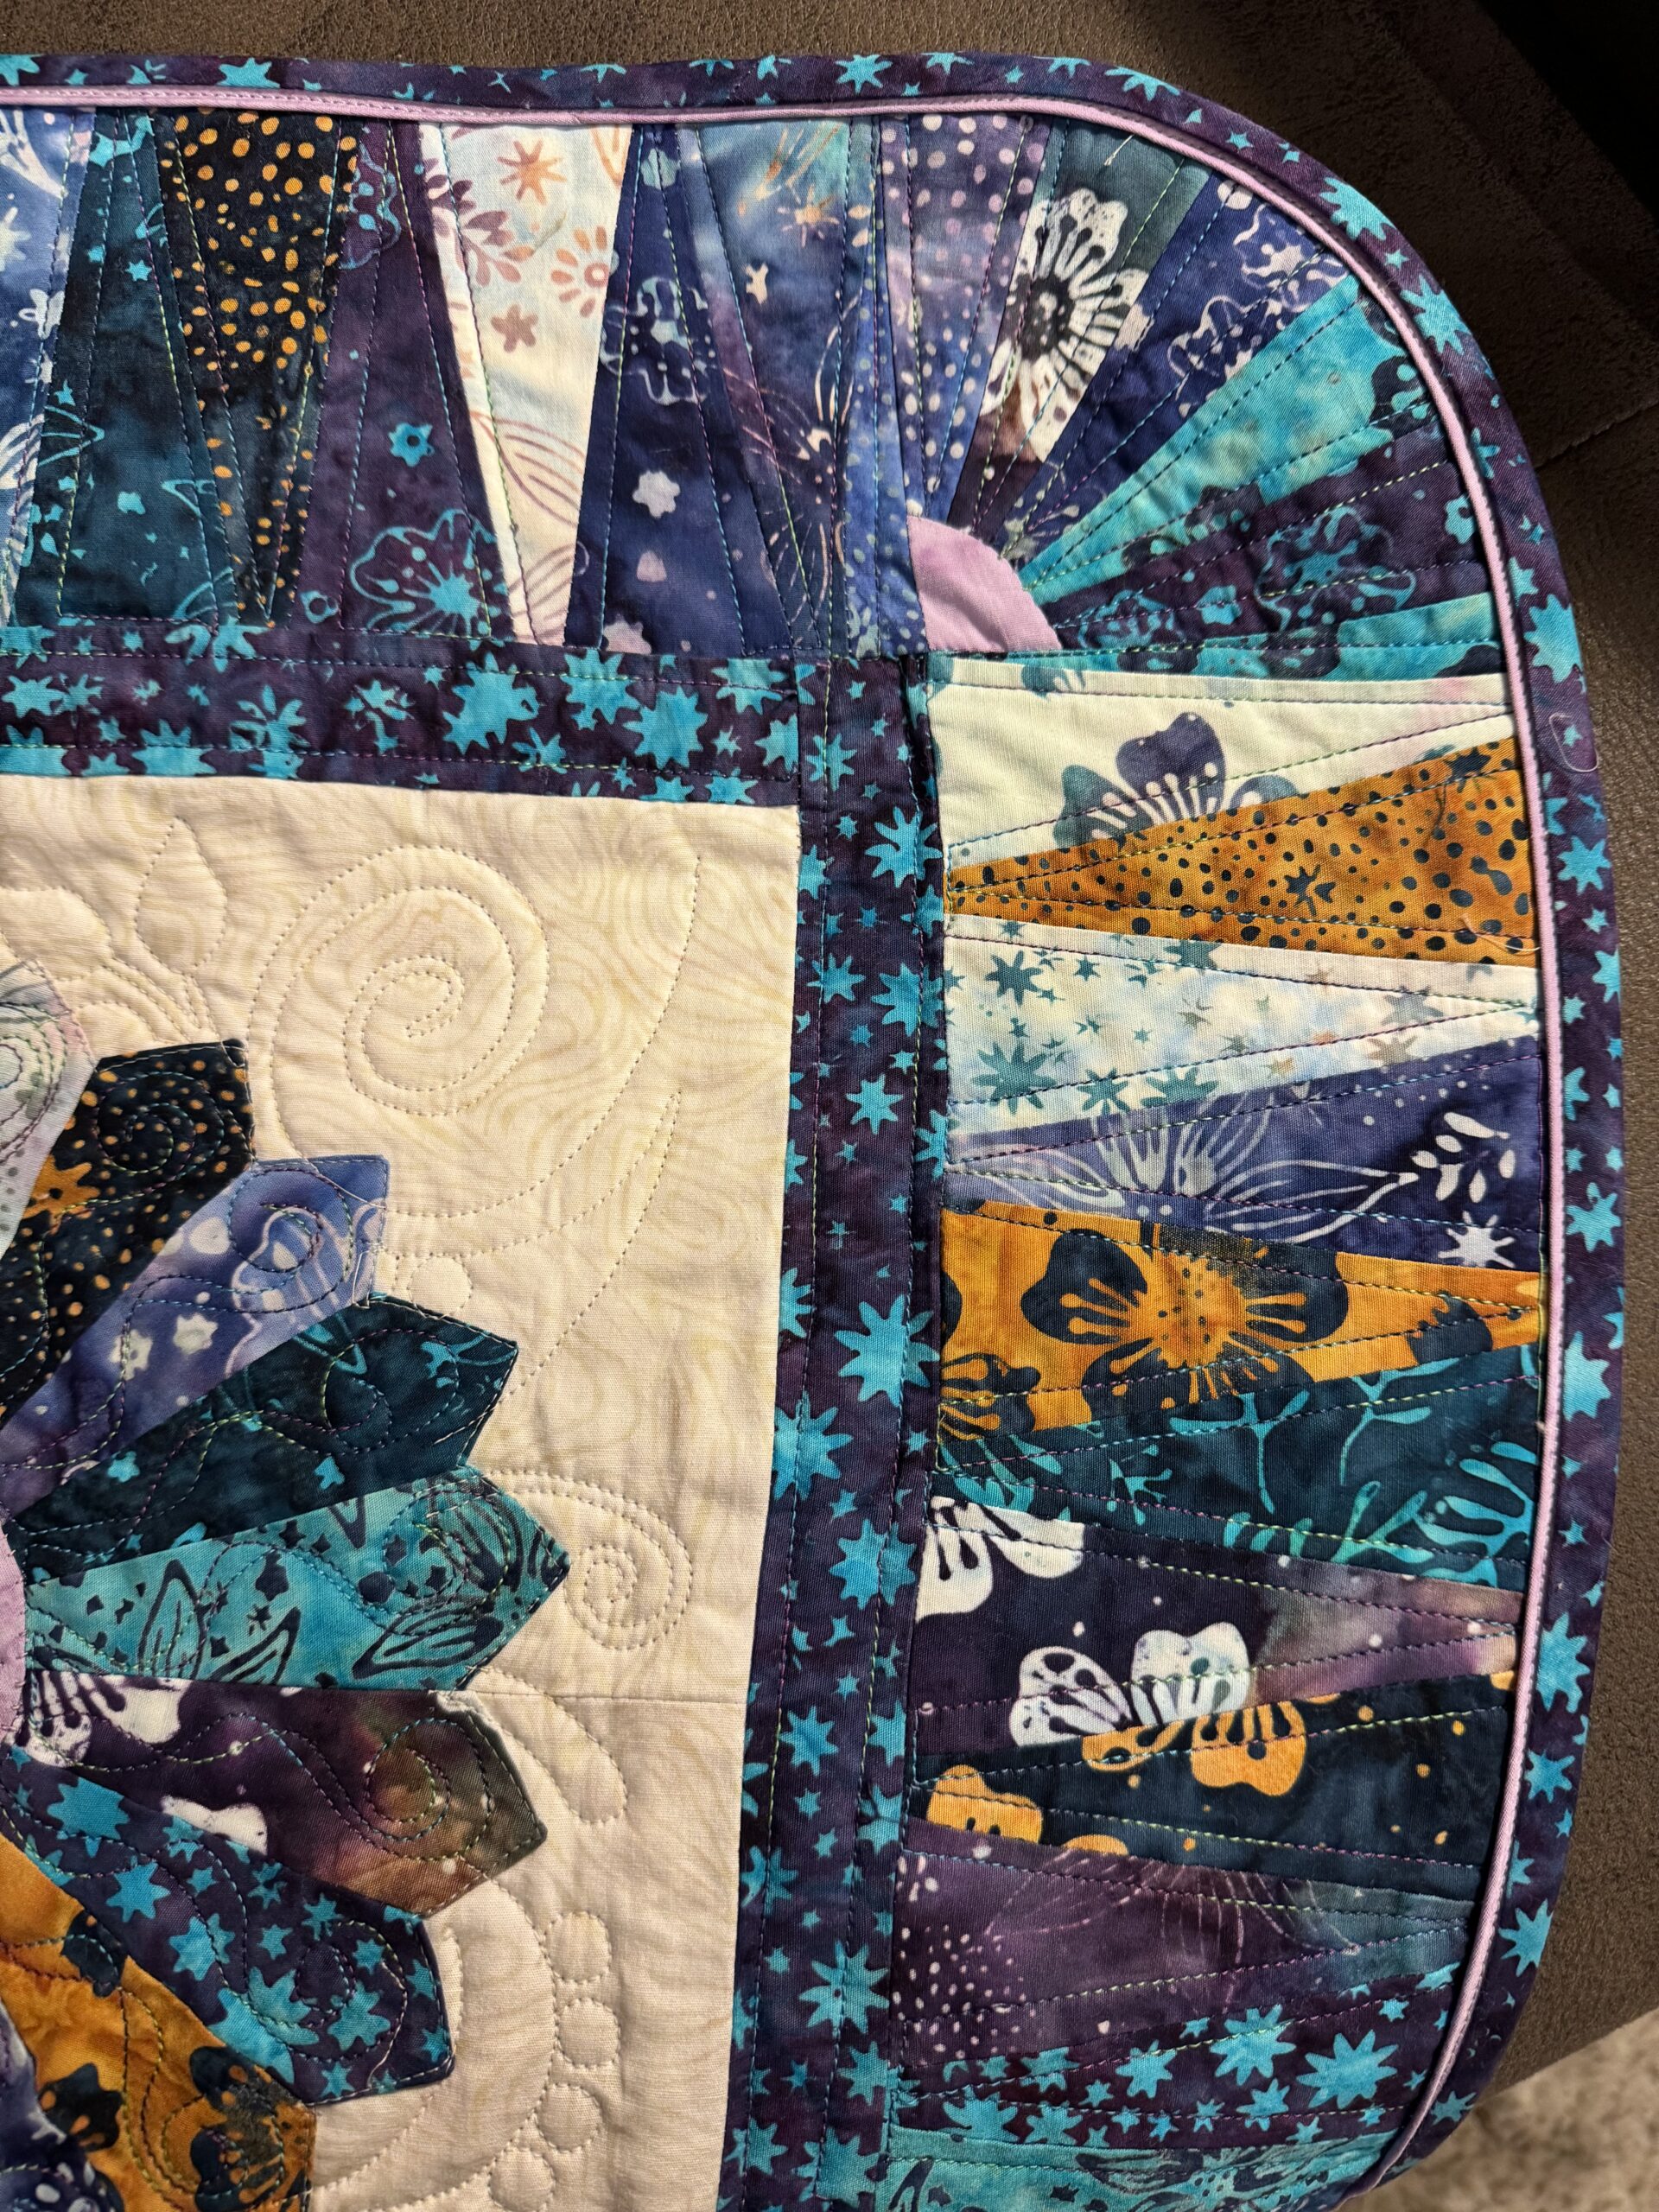
And here’s the finish. I really love it! It finishes at 48×48. First Dresden and first time making flange binding. I love the border Amelie designed for this quilt as well. I used Hobbs Heirloom cotton batting and loved the soft texture! I quilted it on my Handi Quilter Forte 24 longarm.
What’s in Your Bag Challenge? Featuring ByAnnie.com
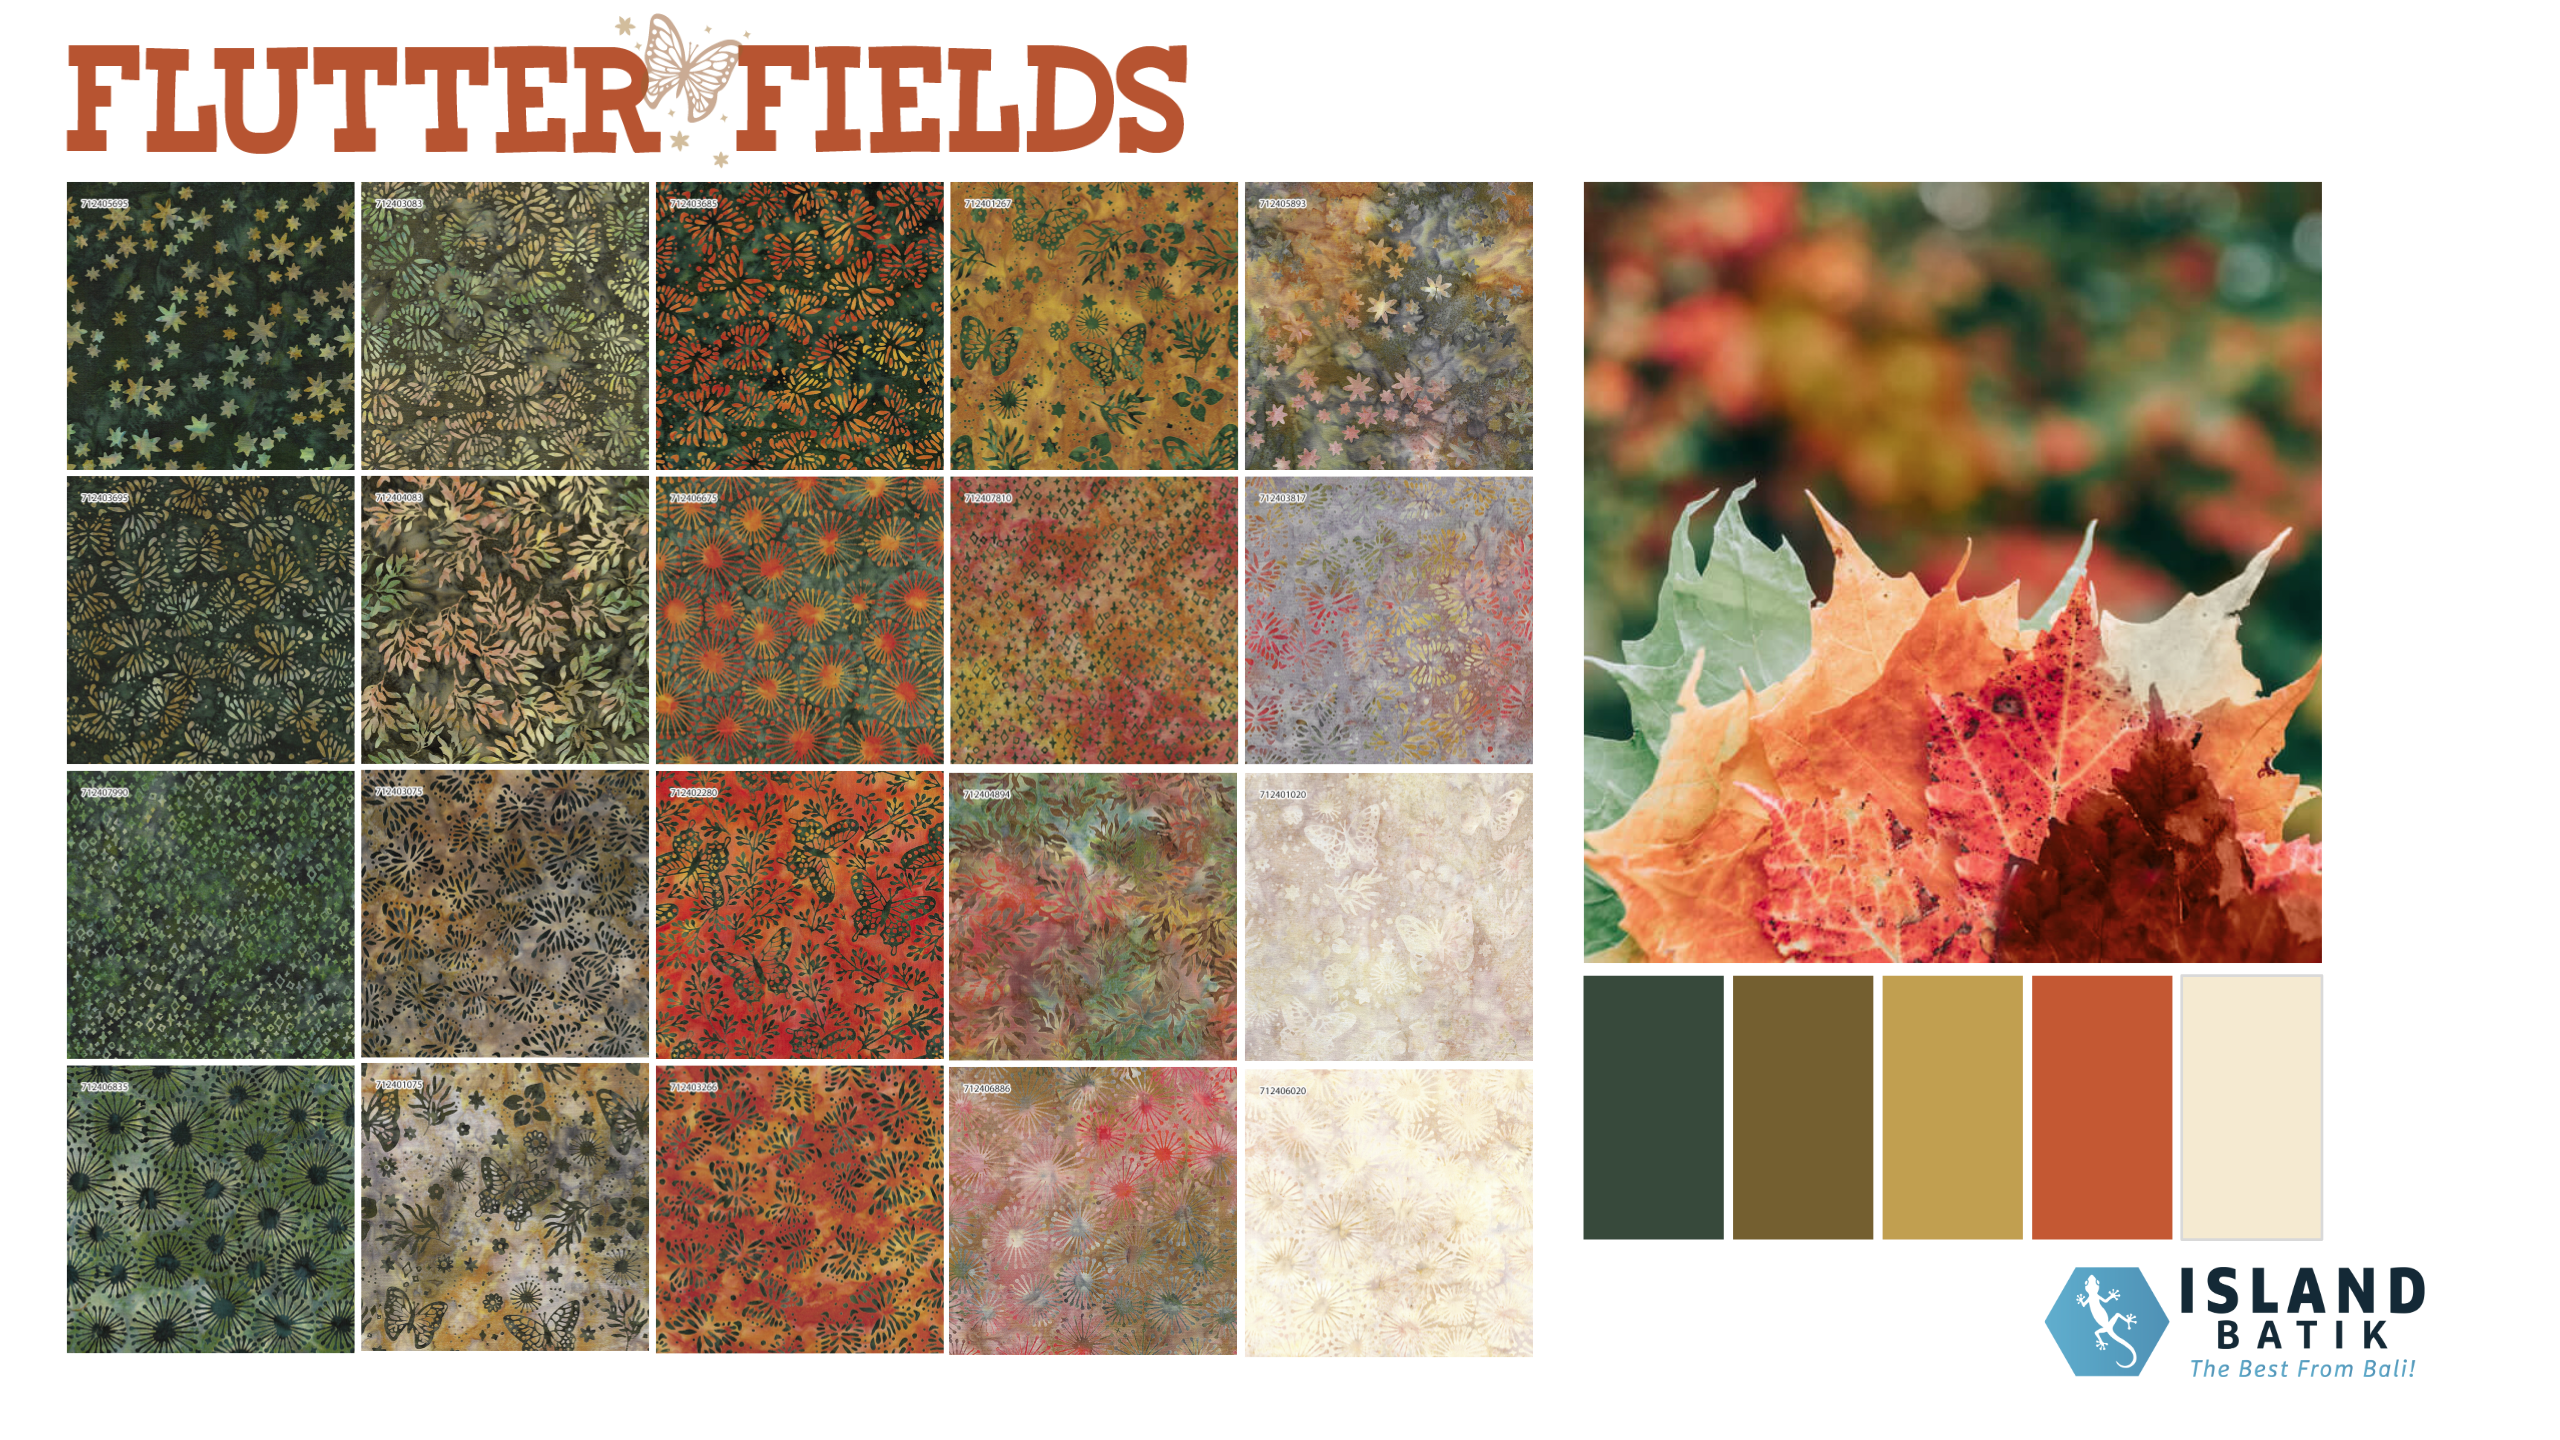
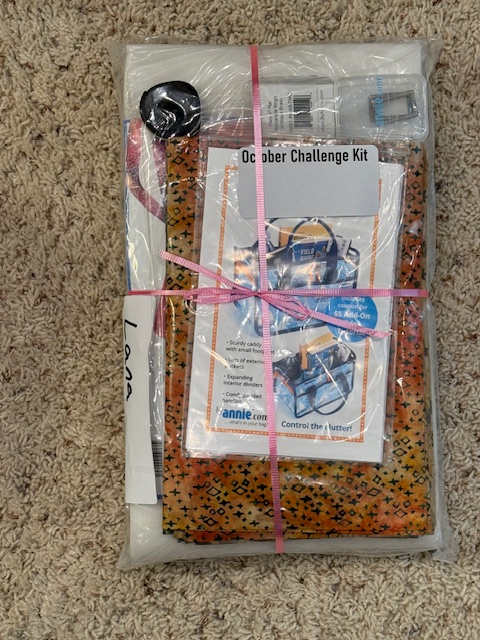
Our challenge this month allowed us to choose a byannie.com pattern and Island Batik fabric and complete the bag and post about it any day in October. Byannie.com supplied the pattern and supplies, including hardware, to make the bag. Island Batik supplied the fabric of our choice from either the Spring or Summer ’24 collections.
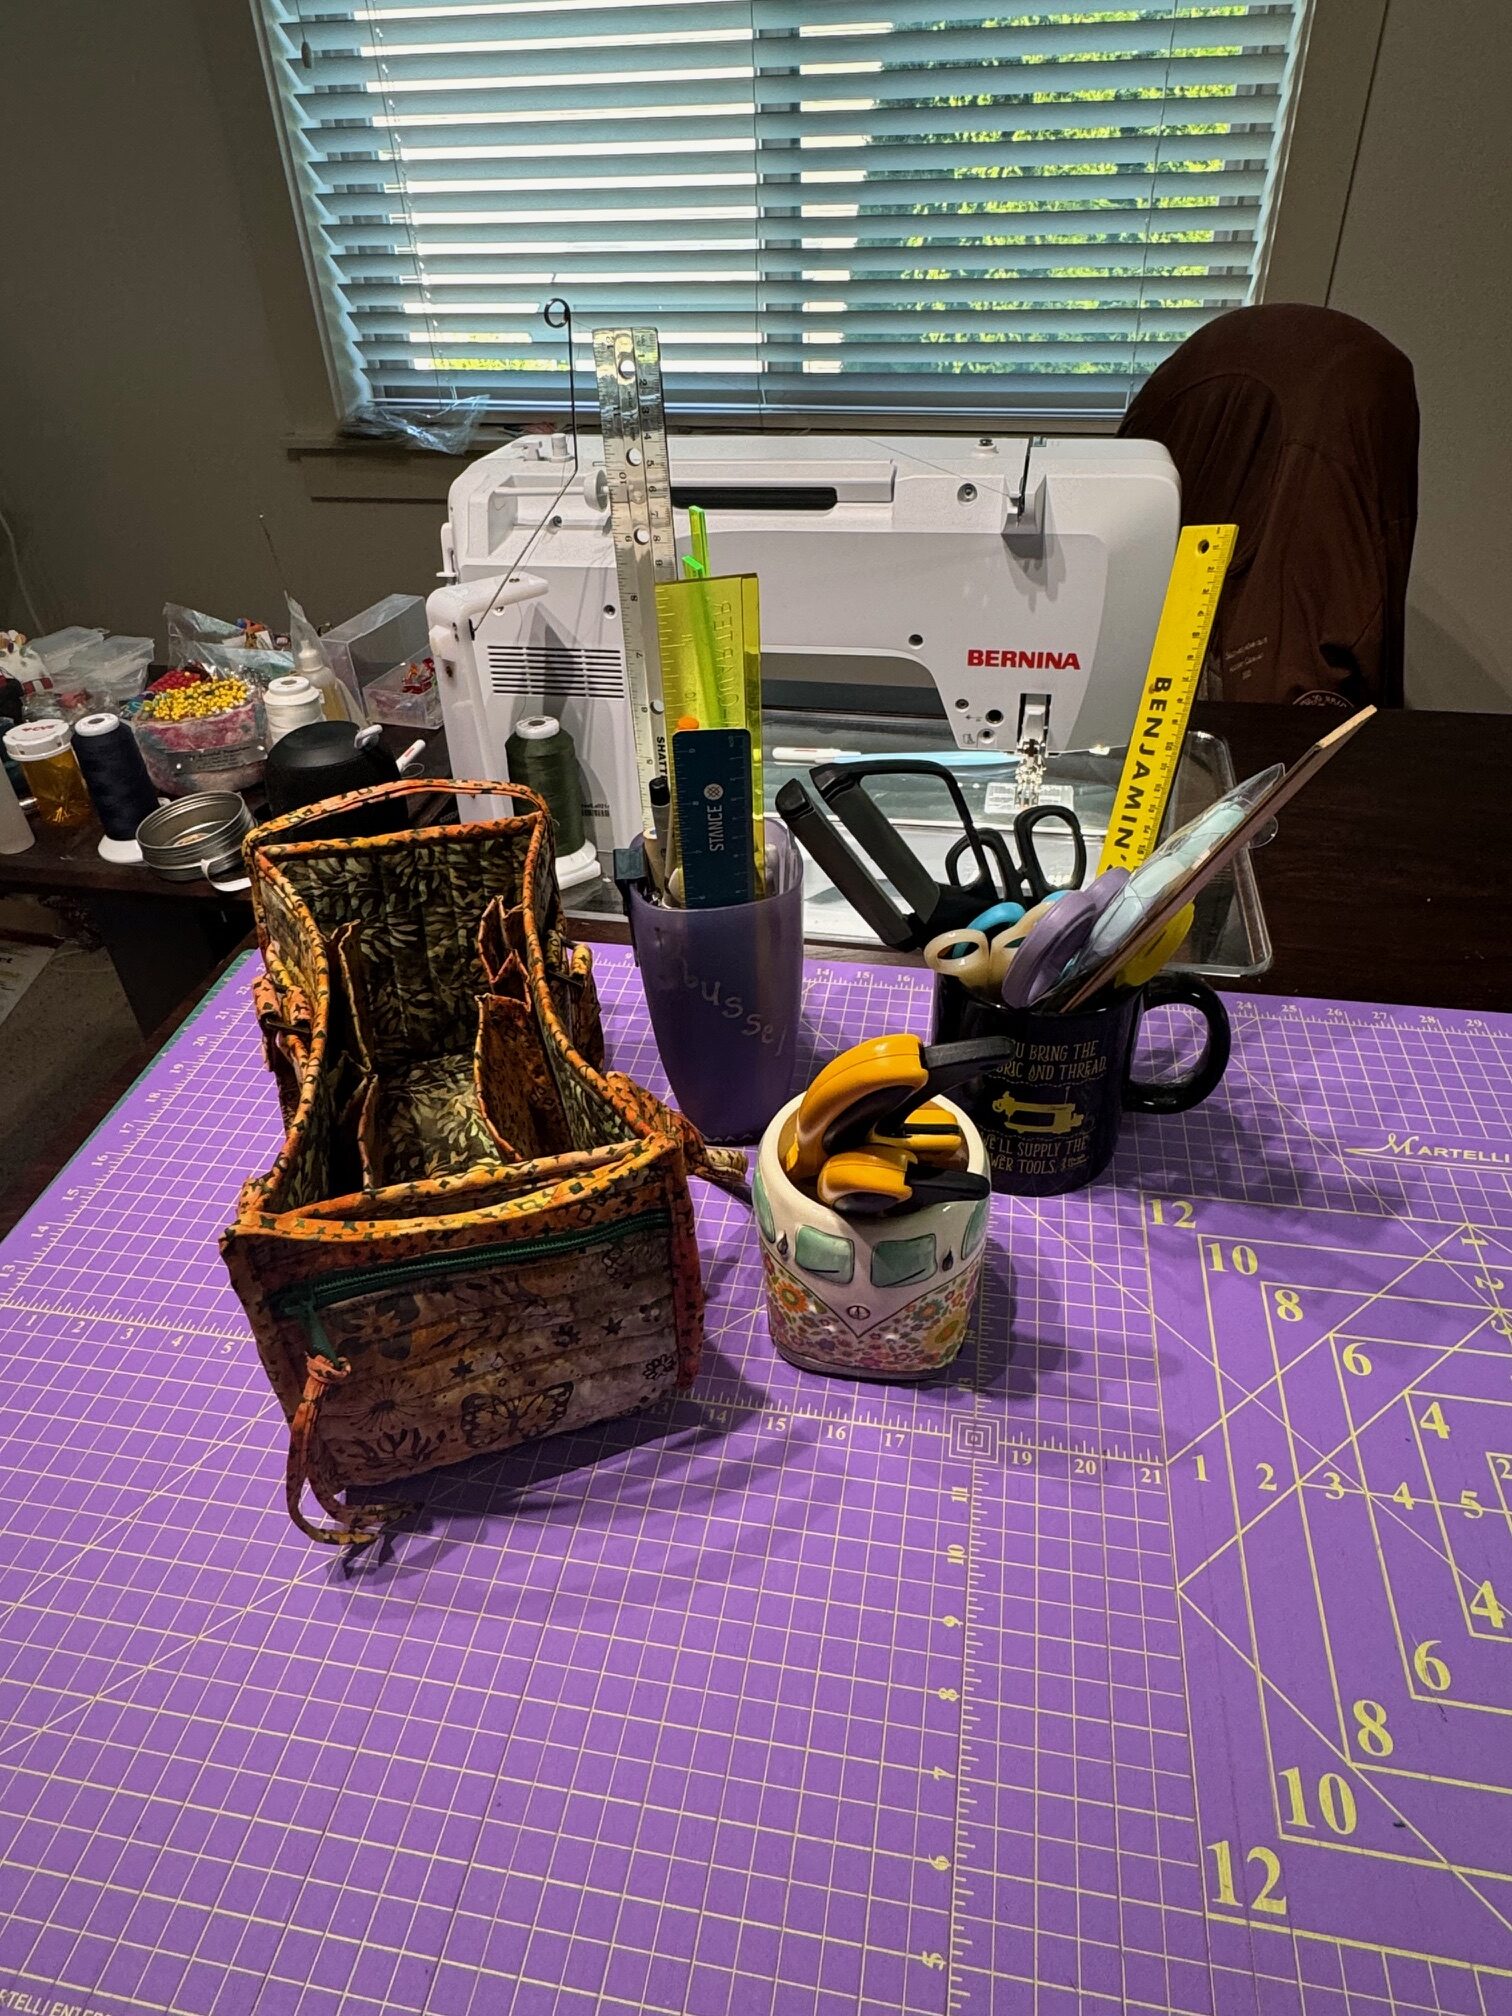
I chose the In Control Bag. My goal was to replace the 3 mugs full of notions that sit on my sewing table, often being knocked off the back of my table landing in the abyss behind my tall trash can. Let’s just say I no longer enjoy getting on my hands and knees nor getting up from that position. The In Control Bag held great promise for controlling my chaos.
You can find this collection at Creekside Quilts in Banks, Oregon.
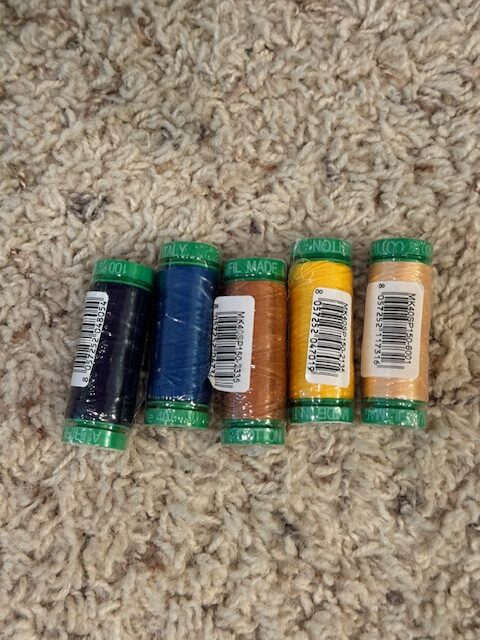
I decided to use # 712401075 for the front and #712404083 for the back and #712407810 for the accent.
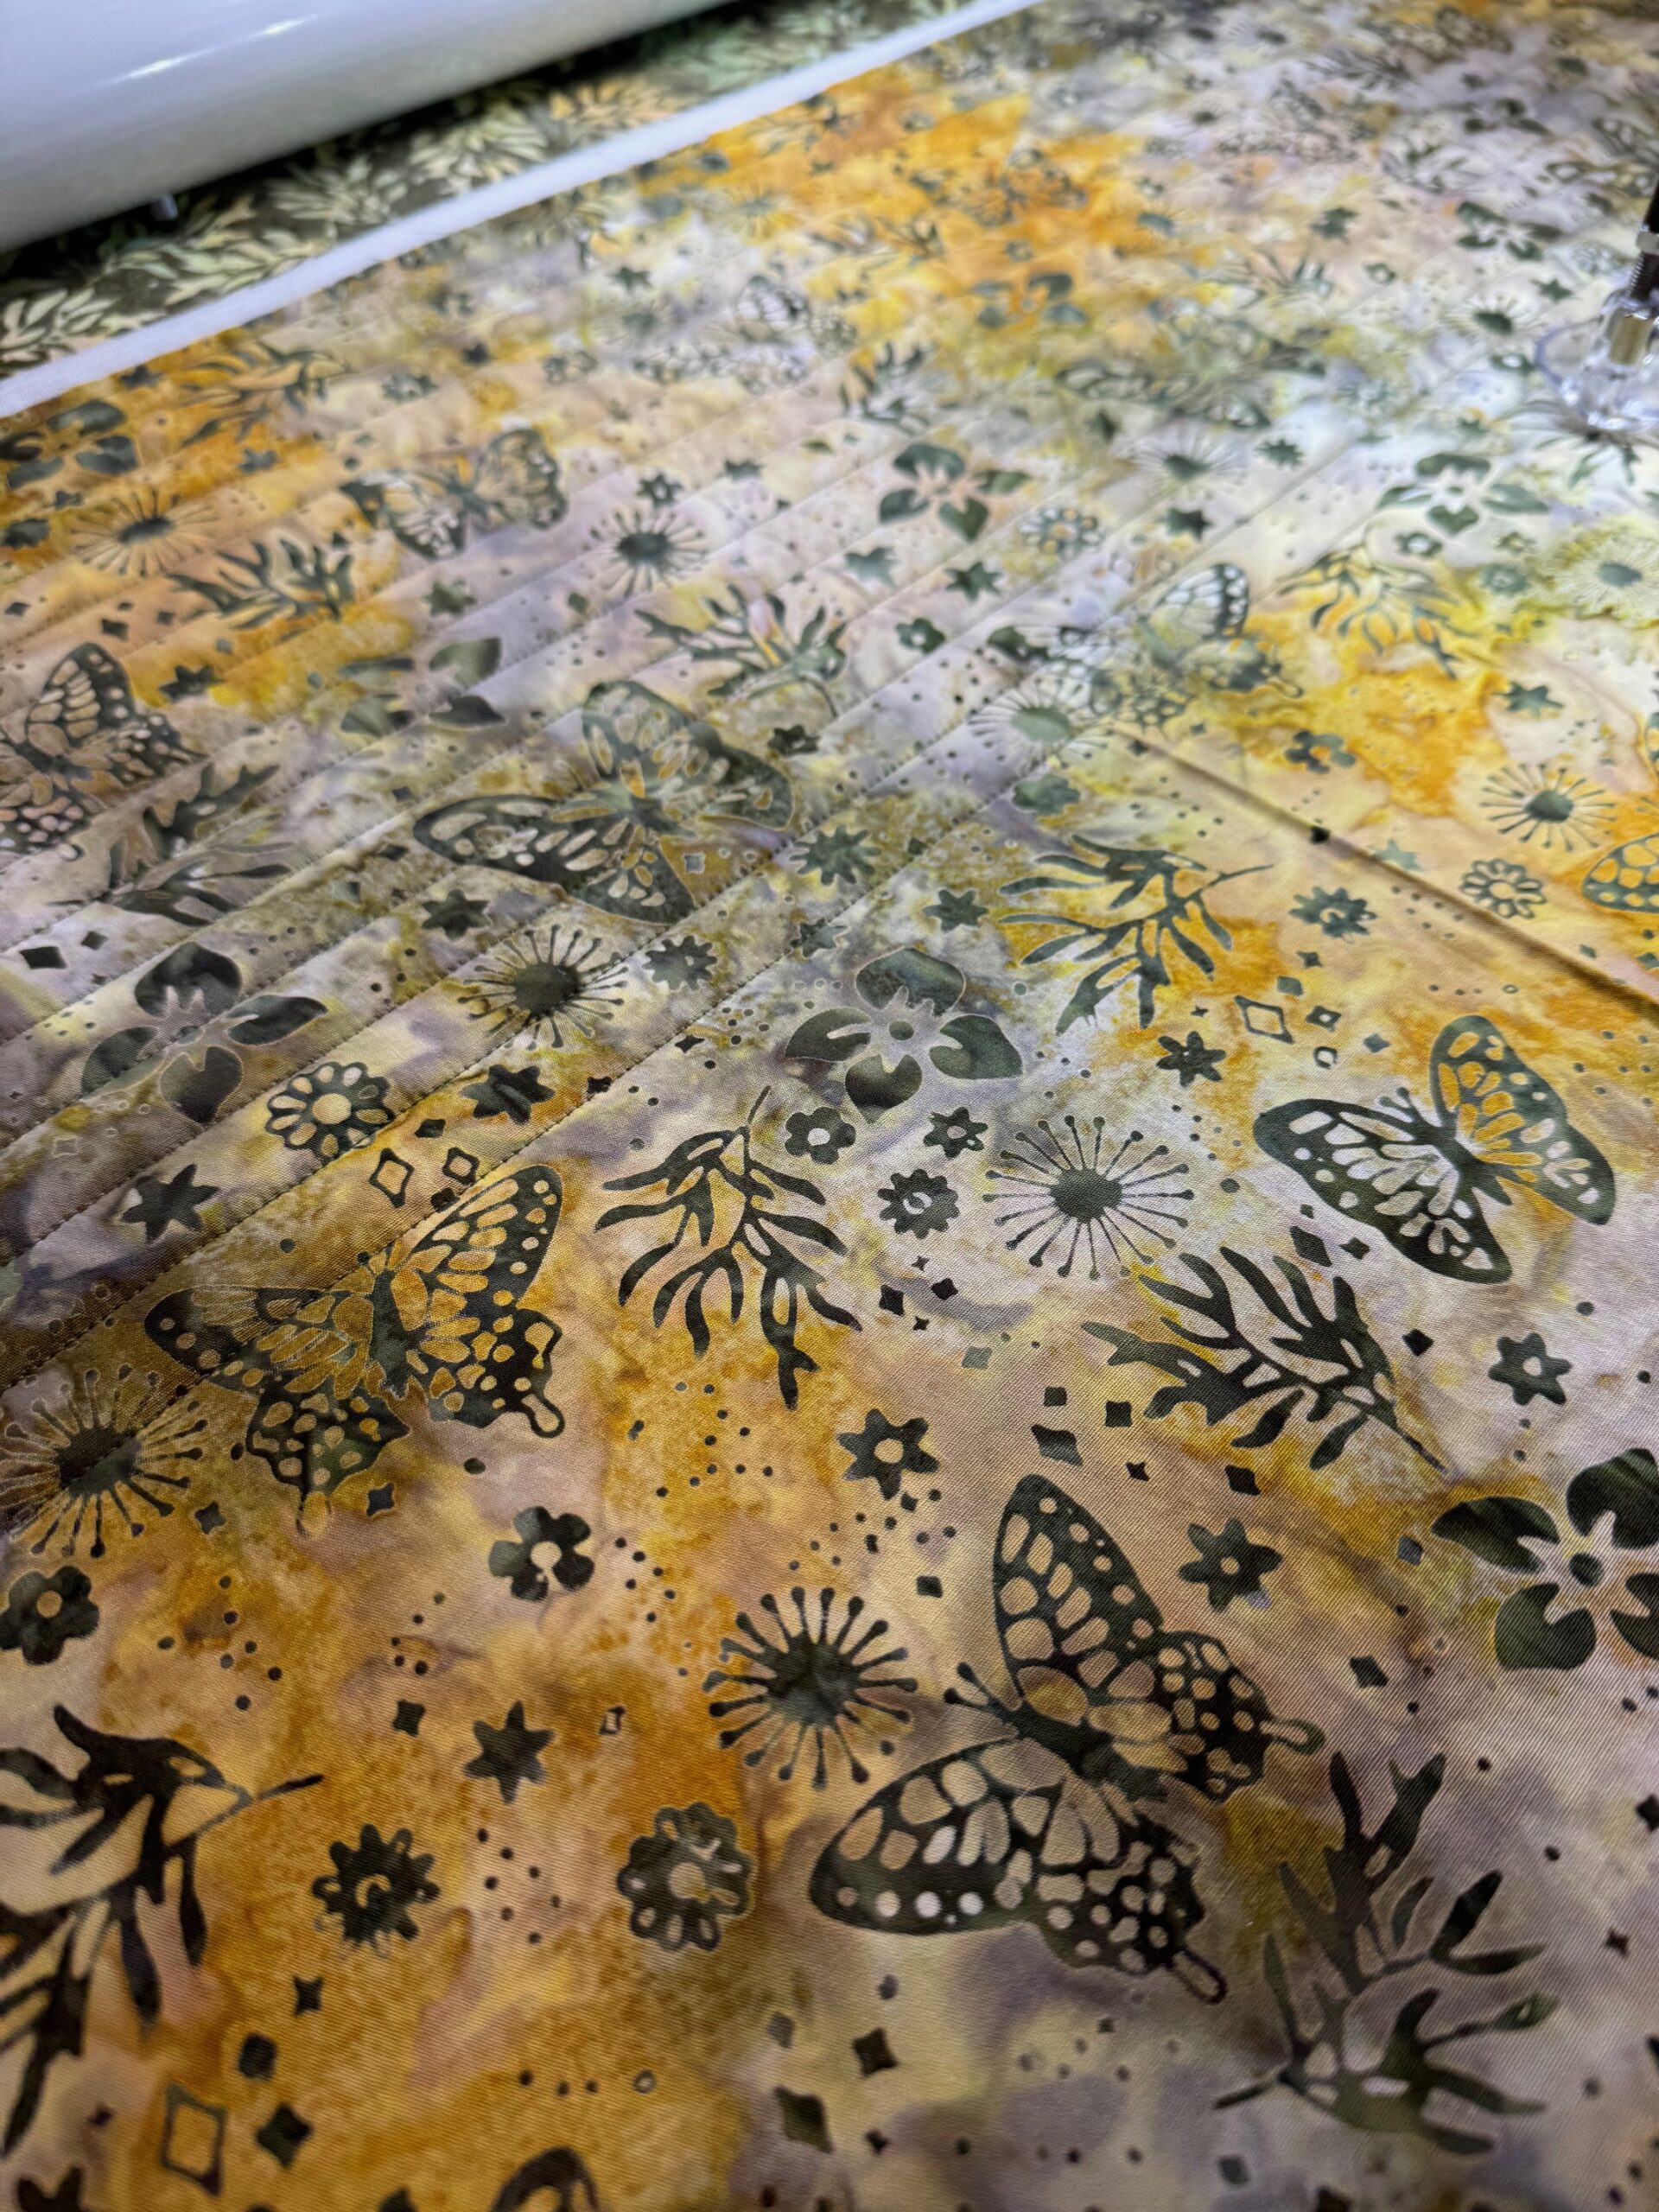
I loaded the front and back on my Handi Quilter Forte (Amara 24) longarm using Soft and Stable provided by ByAnnie.com for the batting using a narrow horizontal straight line quilt pattern.
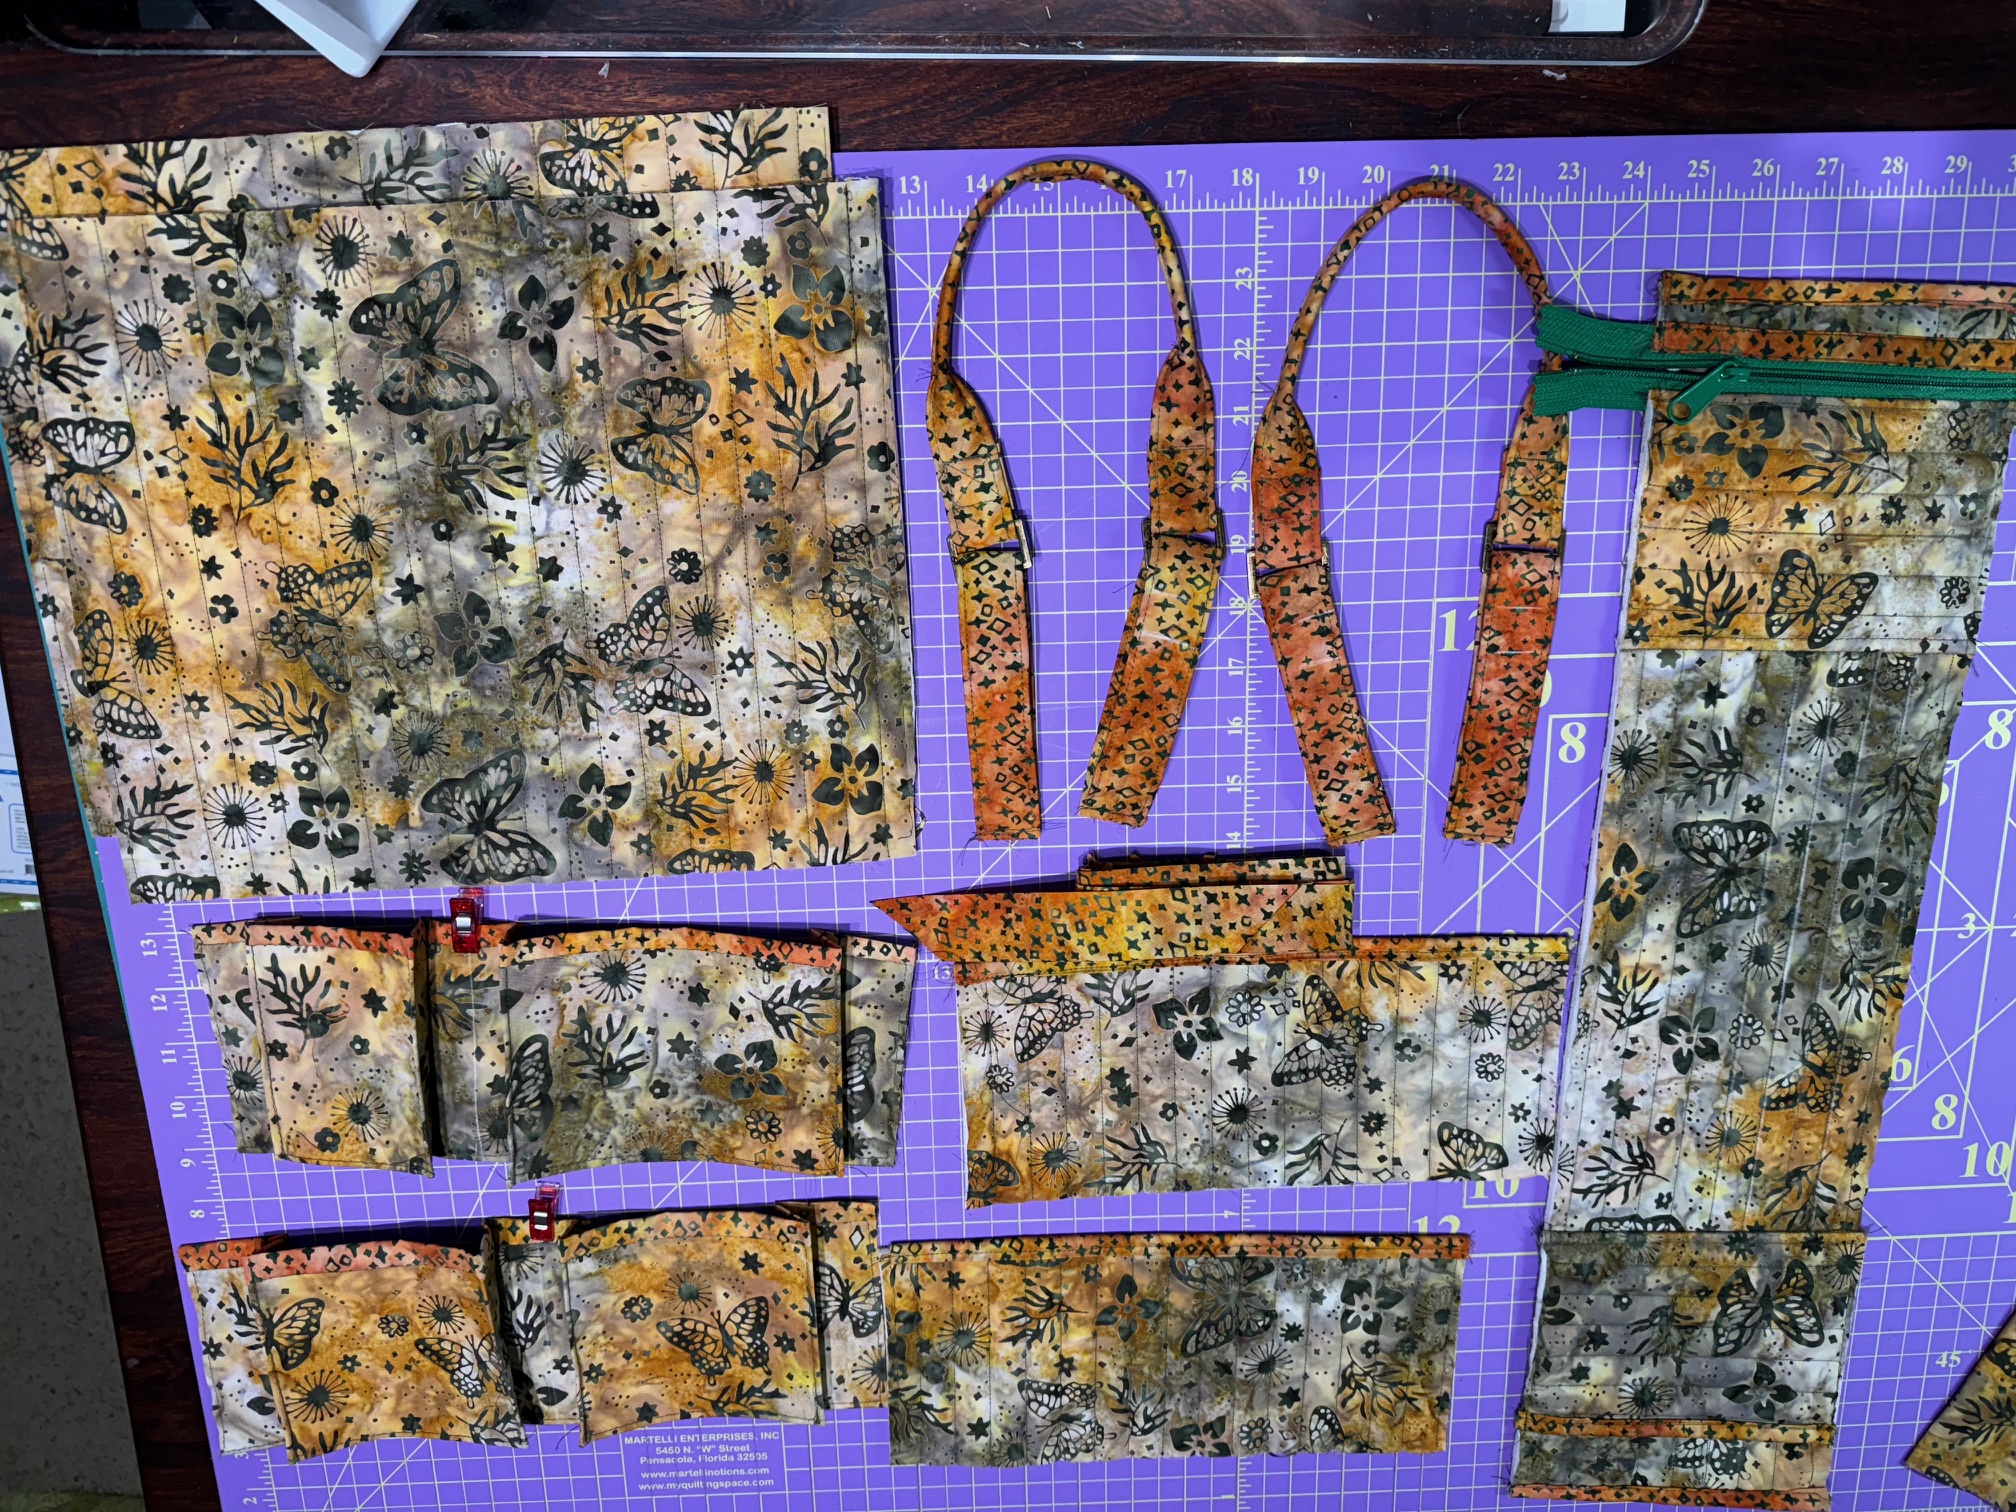
I first made all the pieces according to the well written directions. Byannie even prints check boxes for you to check off each step as you go as well as a sheet with the numbers of the pieces to pin to each piece to keep everything organized. There are even video instructions for many of the steps.
I love how professional the bags look when complete. The directions provide steps that lead to a very nicely finished bag. The piece next to the pattern is the stabilizer for the bottom of the bag.
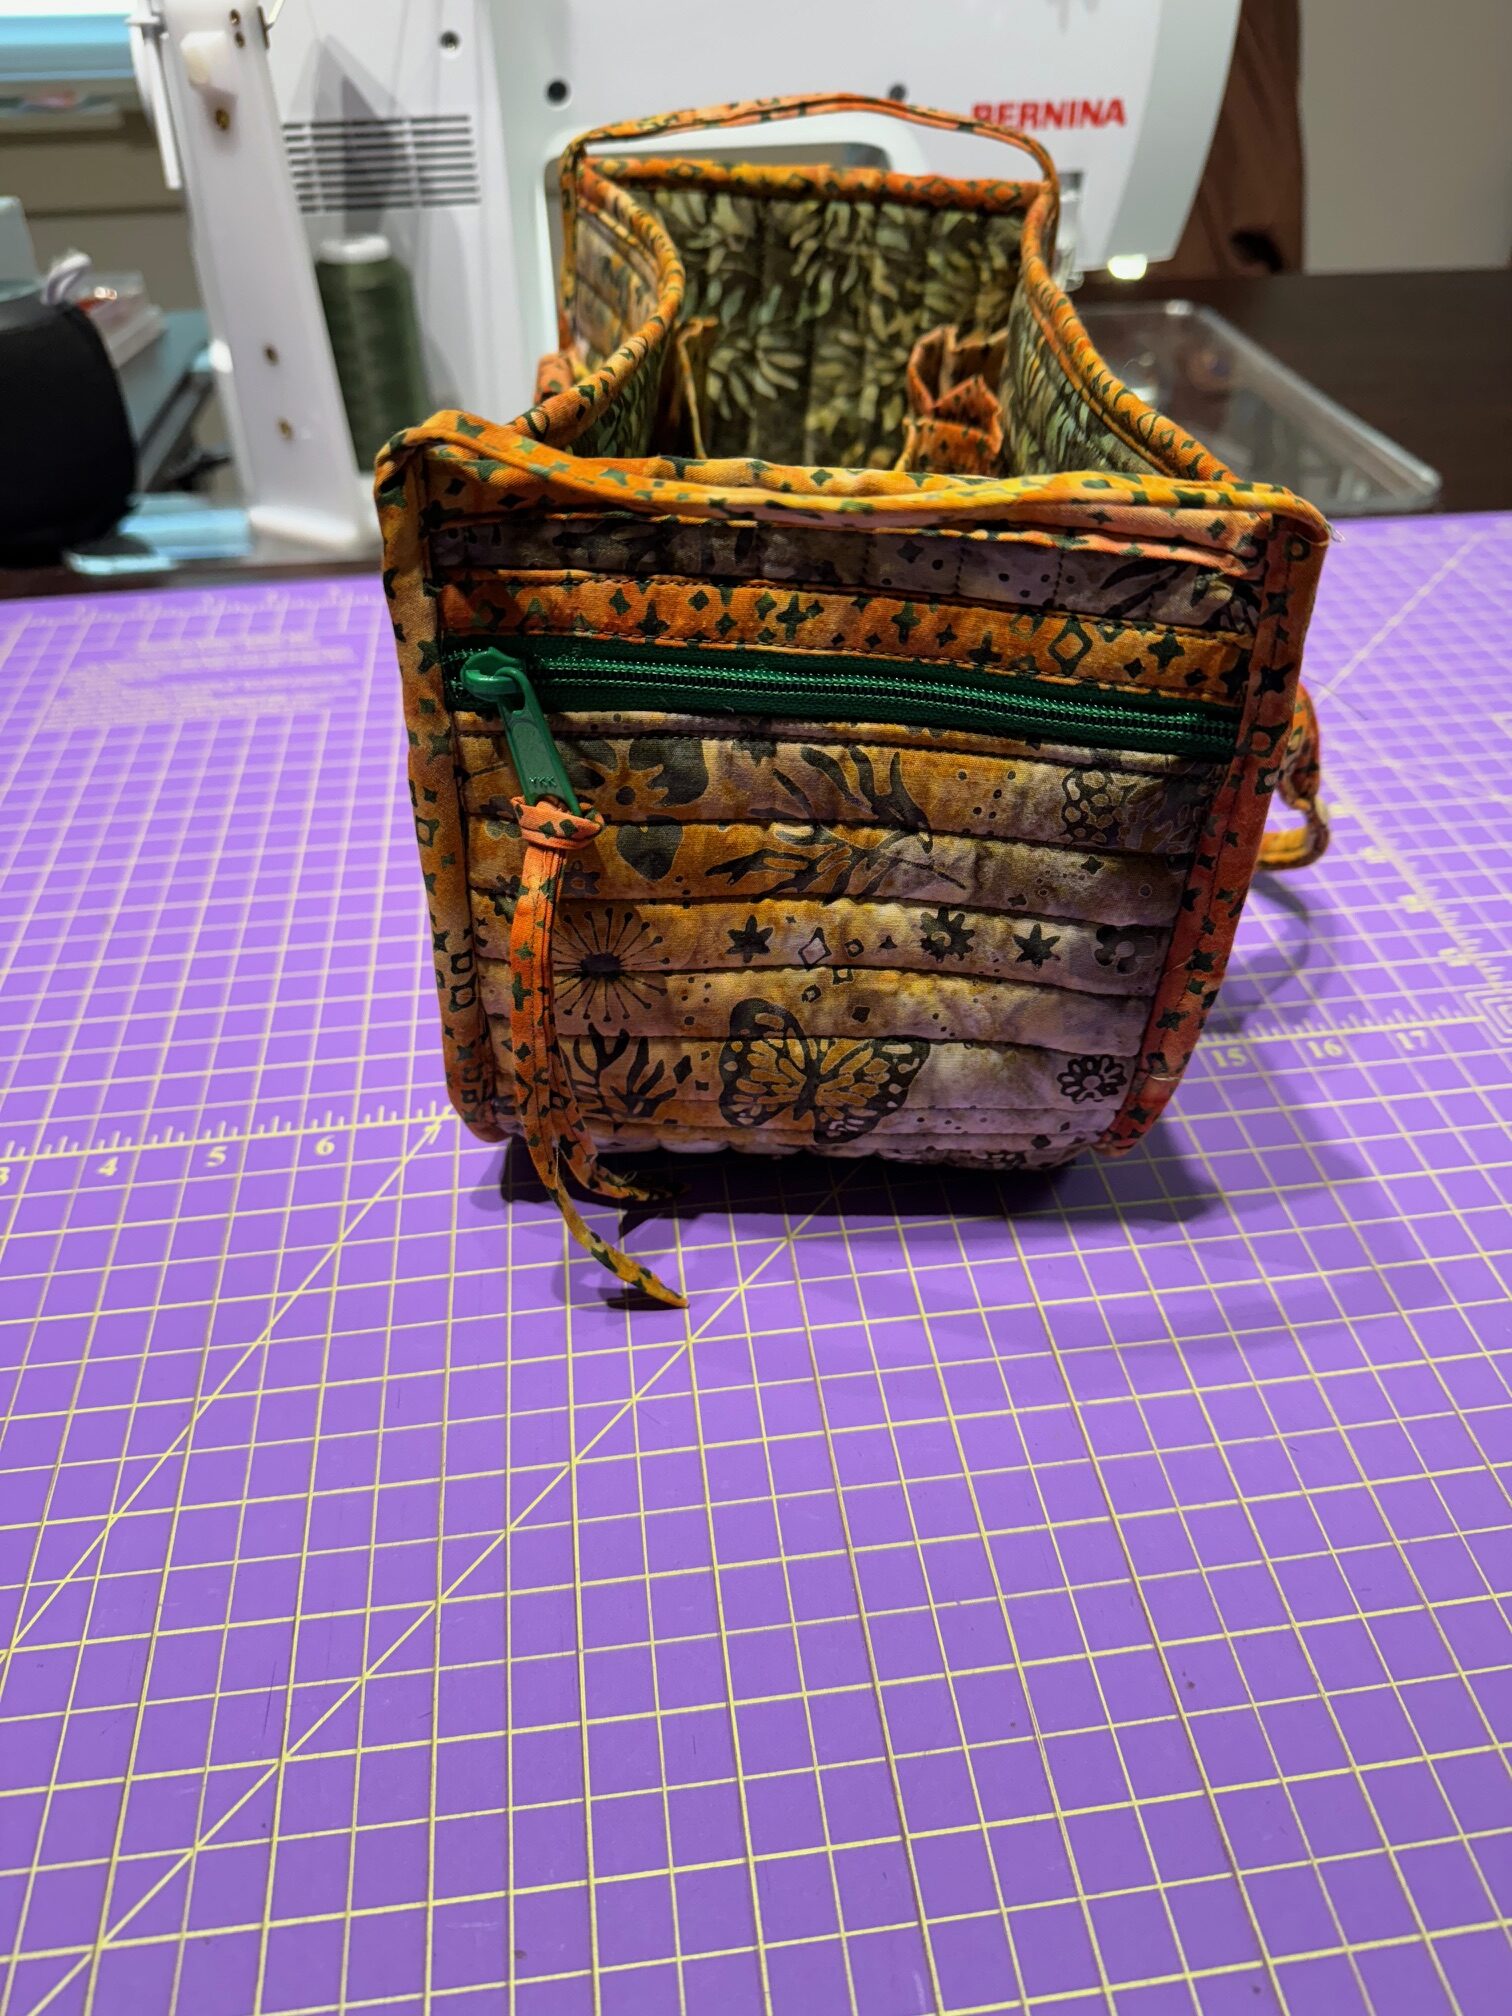
I love all the pockets!
Pockets on the inside, outside, and ends!!
One zippered pocket!
Here are my three mugs with notions that I was referring to earlier that continually get knocked off behind my sewing table. My hope was that they all would fit, be easier to access, and be less likely to be knocked off.
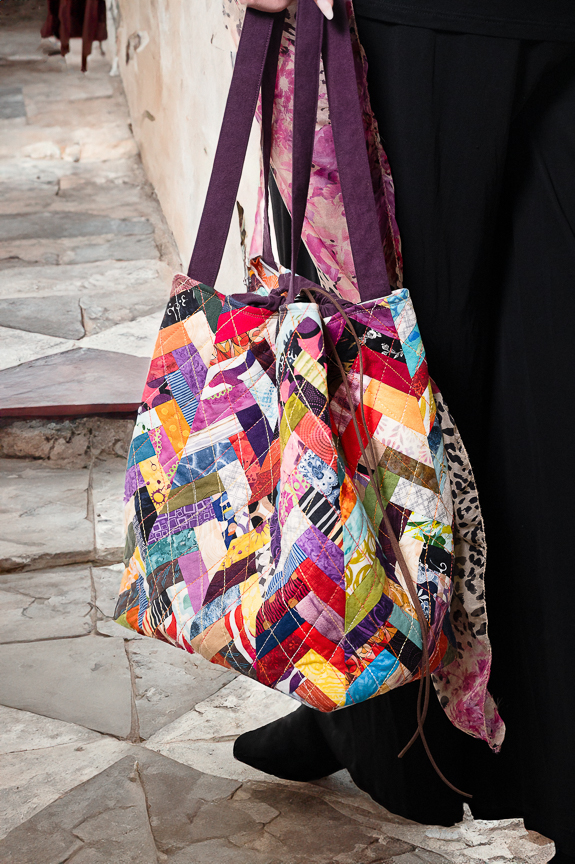
…and it all fit easily! I just used the inside pockets and still have the center part available as well as all the outside pockets!! I’m so please with how it turned out. It will definitely be less likely to be knocked off because of the larger base and it feels so much more organized.
Maybe you remember the Full Bloom BOM quilt by 4th and 6th Designs. The edge painting appliqué technique used was the basis for this popular quilt. The technique is raw edge and is the basis for our September challenge. Here is a video that shows this technique if you are unfamiliar with it. YouTube Video demonstrating the edge-coloring technique.
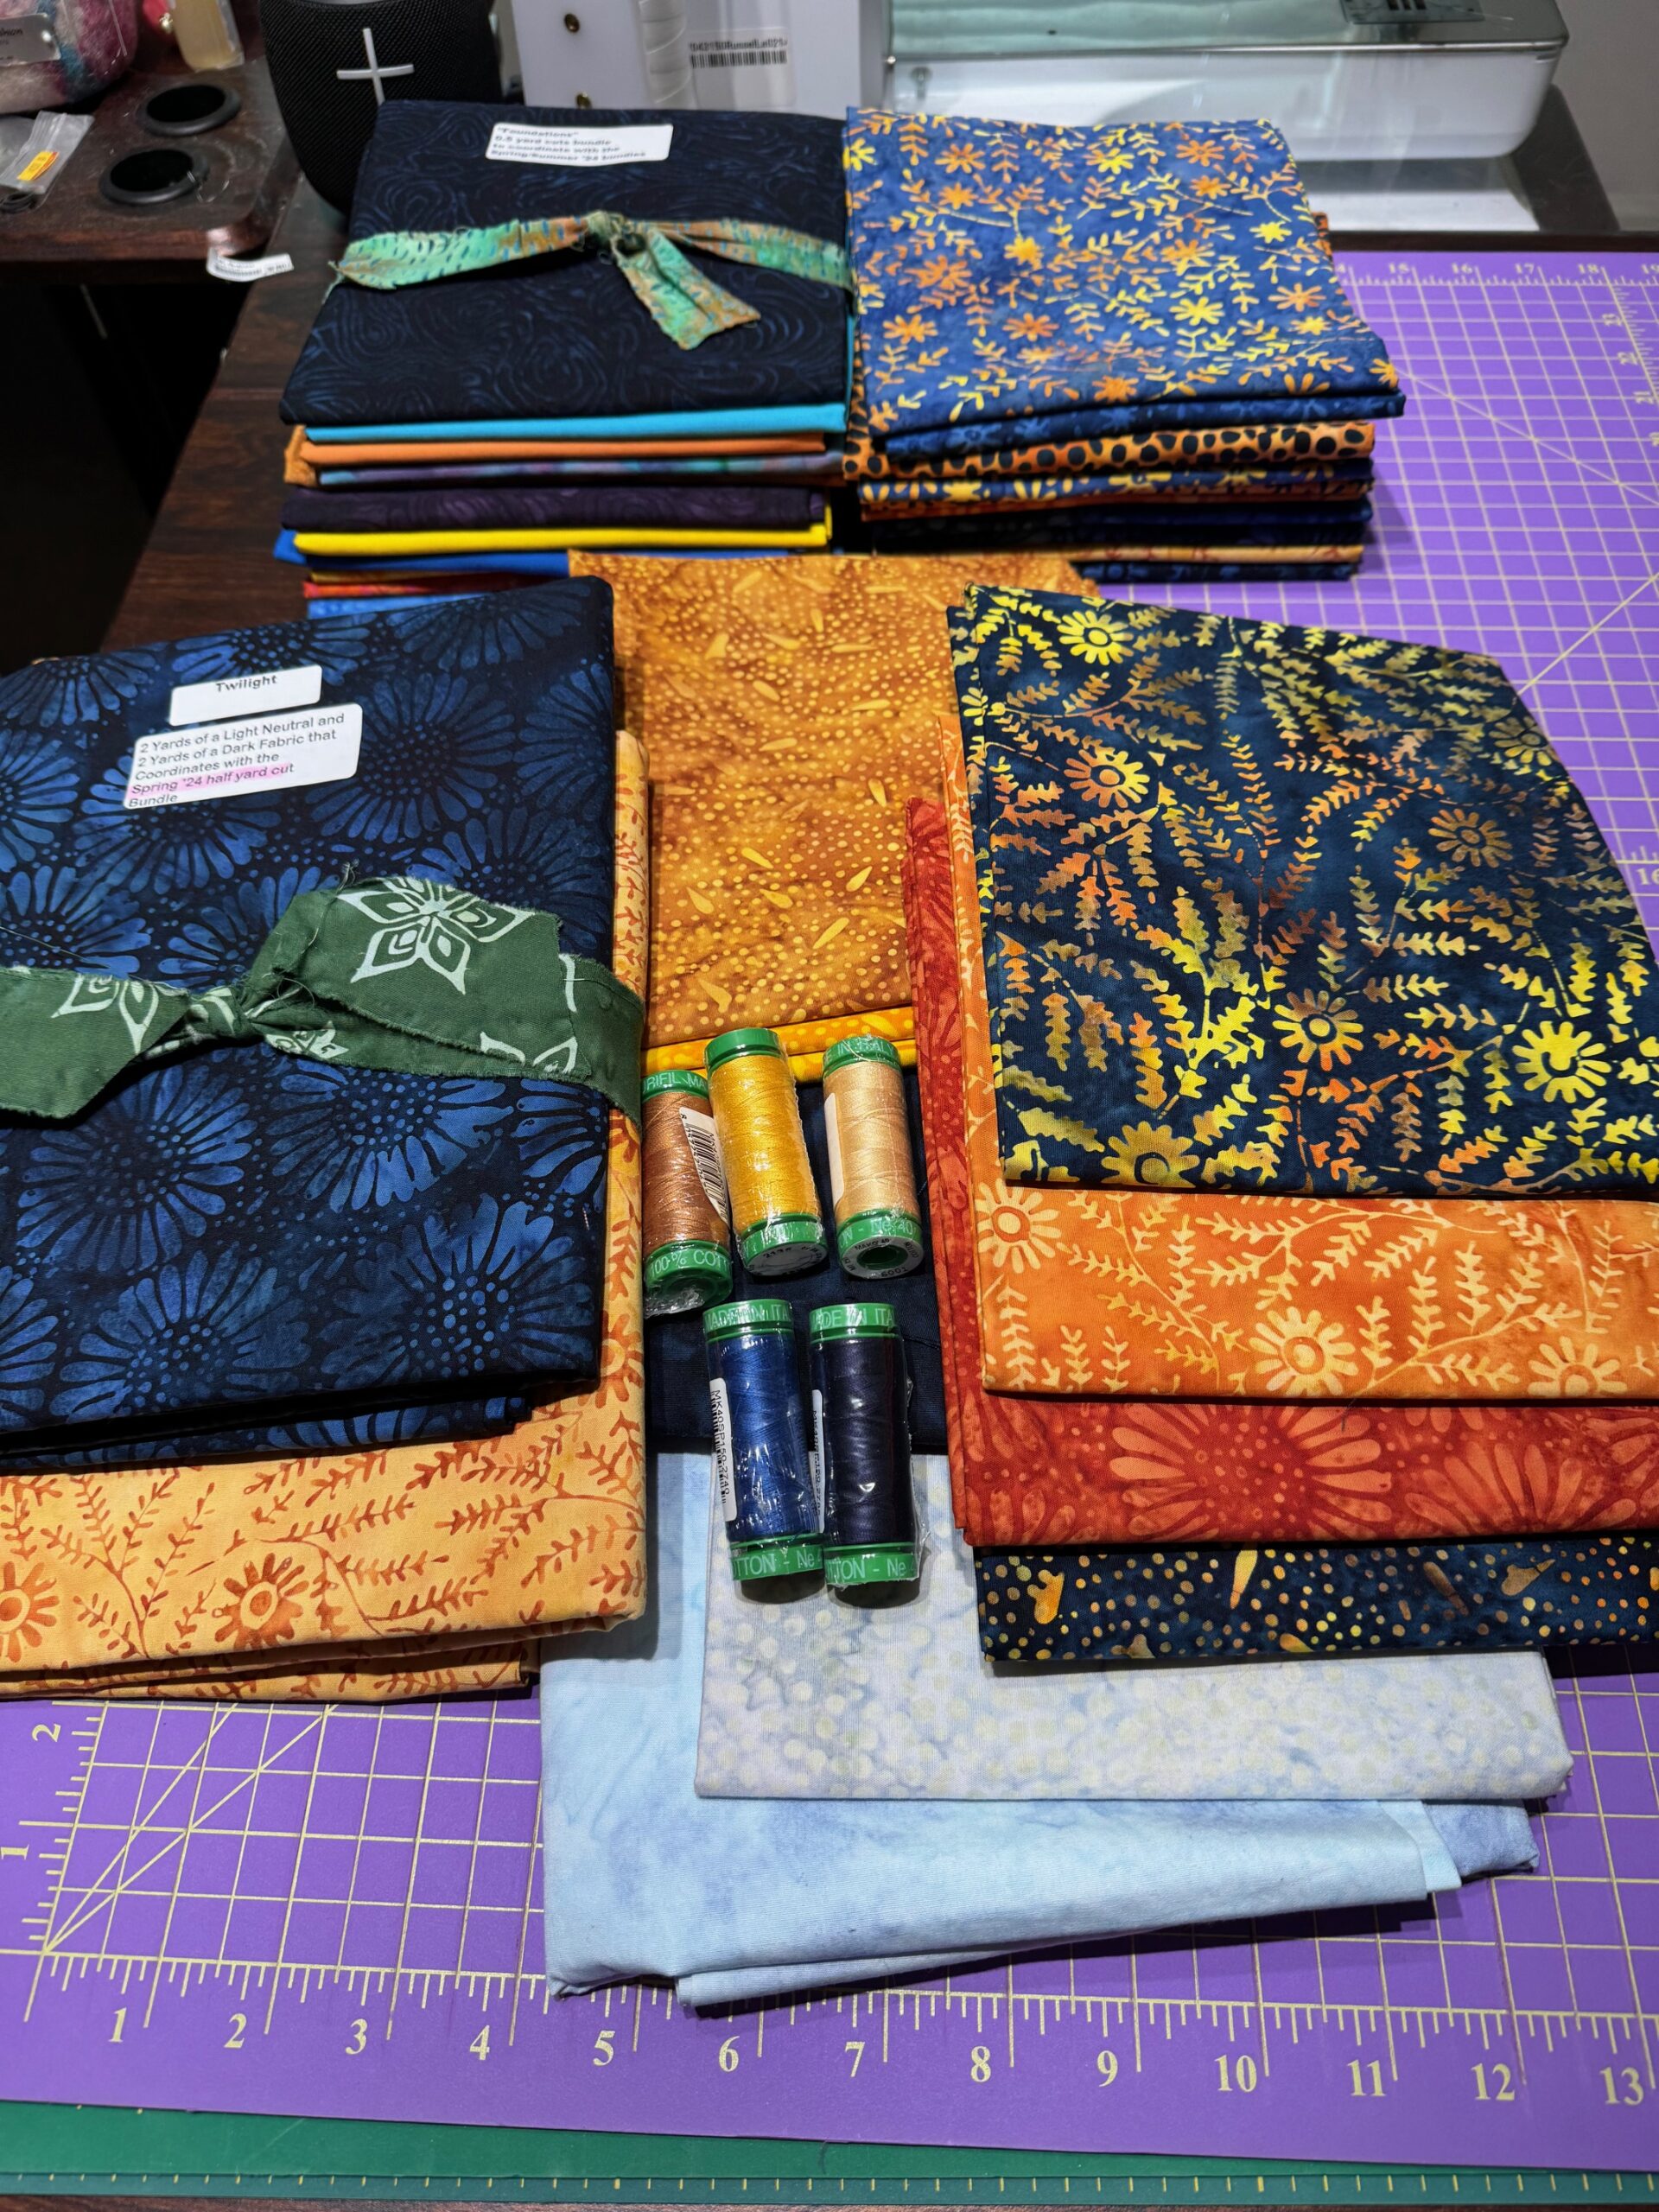
Full Bloom applique quilt using Island Batik fabrics and the edge stitching processThis beautiful collection of fabric was given to me by Island Batik to use for this challenge. Twilight by Kathy Engle for Create with ClaudiaI love these colors and this collection and couldn’t wait to get started! Shipping to shops this month!
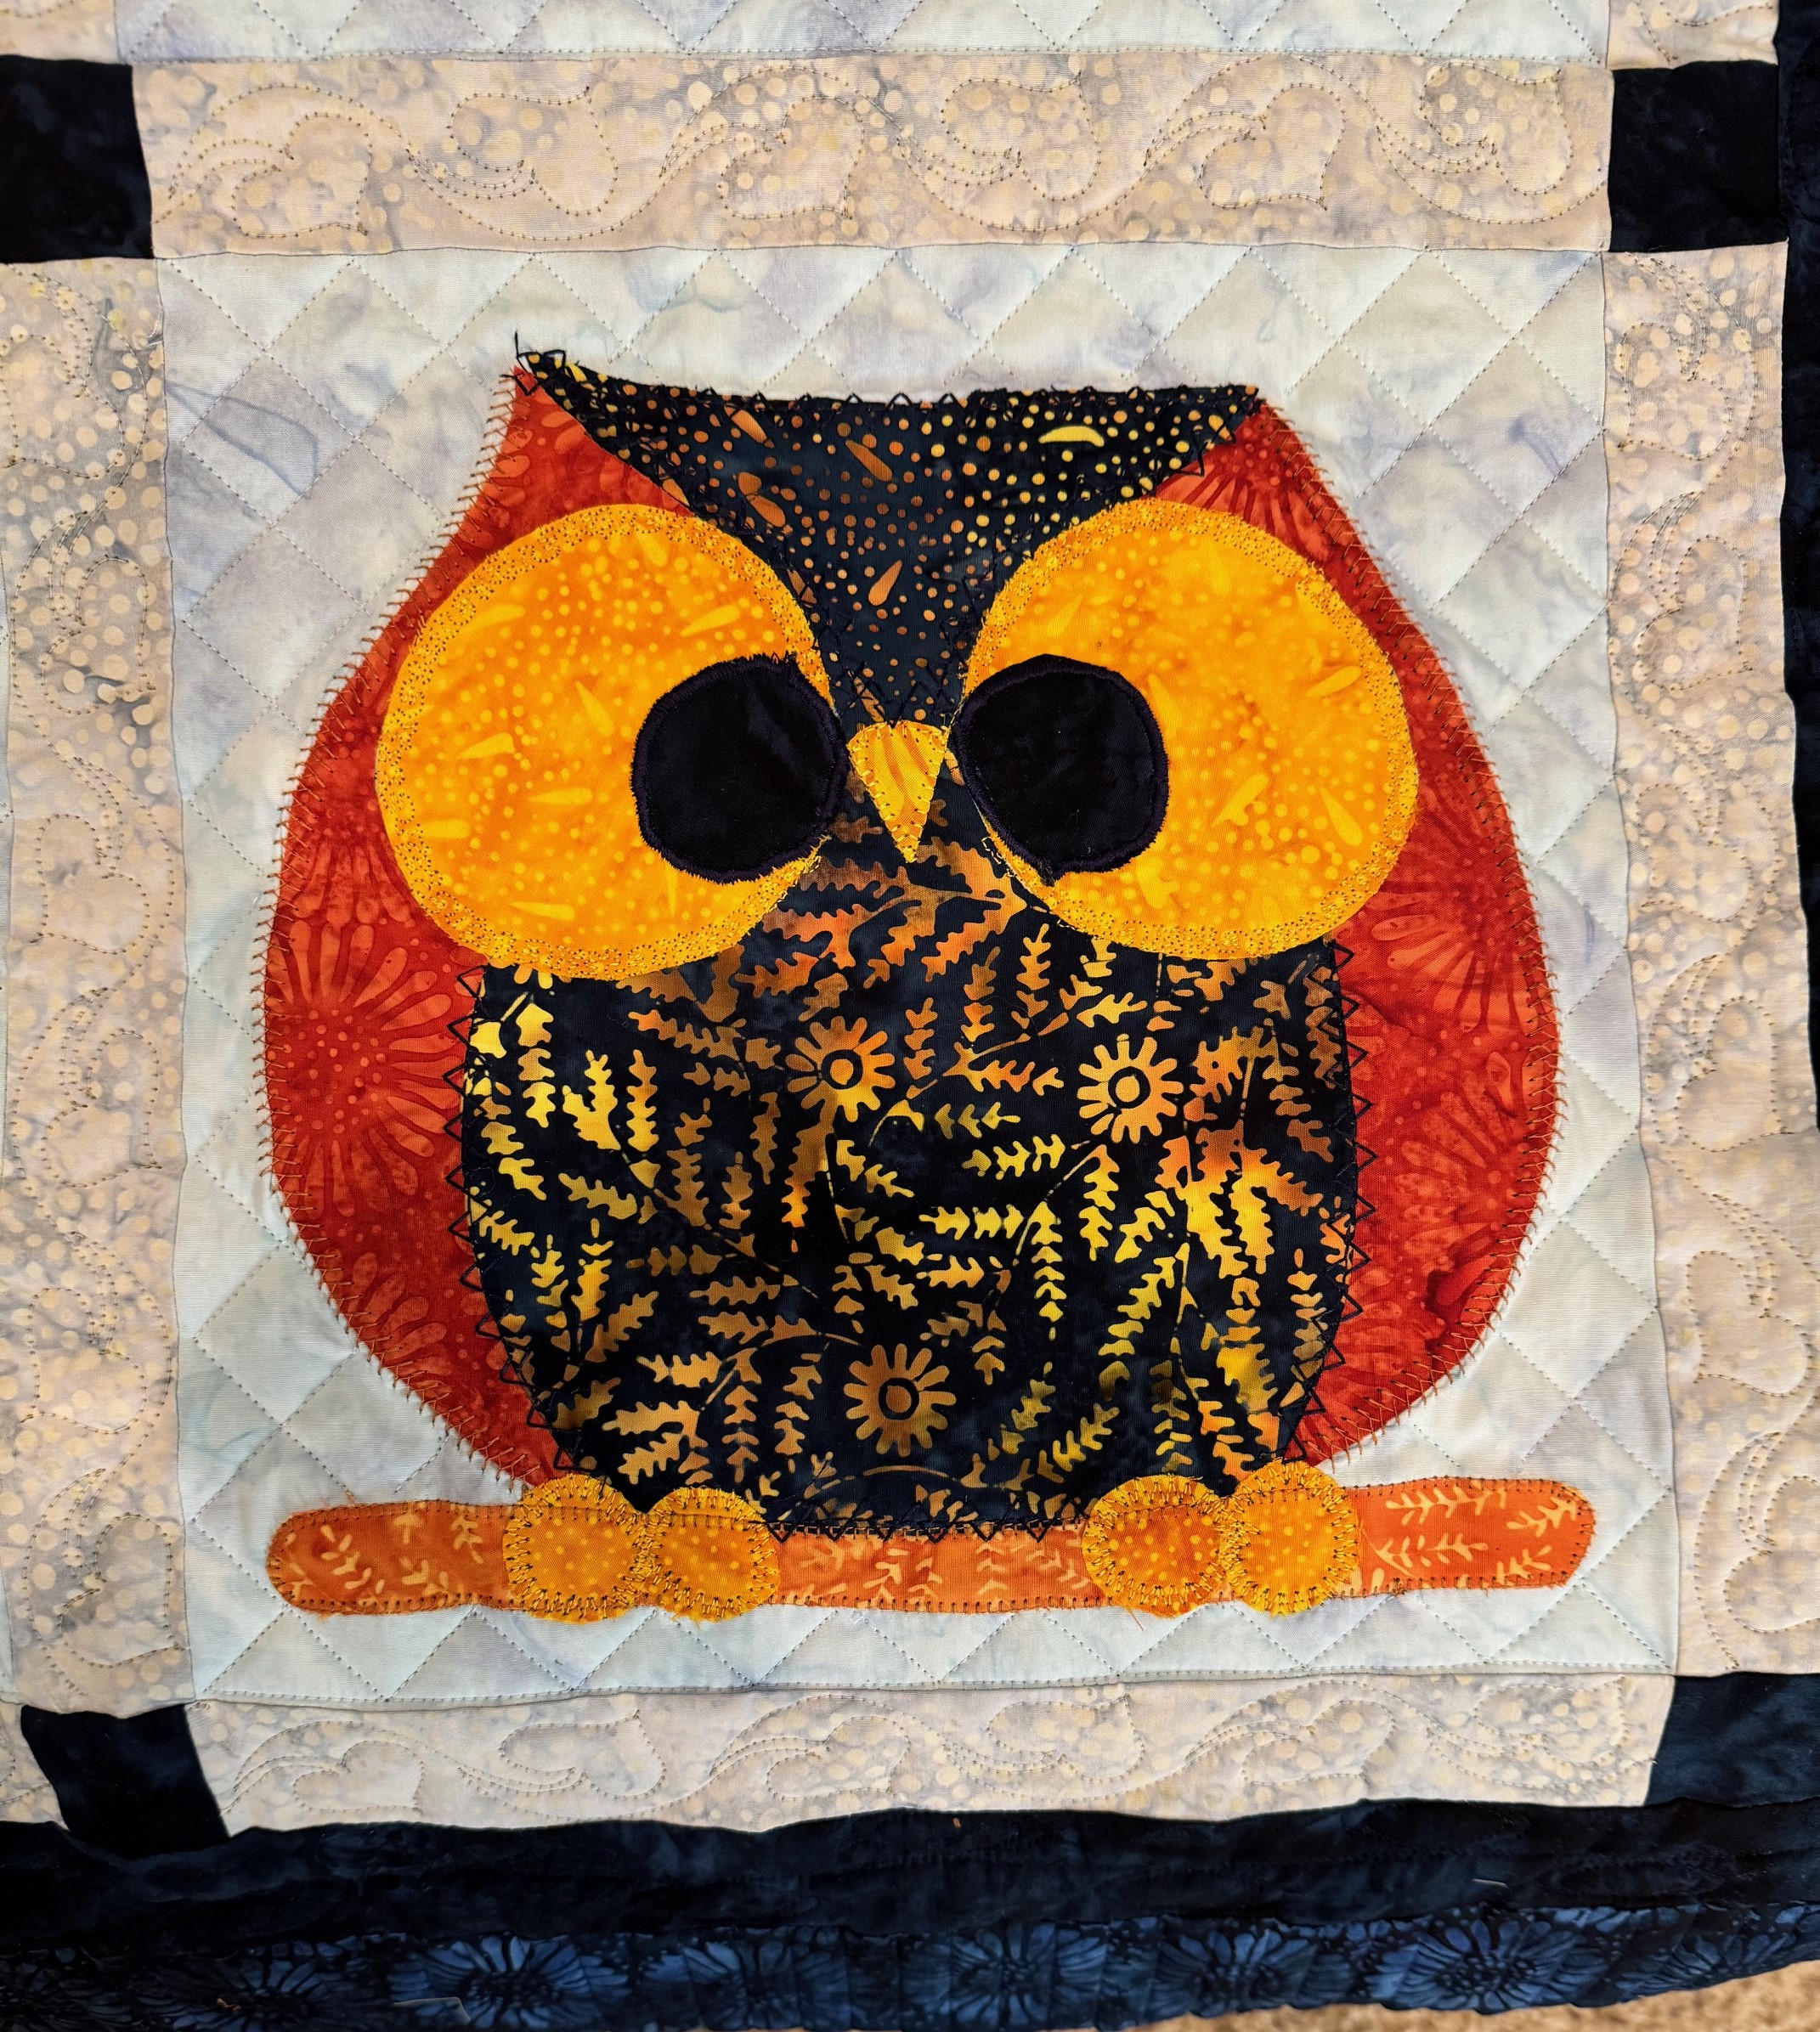
I came across this perfect pattern, Night Owls by Fat Cat Patterns. The colors worked beautifully for this pattern. The Twilight collection and two coordinating fabrics were given to me by Island Batik for this challenge.
I added a few other Island Batik fabrics to work well with this collection. These beautiful 40 weight threads were given to me to use for this challenge by Aurifil threads.
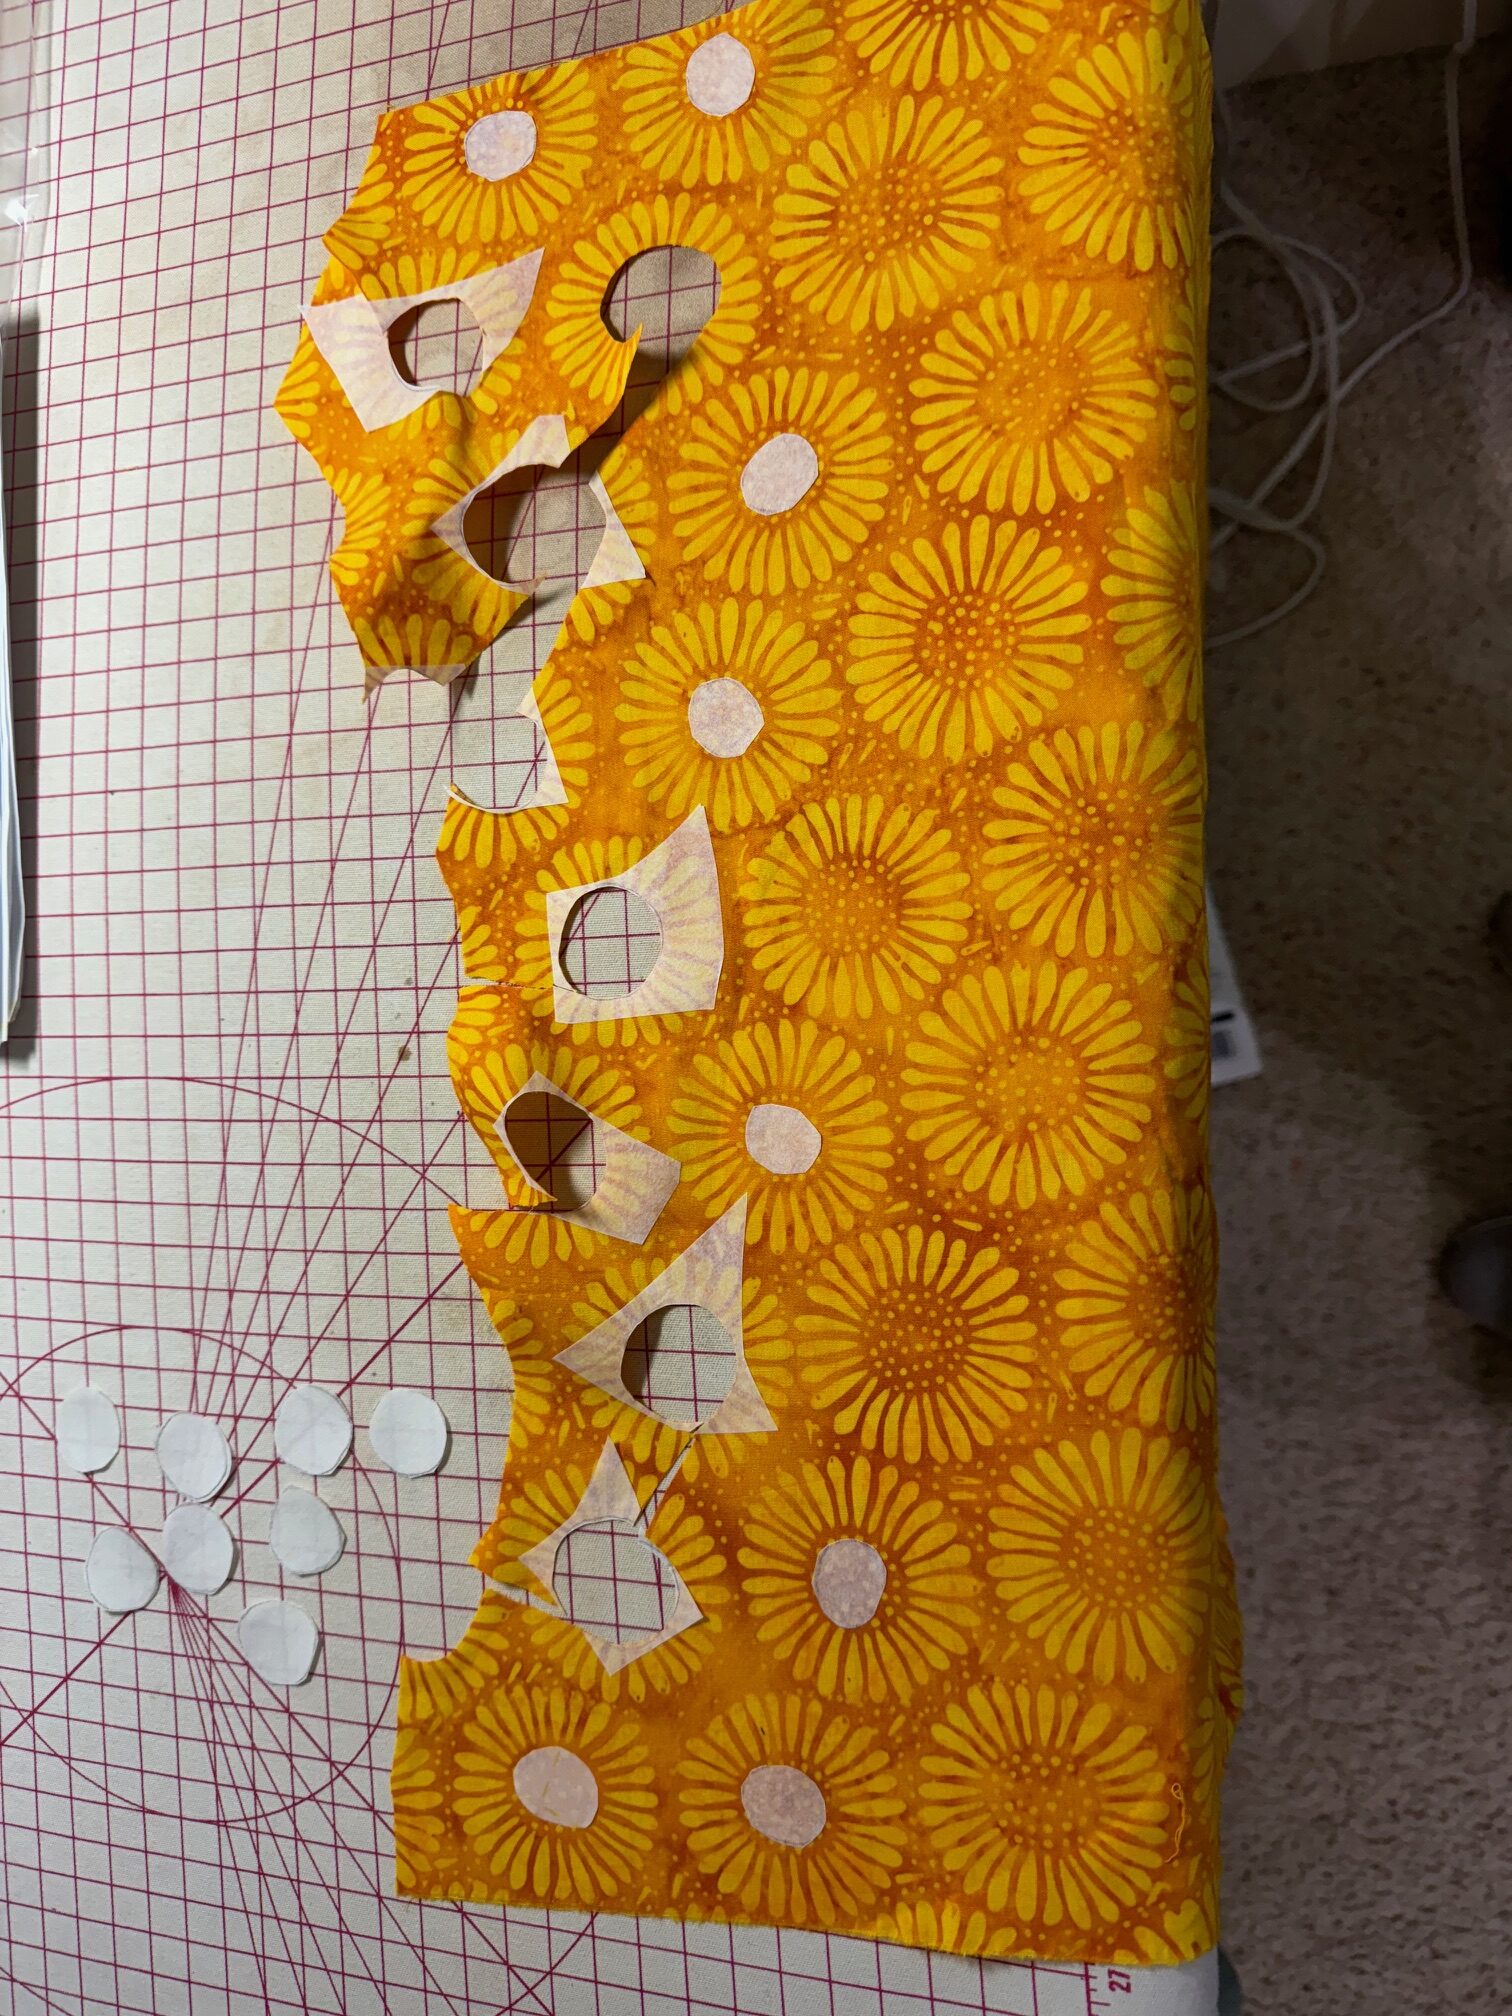
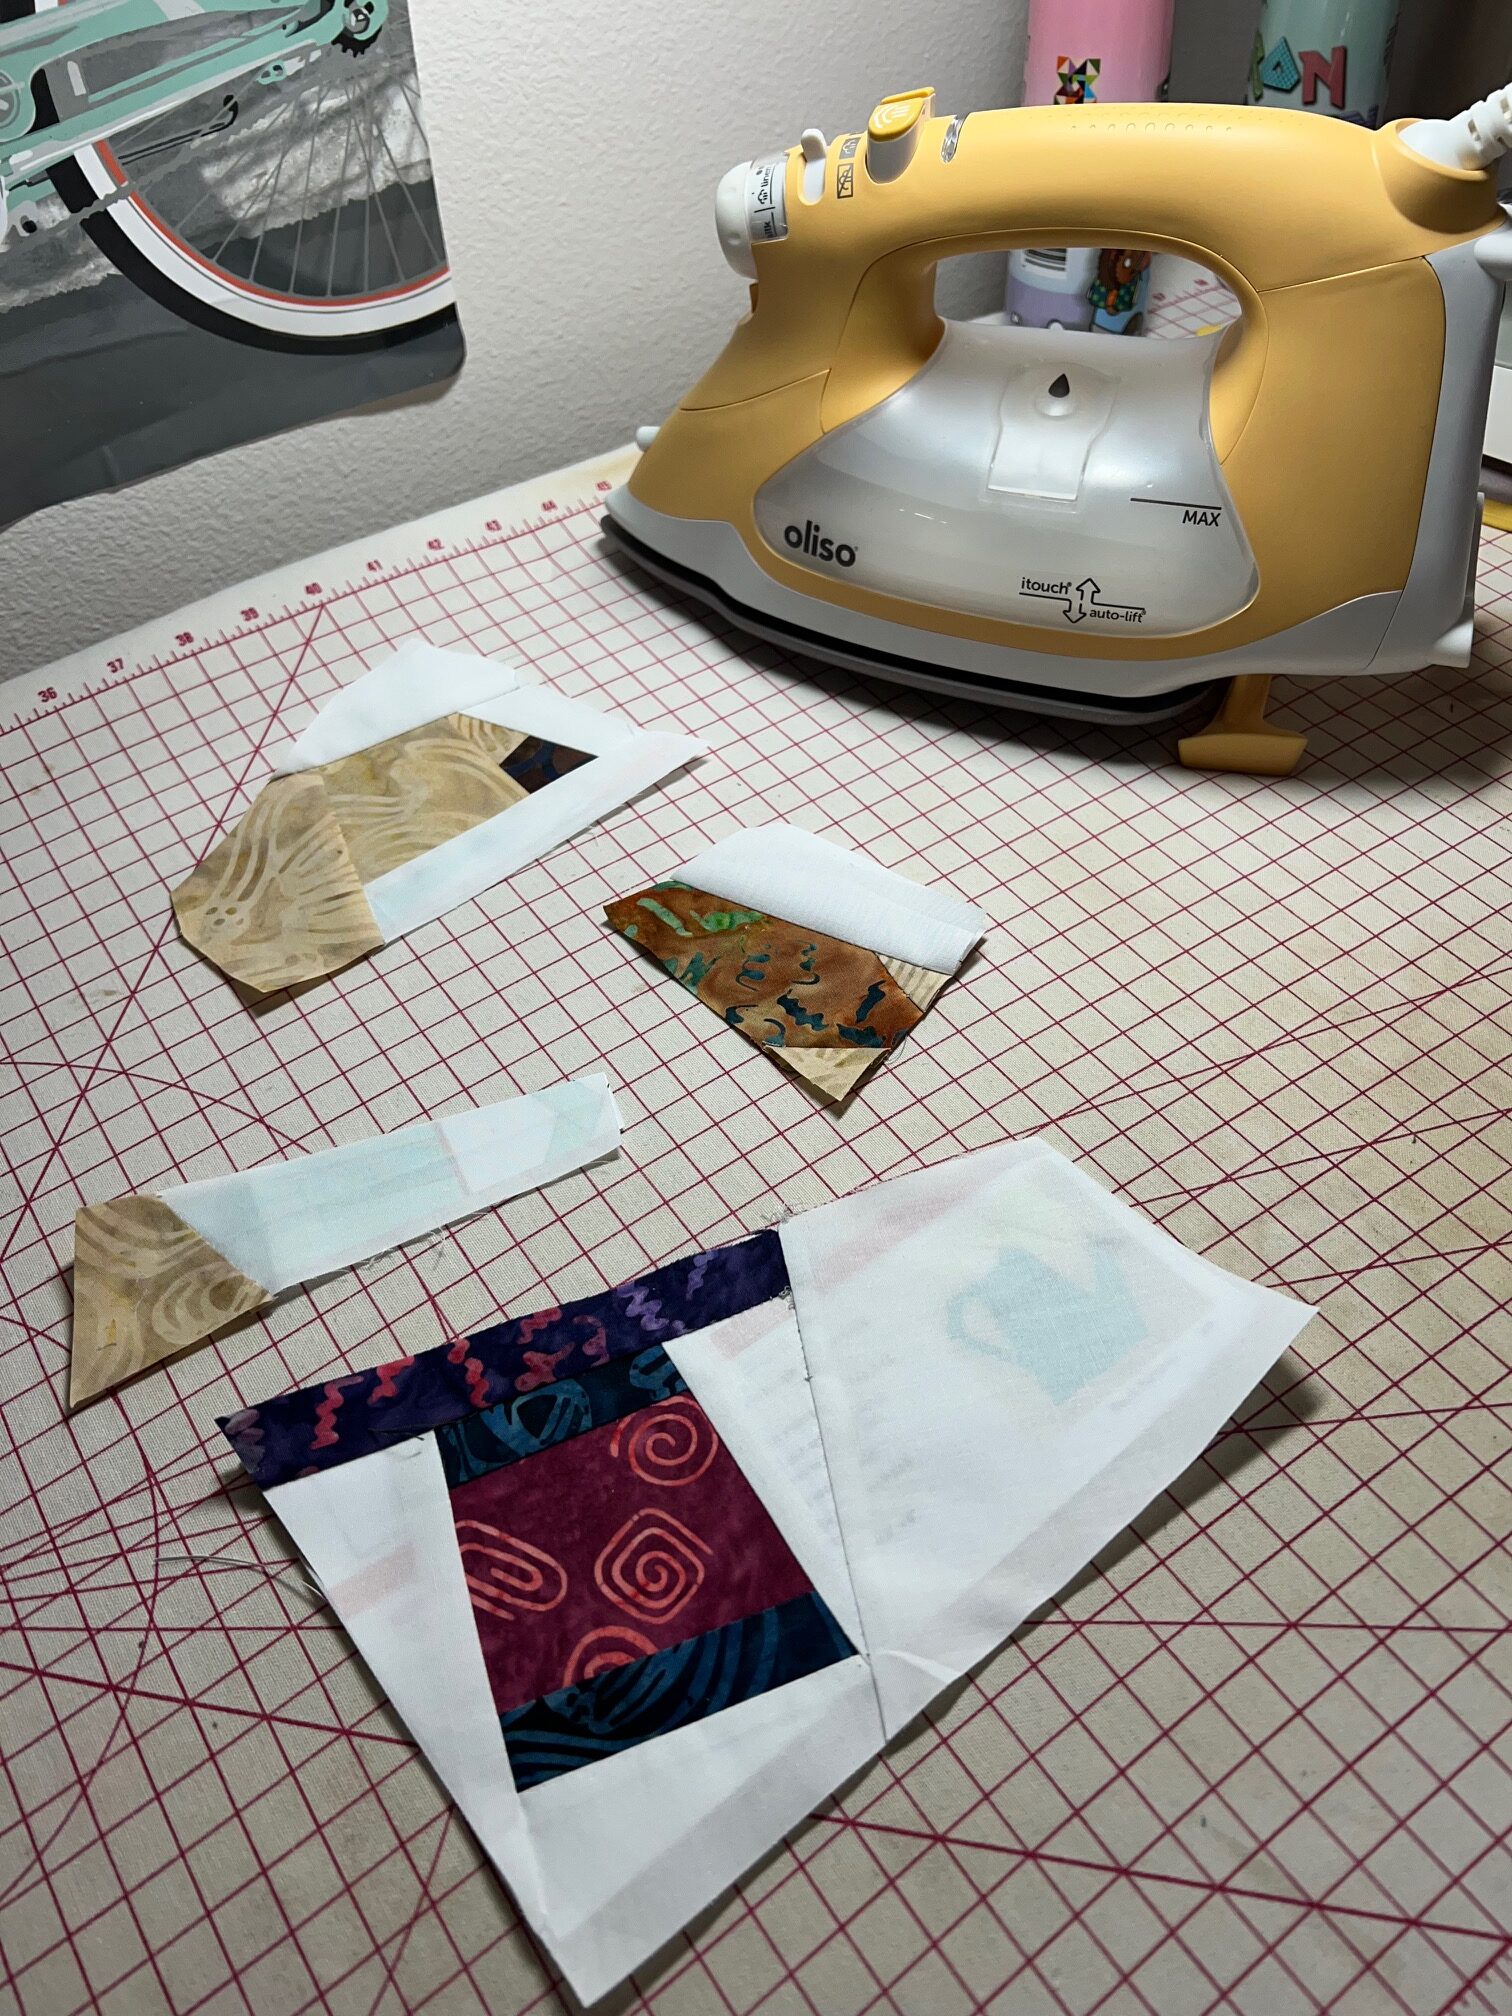
I used Steam a Seam 2 and my Oliso iron to bond the applique pieces to the background fabric.
I used my paper scissors to cur out the Steam a Seam shapes leaving a little extra to cut through once adhered to the applique fabric.
I fussy cut the center of the daisies in this fabric for the owl toes!
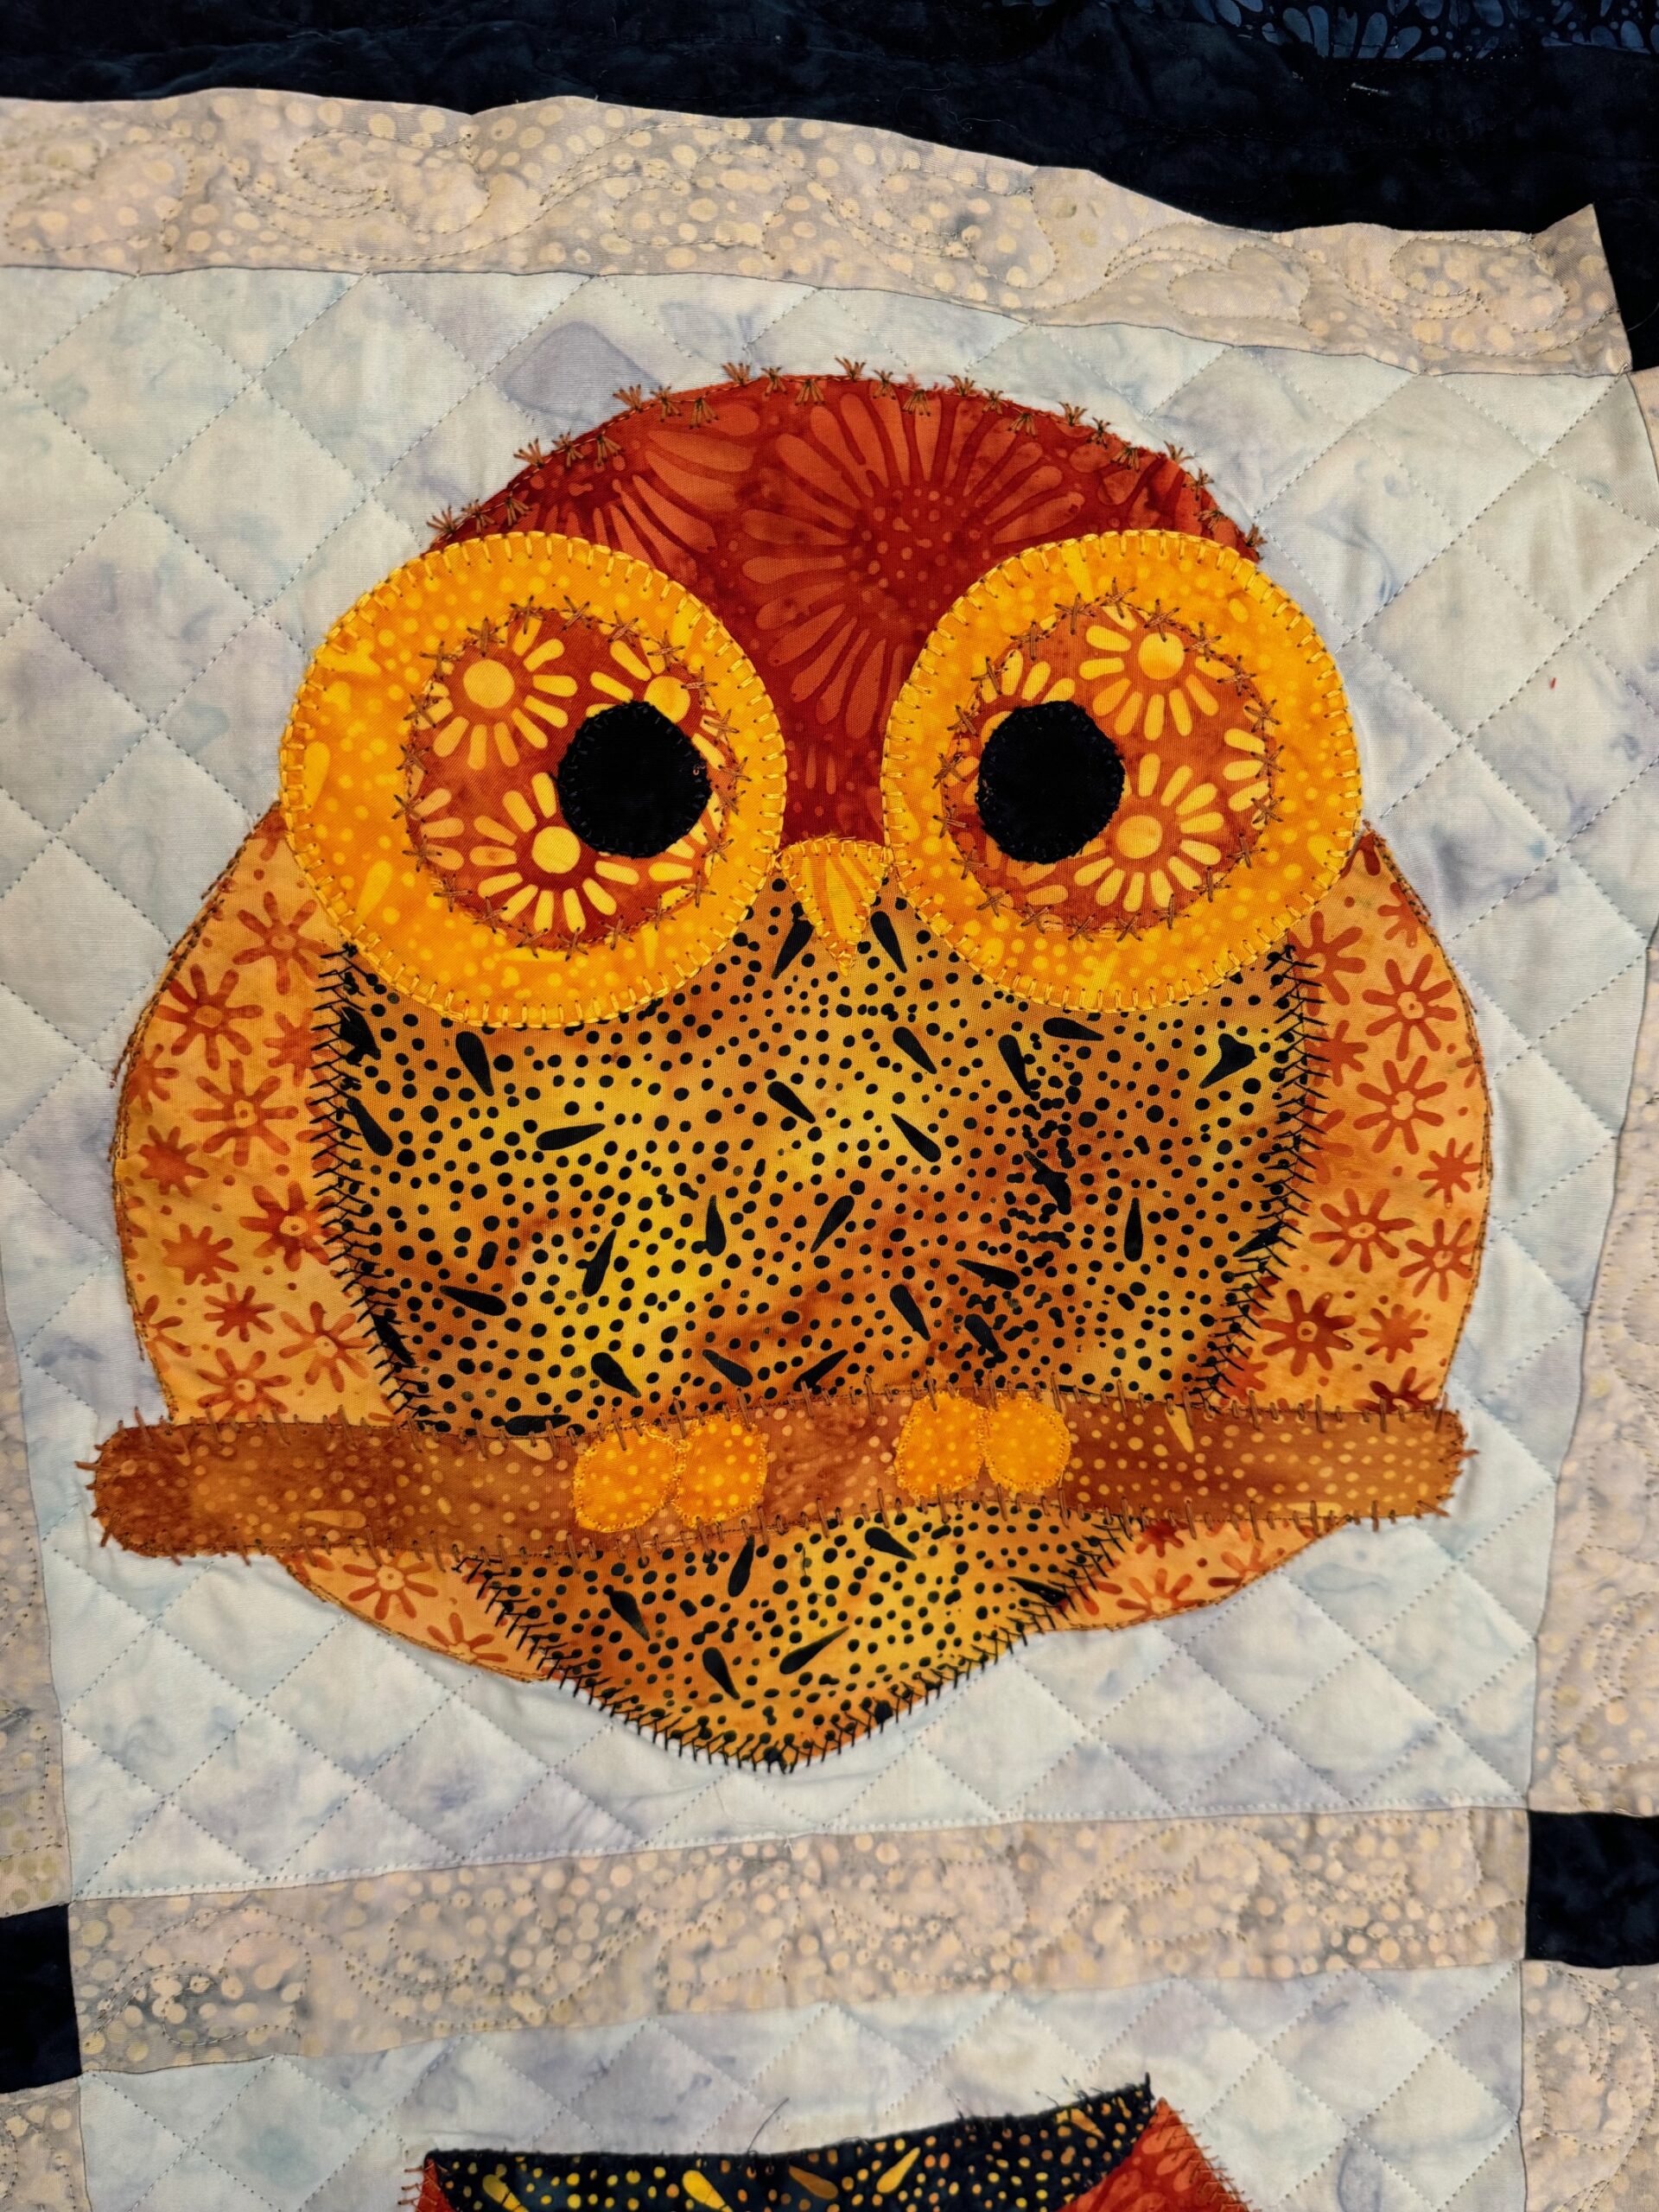
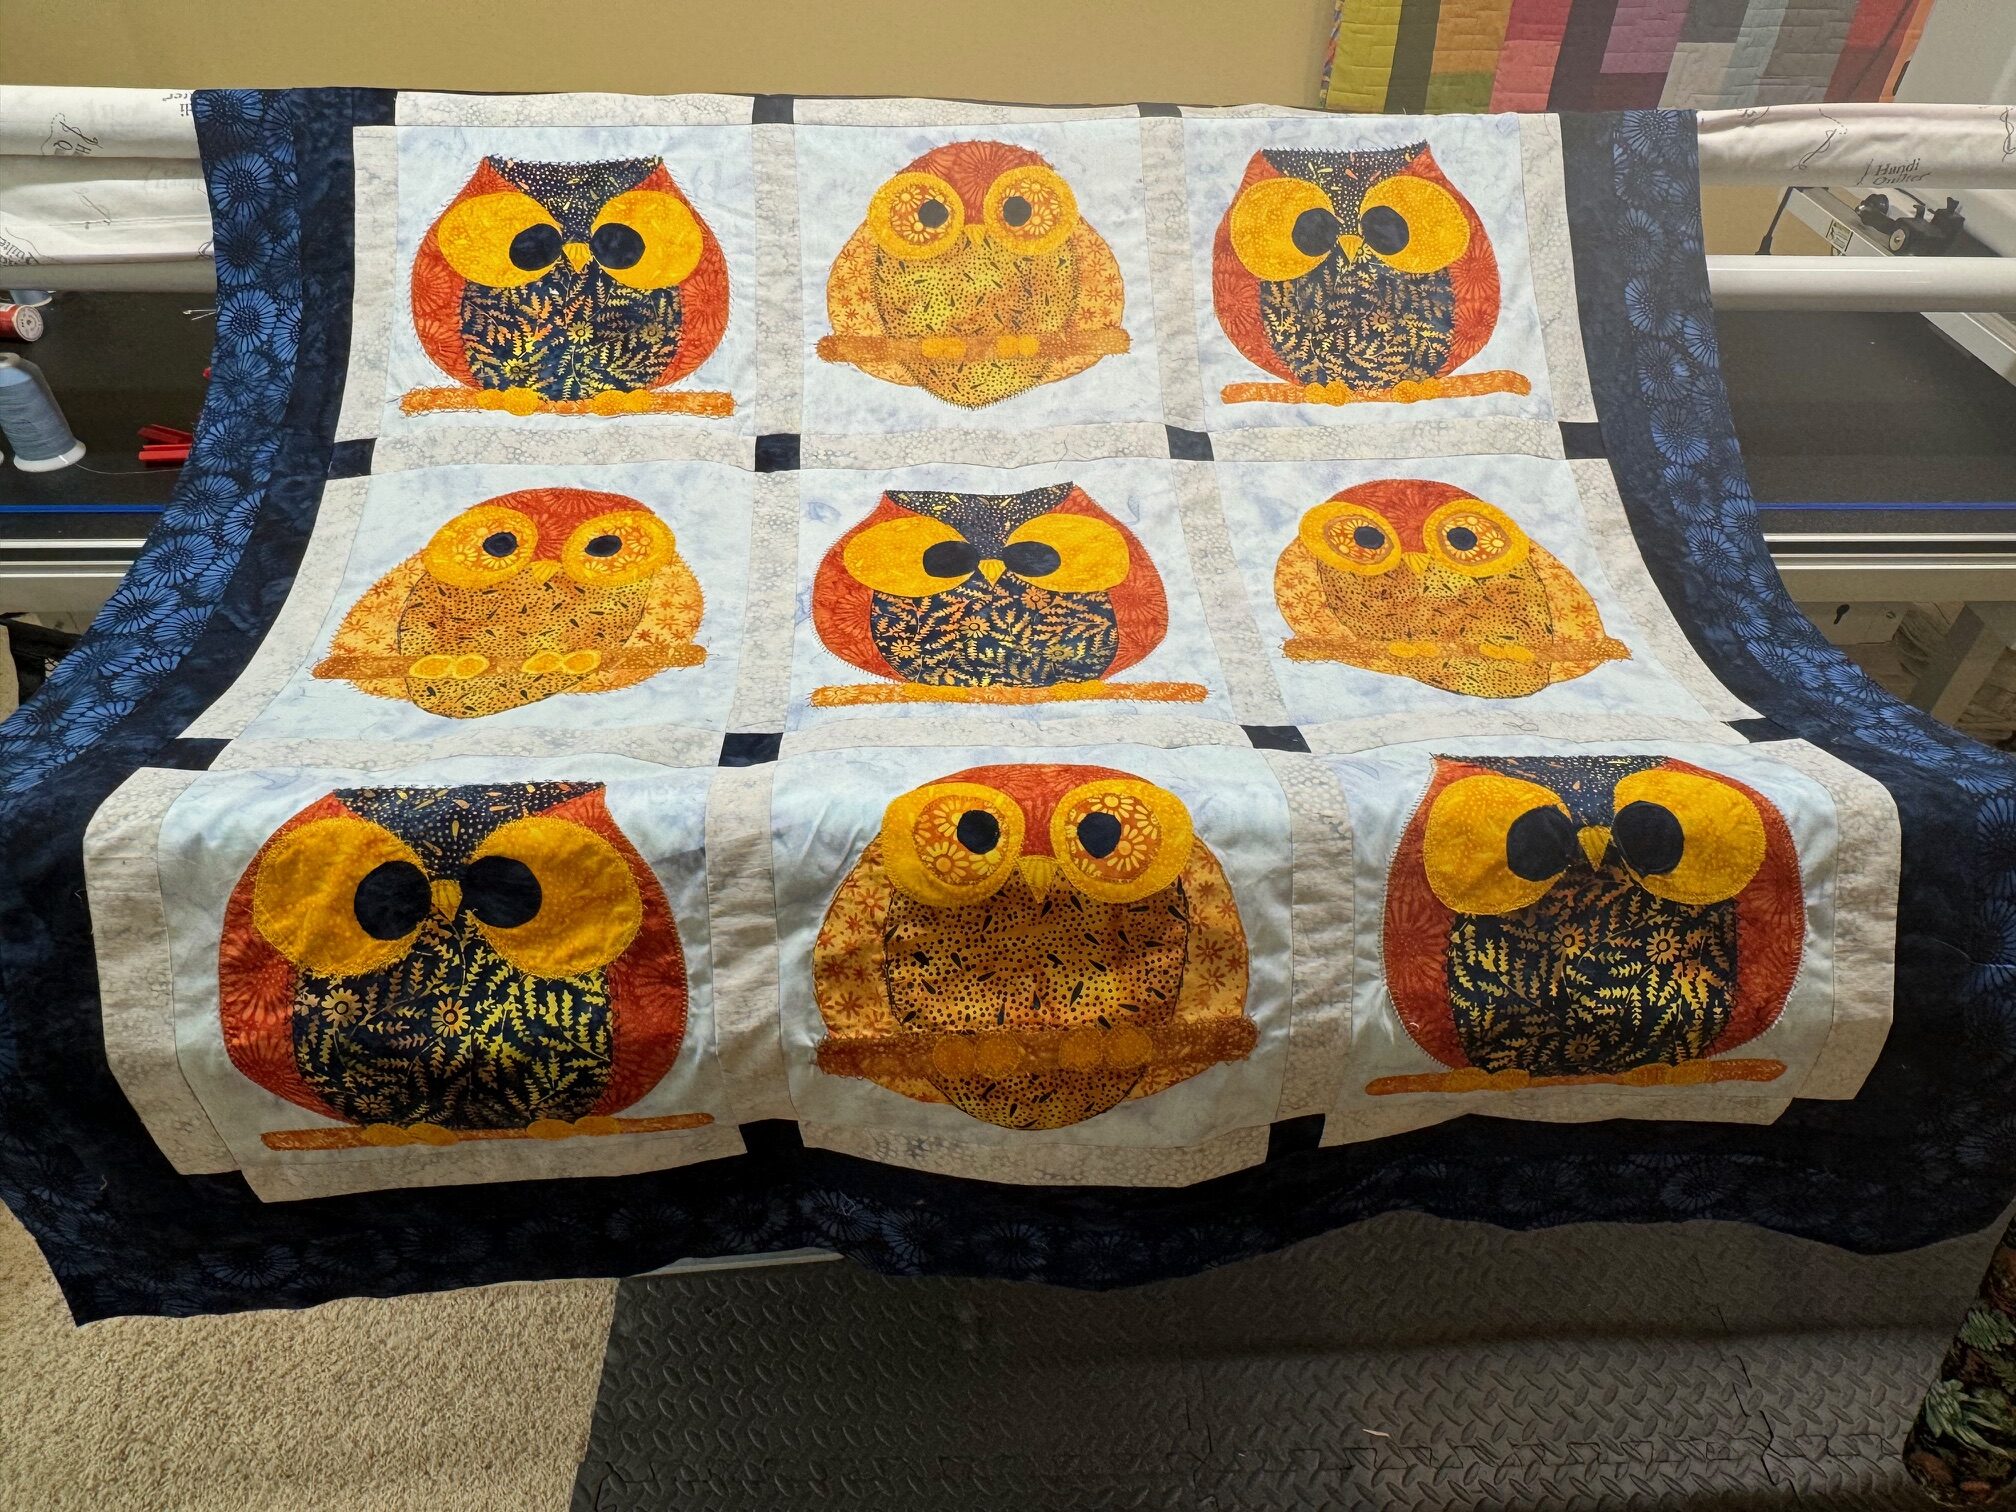
I have all 9 of my owls are made and am ready to begin edge painting and coloring as well as use some decorative stitches to outline my applique stitches. I used a new Schmetz needle 90/14 for the heavier40 weight Aurifil thread,
I wasn’t comfortable with coloring outside the lines with edge coloring at first, but after a few blocks it was very fun and freeing!
Here I was trying to make the stitching look like the owl’s feathers. Aurifil 40 weight threads worked great for this application.
Loved getting to use some of my decorative stitches also and after a couple of afternoons of fun with decorative stitching I was ready to add the sashing and borders and complete the top.
Soon after I was ready to have some fun quilting my owls!
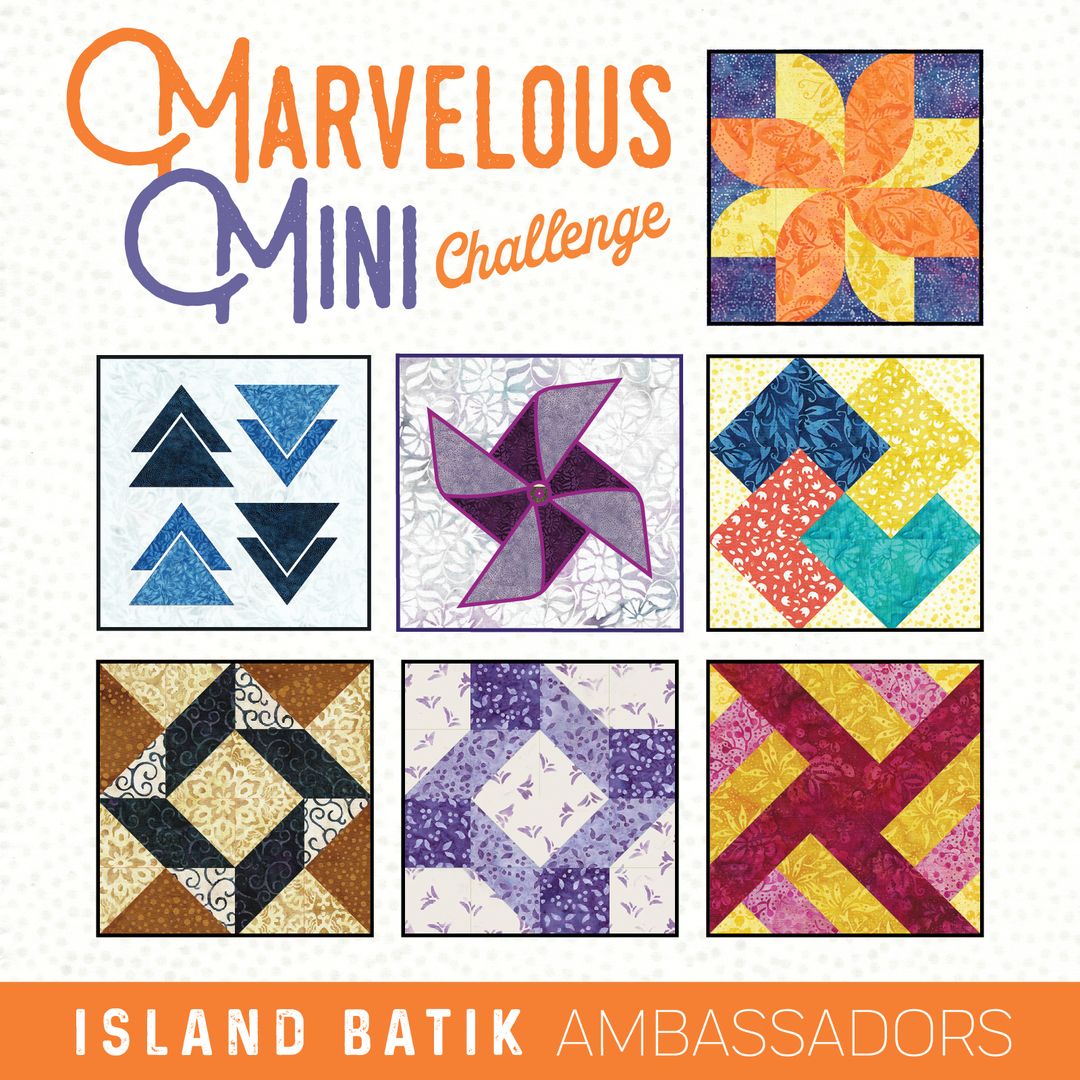
Be sure to hop on over to these Island Batik Ambassador’s websites to check out their creations for this challenge. Listed below are the dates and Island Batik collections featured. Also be sure the follow Island Batik blog to register for very nice weekly prizes!!
The August monthly challenge was to make a mini quilt of our choice using any technique, not to exceed 24″ square. We could choose any fabric collection except the Surprise Bundle to be disclosed at a later date.
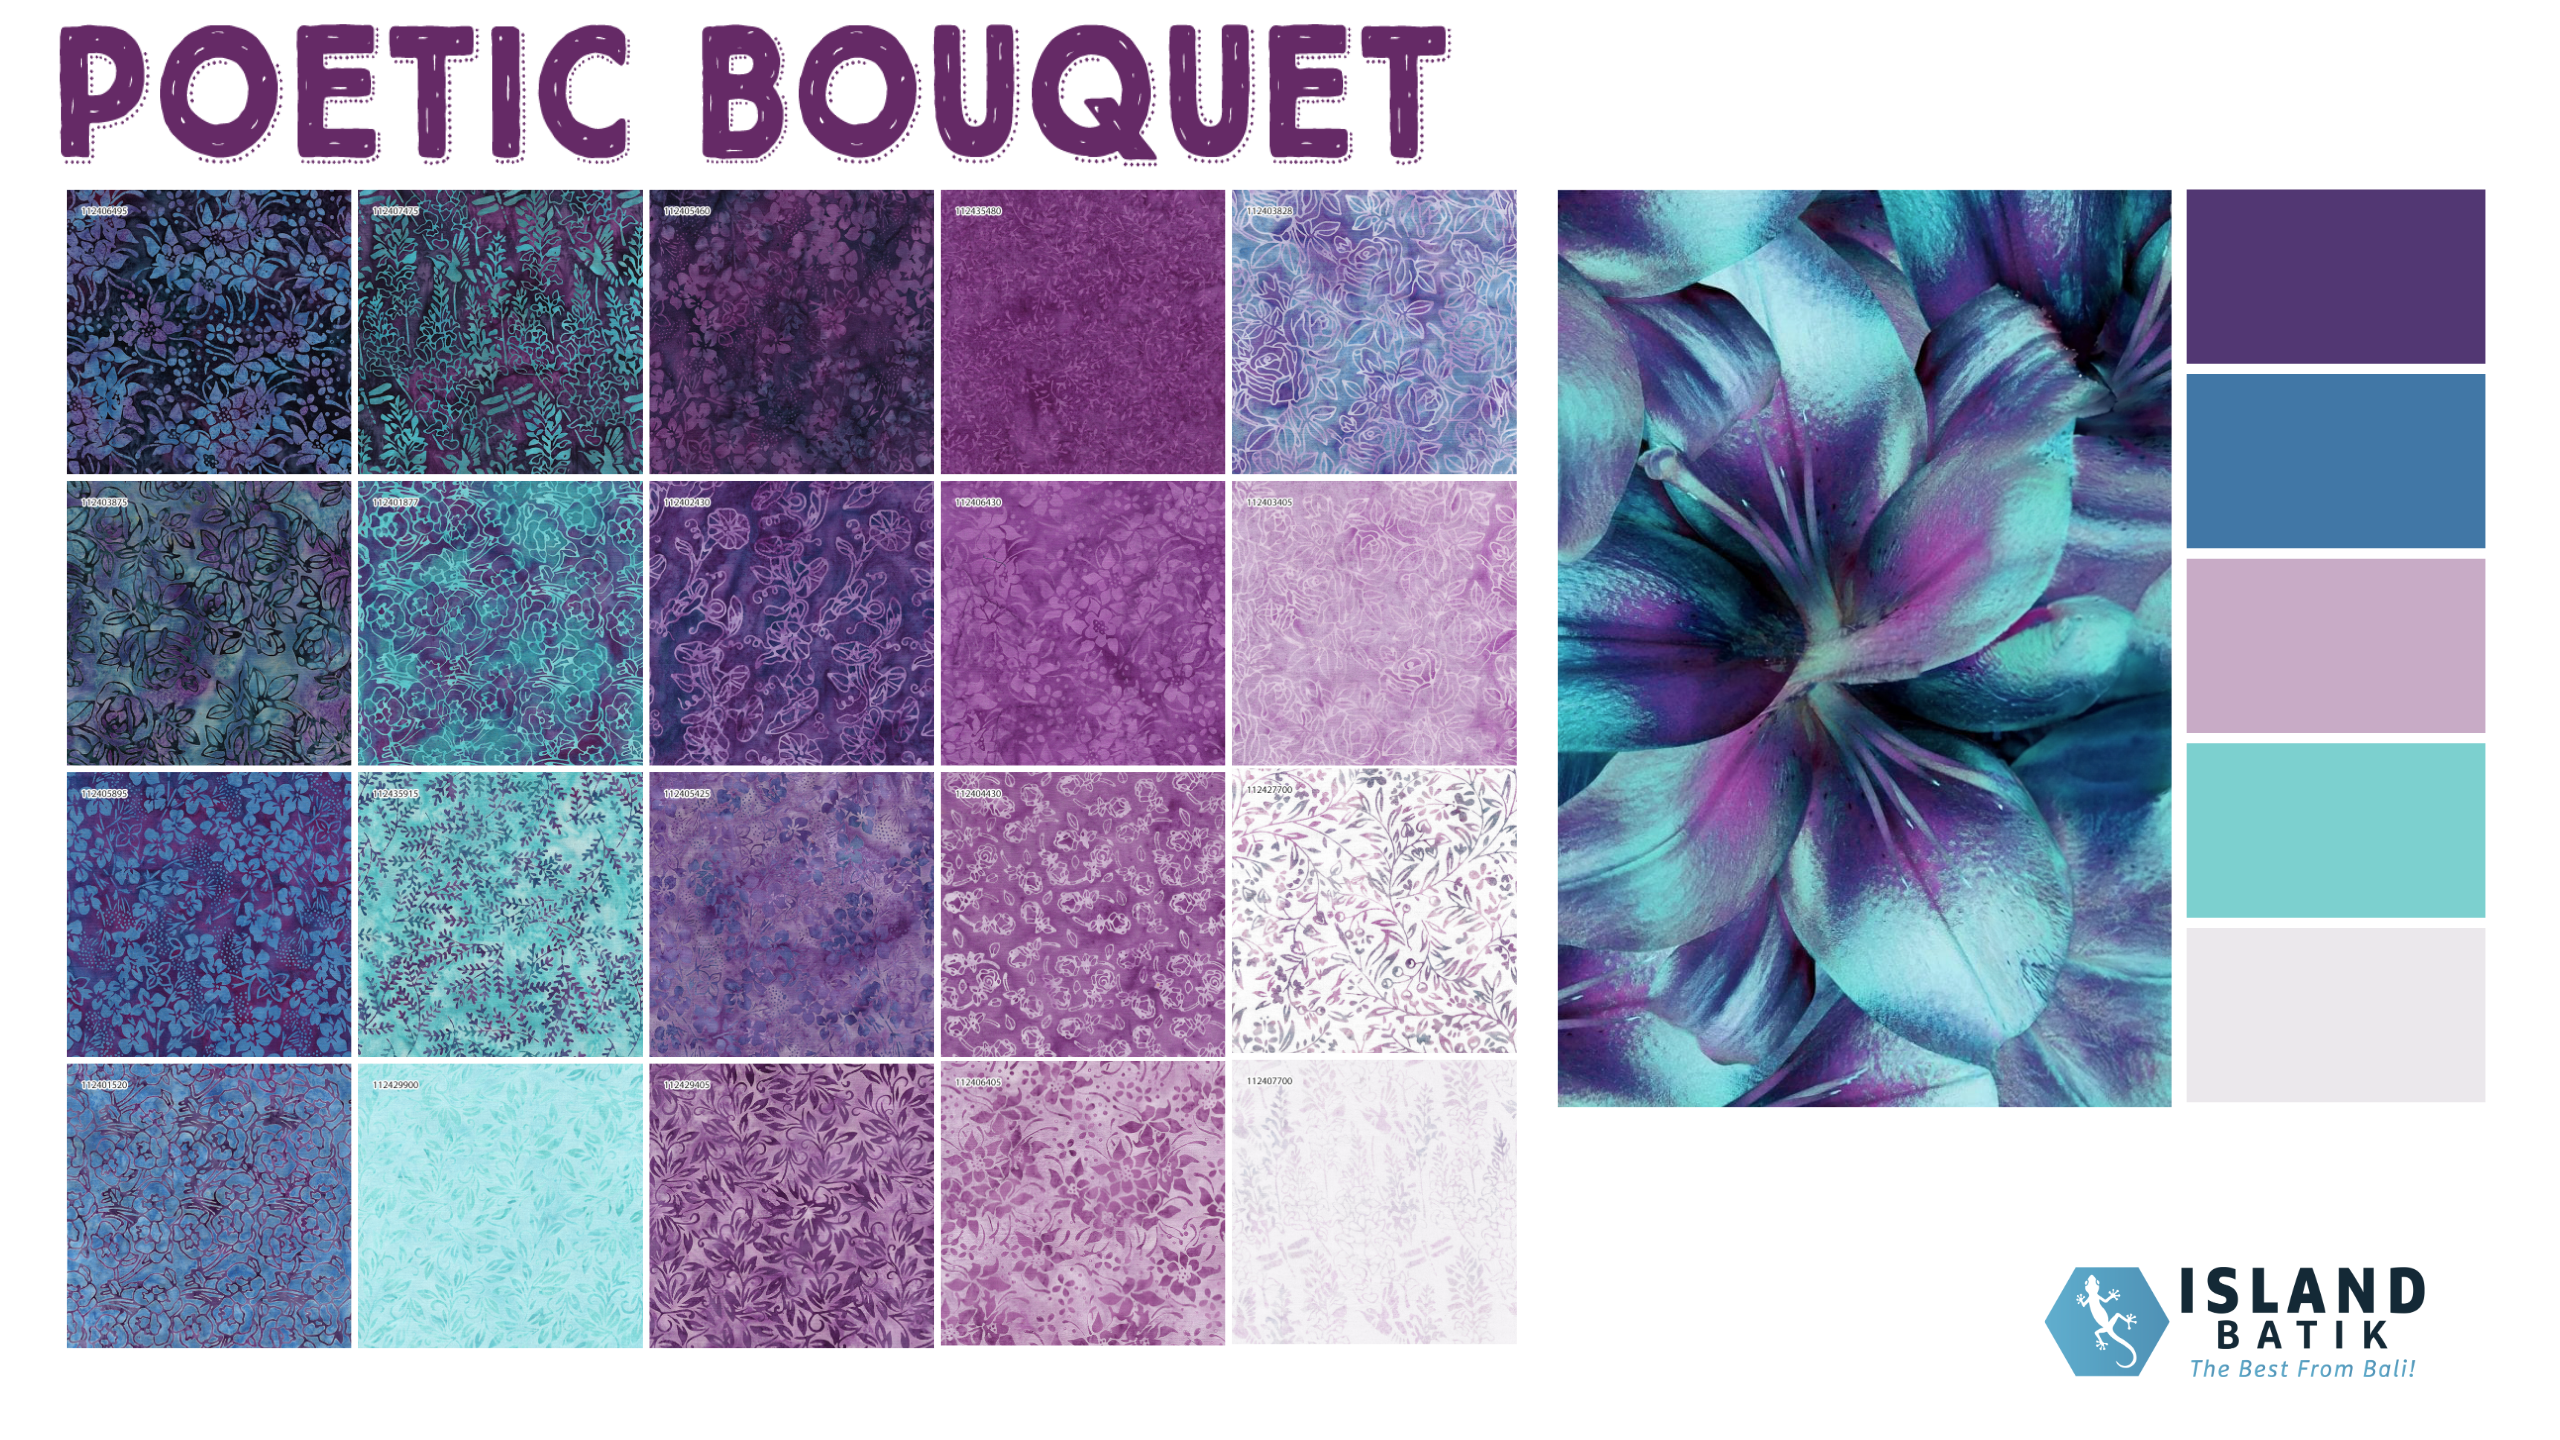
Island Batik’s Poetic Bouquet by Kathy Engle for The Whimsical Workshop
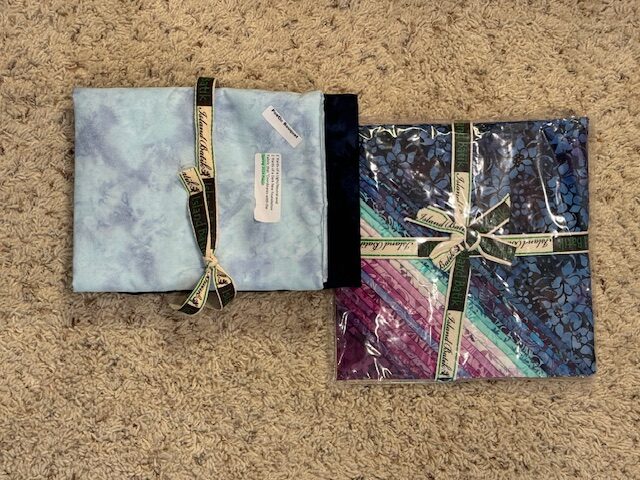
I had a pattern called Hues of Blue by Sherri McConnell that I had saved from a magazine ages ago.. It finished at 22″ square, so perfect! I couldn’t find the name of the magazine anywhere on my copy. I thought this would be a great time to use it as i could feature every fabric in the Poetic Bouquet collection along with the two coordination fabrics. I used the dark coordinating fabric (Storm) for the center block and the light one (Sky) for the background.
Such a gorgeous collection!Copy of Hues of Blue by Sherri McConnell from an unknown magazine
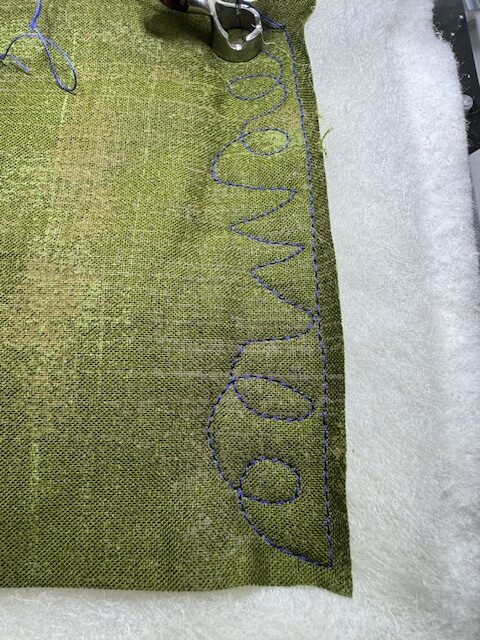
Once the piecing was complete, I loaded it on my Handi Quilter Forte longarm. I used Hobbs 80/20 batting with a layer of Hobbs wool batting on top to give more definition to my quilting. I test my tension before quilting by placing a 5″ square of scrap fabric to the side of my quilt and stitch some circles and sharp angles to test for eyelashing indicating uneven tension. The stitches should look the same on the front and back as shown above and below.
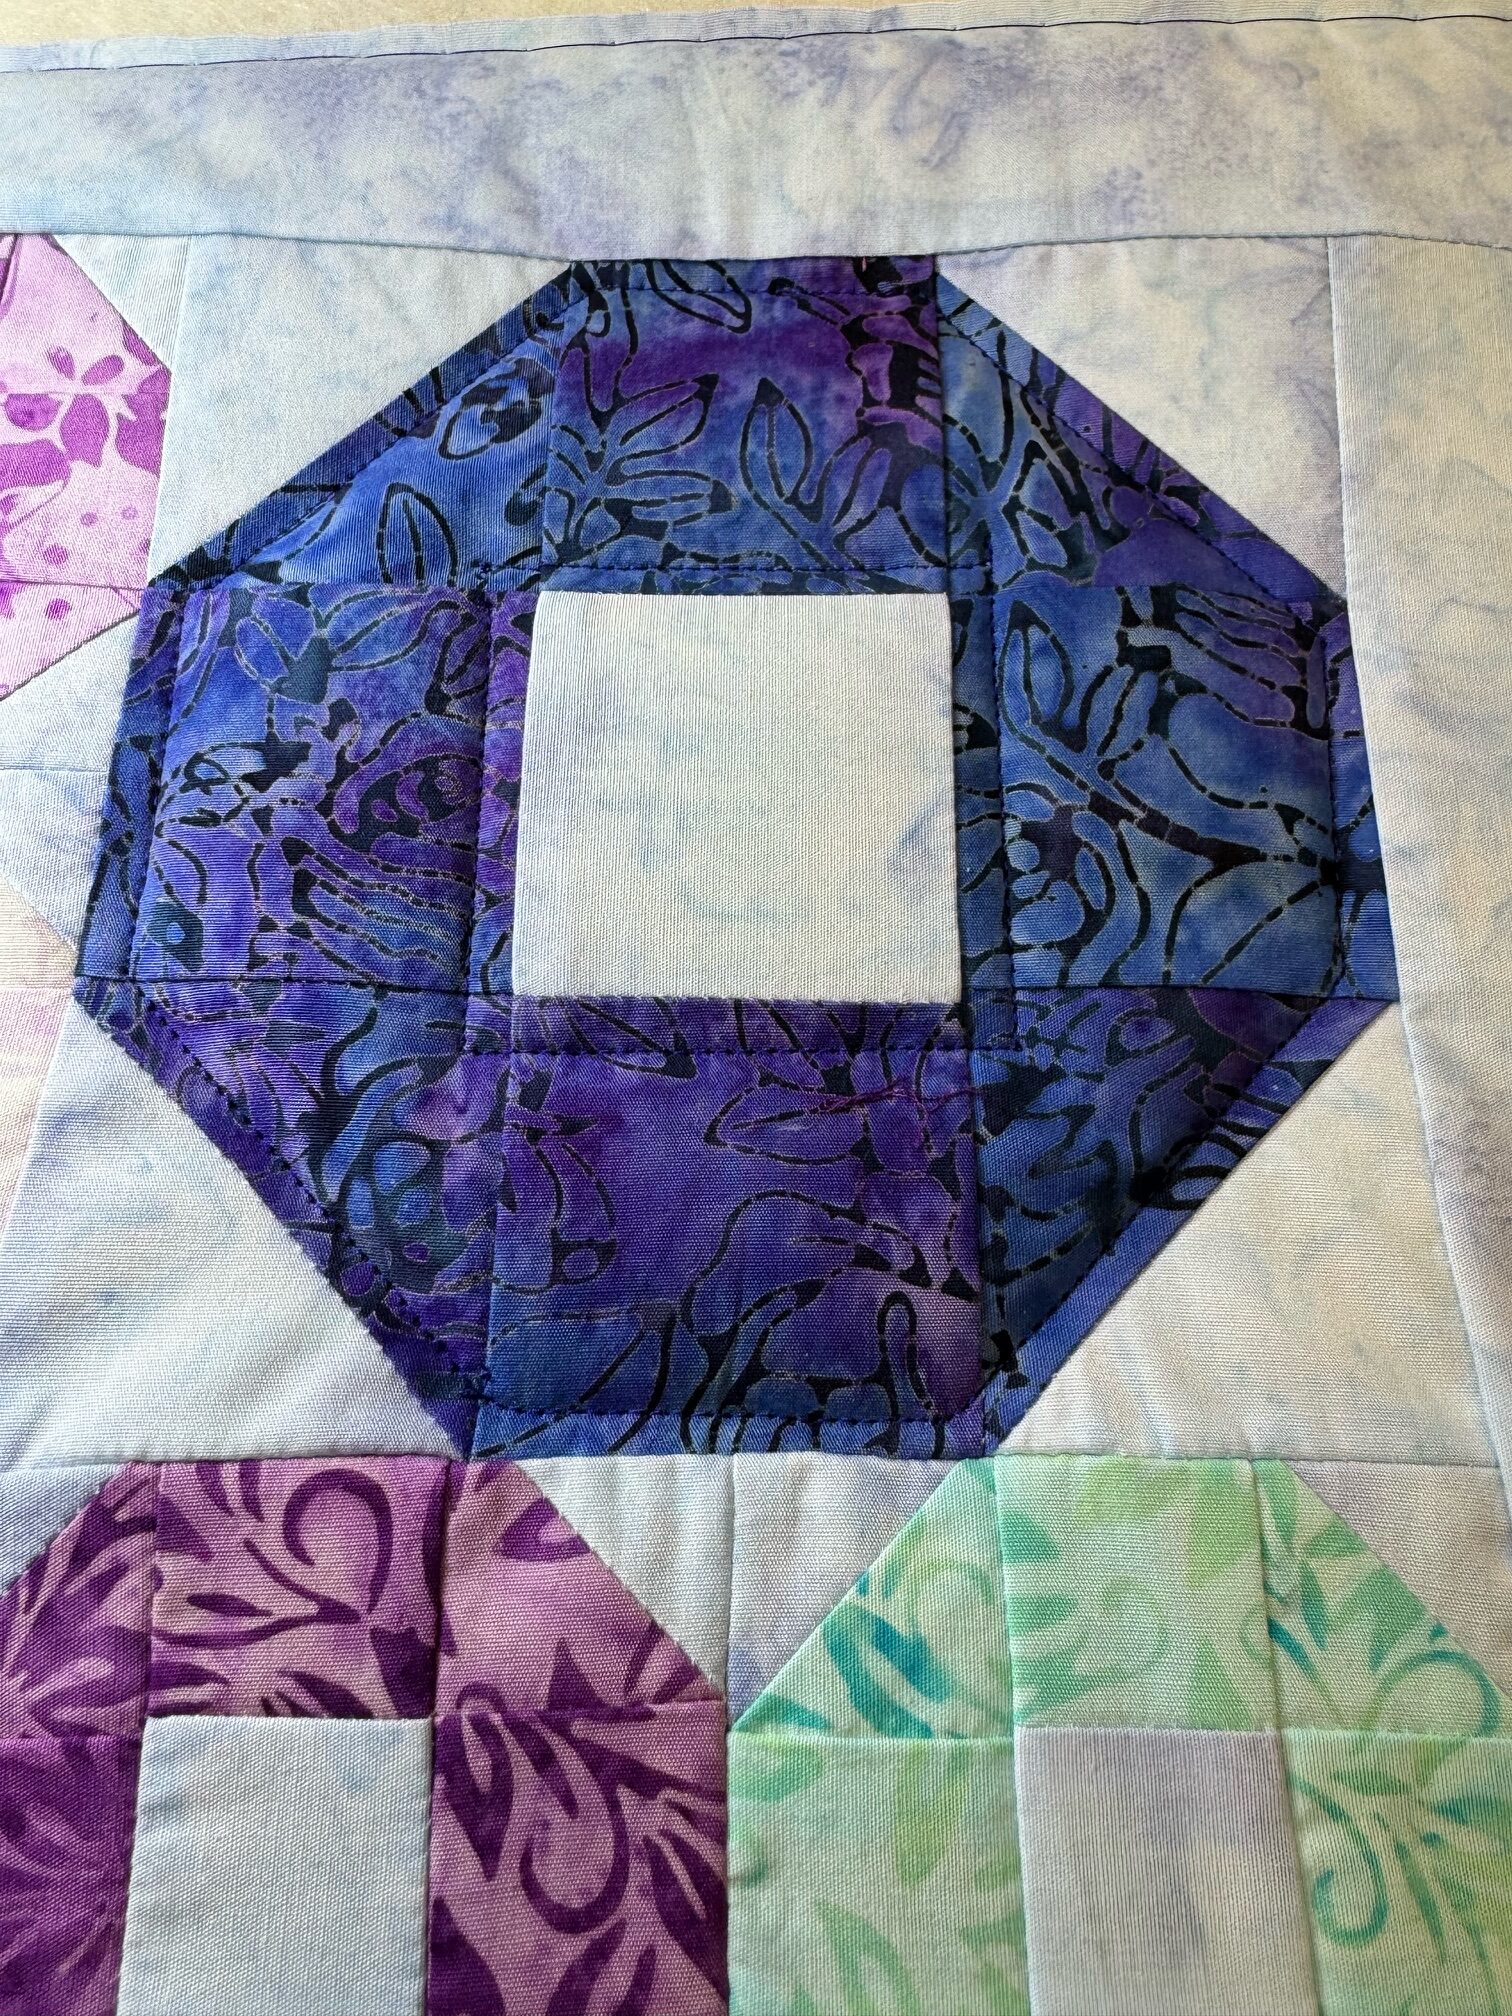
I wanted the piecing to be the star and not have the quilting overpower it so I used rulers and echoed the block shapes by stitching 1/4″ away from the edges using my Handi Quilter longarm Ditch Ruler.
Here is a close up.
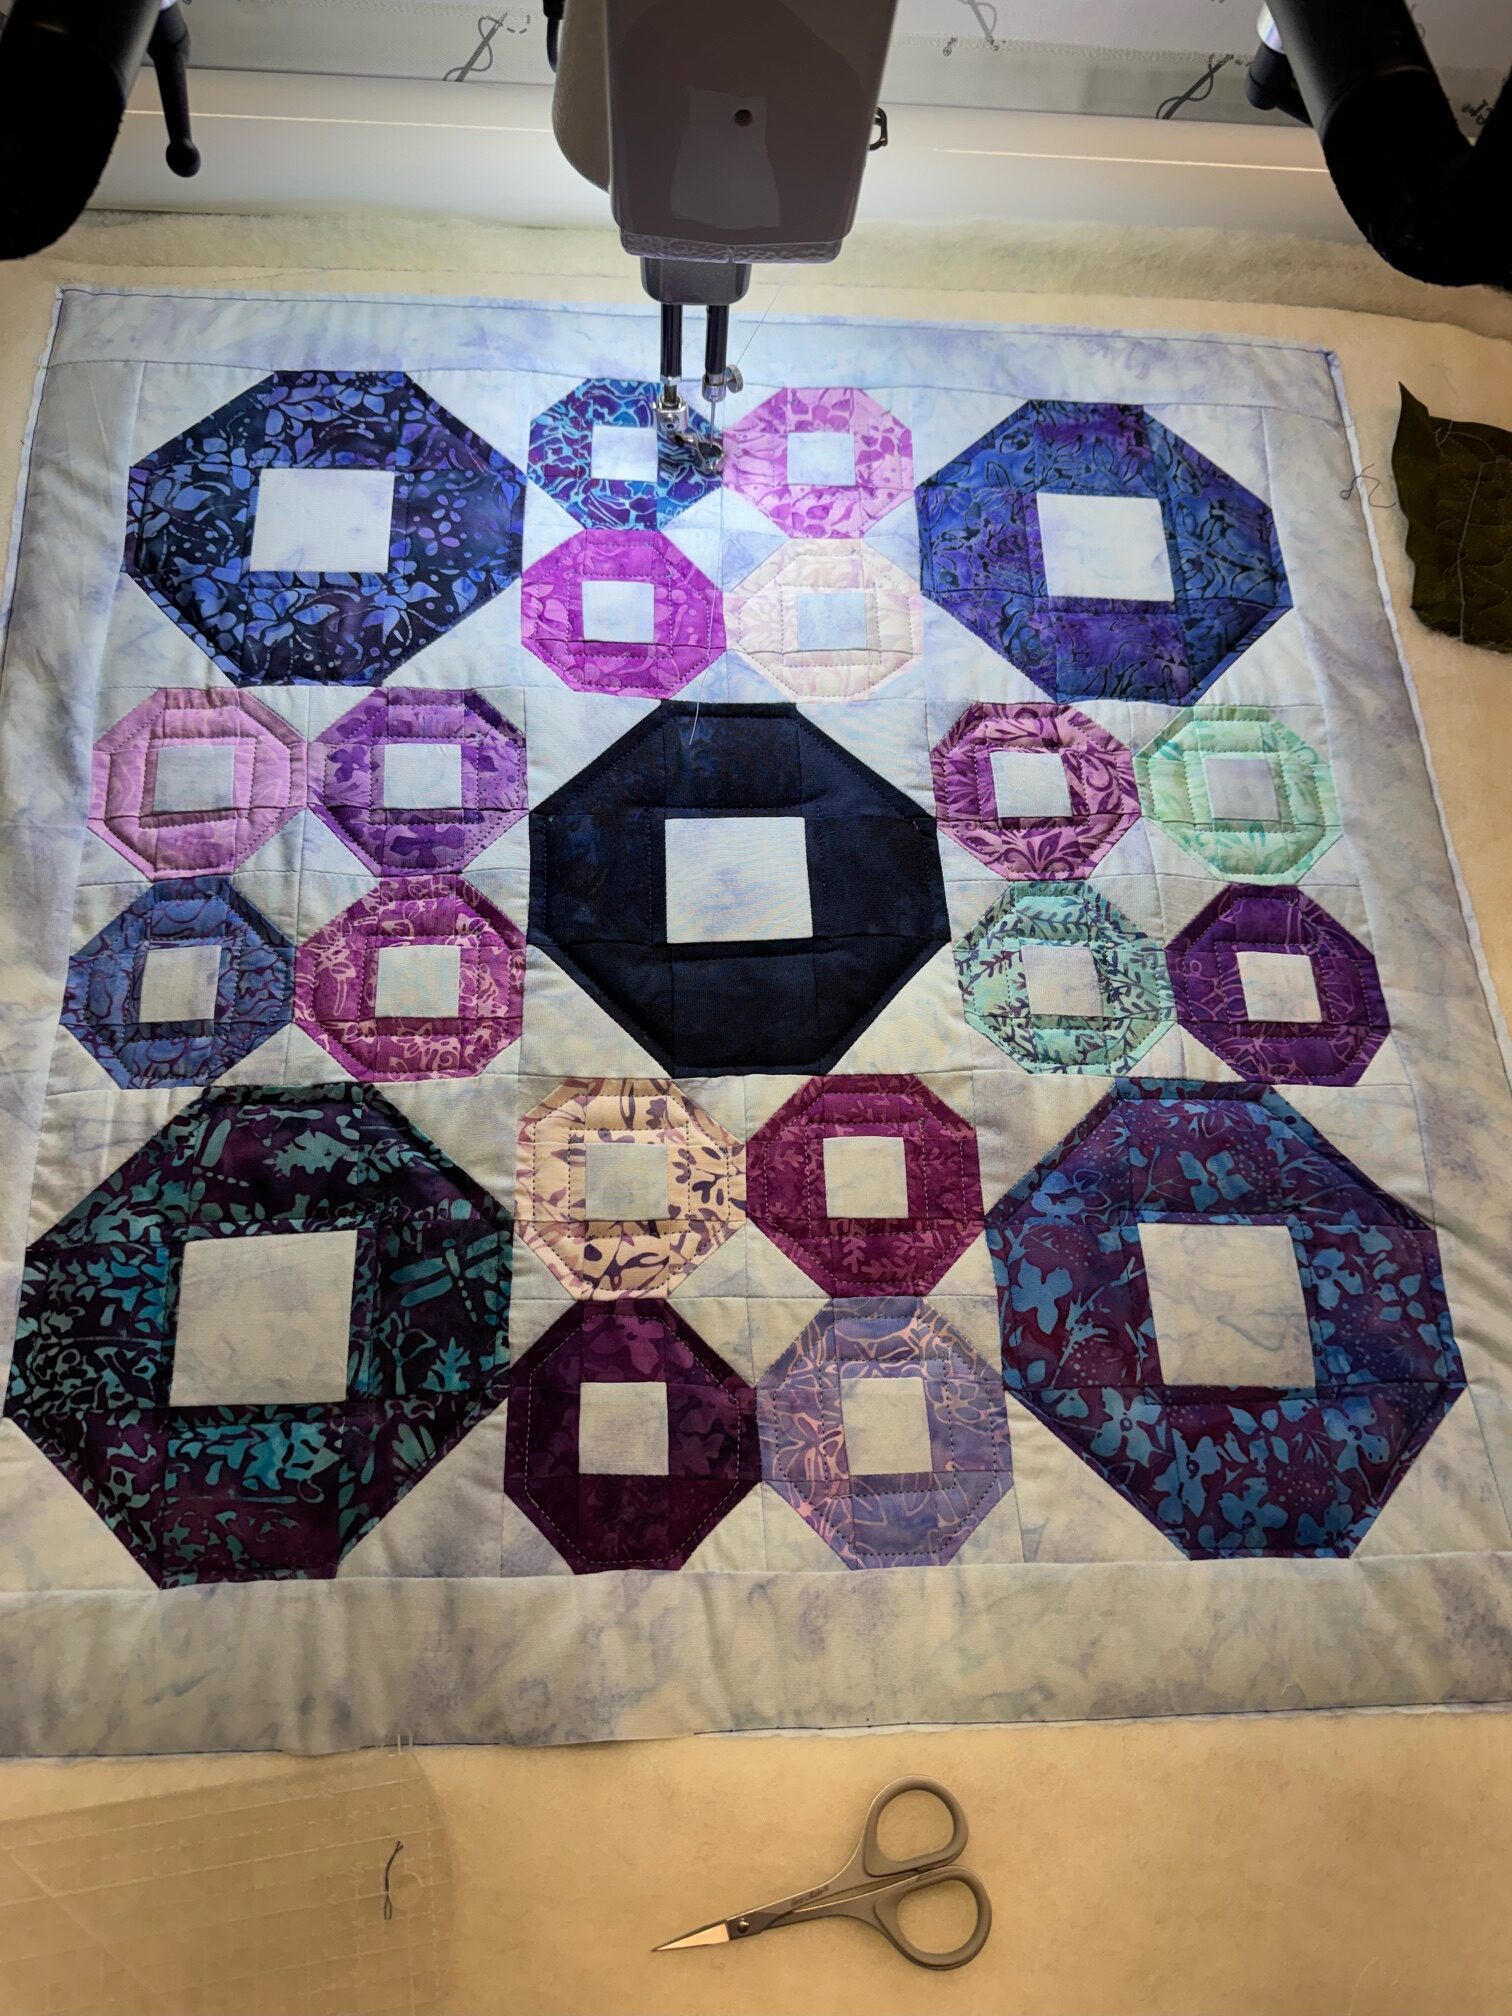
Here all of the shapes are outlined and I’m ready to quilt the background.
All finished! I used various designs for the background using the Handi Quilter Mini Scallop ruler for the borders and the Multi Clamshell and Ditch Ruler for the rest.
Here is the back side and a good picture of Island Batik’s Storm.
Island Batik sends its ambassadors 2 shipments per year, one in January and one in July, including their fabrics and other sponsors supplies for us to use in our monthly challenges. Each shipment includes 2 boxes, one full of Hobbs Batting and the other has Aurifil thread, Schmetz needles (January), byAnnies pattern of our choice and Island Batik fabric along with any straps, hardware, and Soft and Stable to complete the project (July), an Oliso iron (January), Deb Tucker Studio 180 ruler (January) and a Funky Friends Factory pattern (January).
Below is my video I uploaded to my social media last month to show my box contents of goodies I was sent.
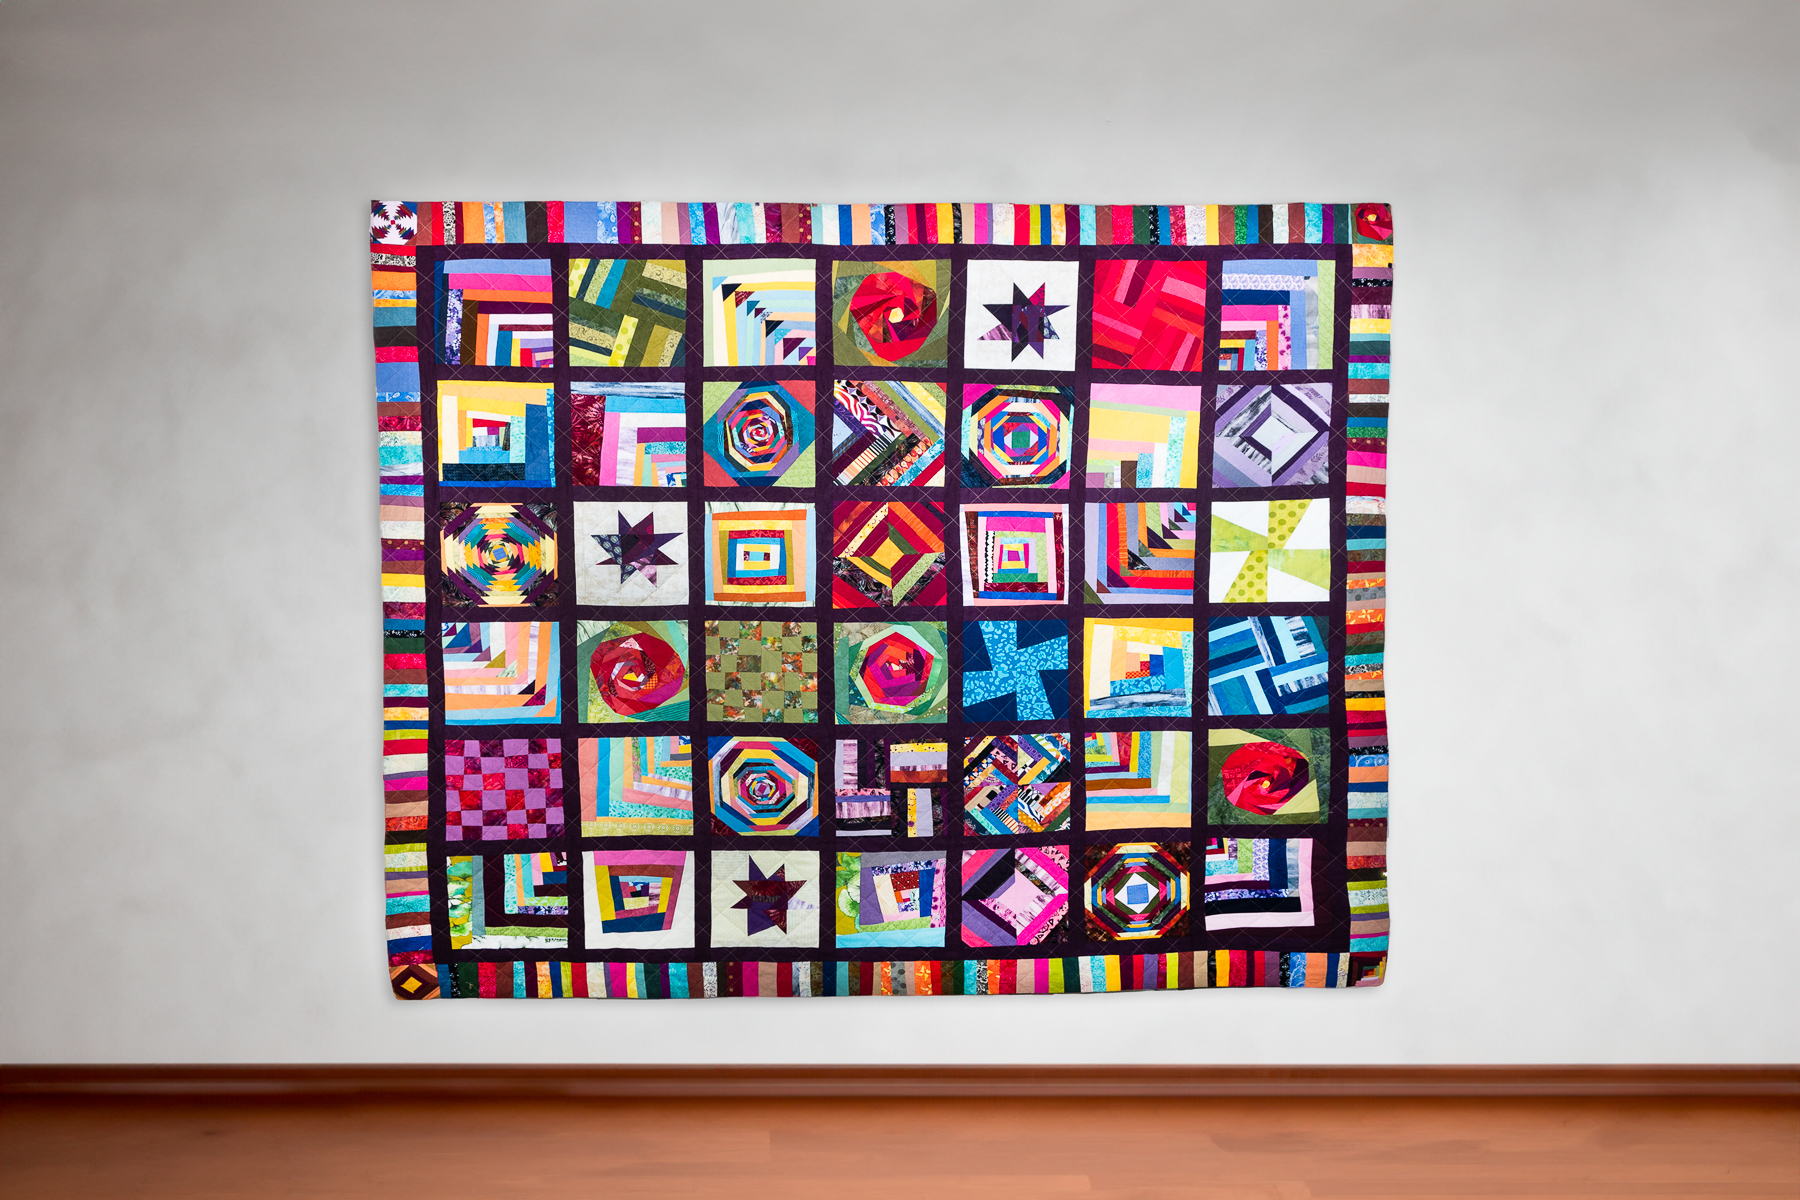
I was given a copy of this 143 page soft cover book by C&T Publishing for review. And to be totally honest, I was super impressed. It starts at the very beginning with needles, thread, and tools, and wraps up with tips on how to quilt on a home sewing machine, which makes it totally accessible for beginning quilters. Following the instructions are 13 projects, most not even needing a pattern because they are wonky and therefore forgiving, so it’s very appropriate for someone just starting out learning about all things sewing and quilting.
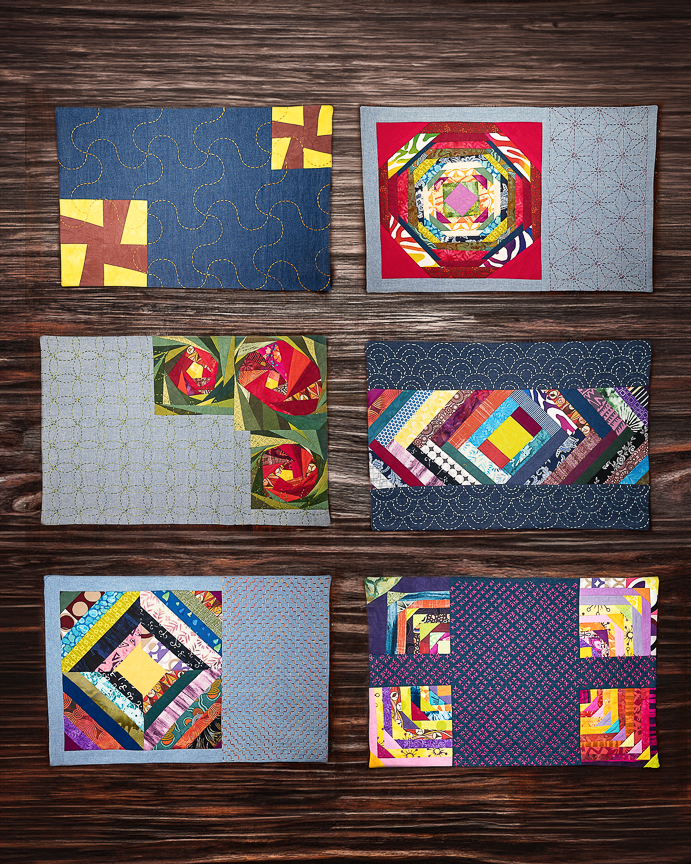
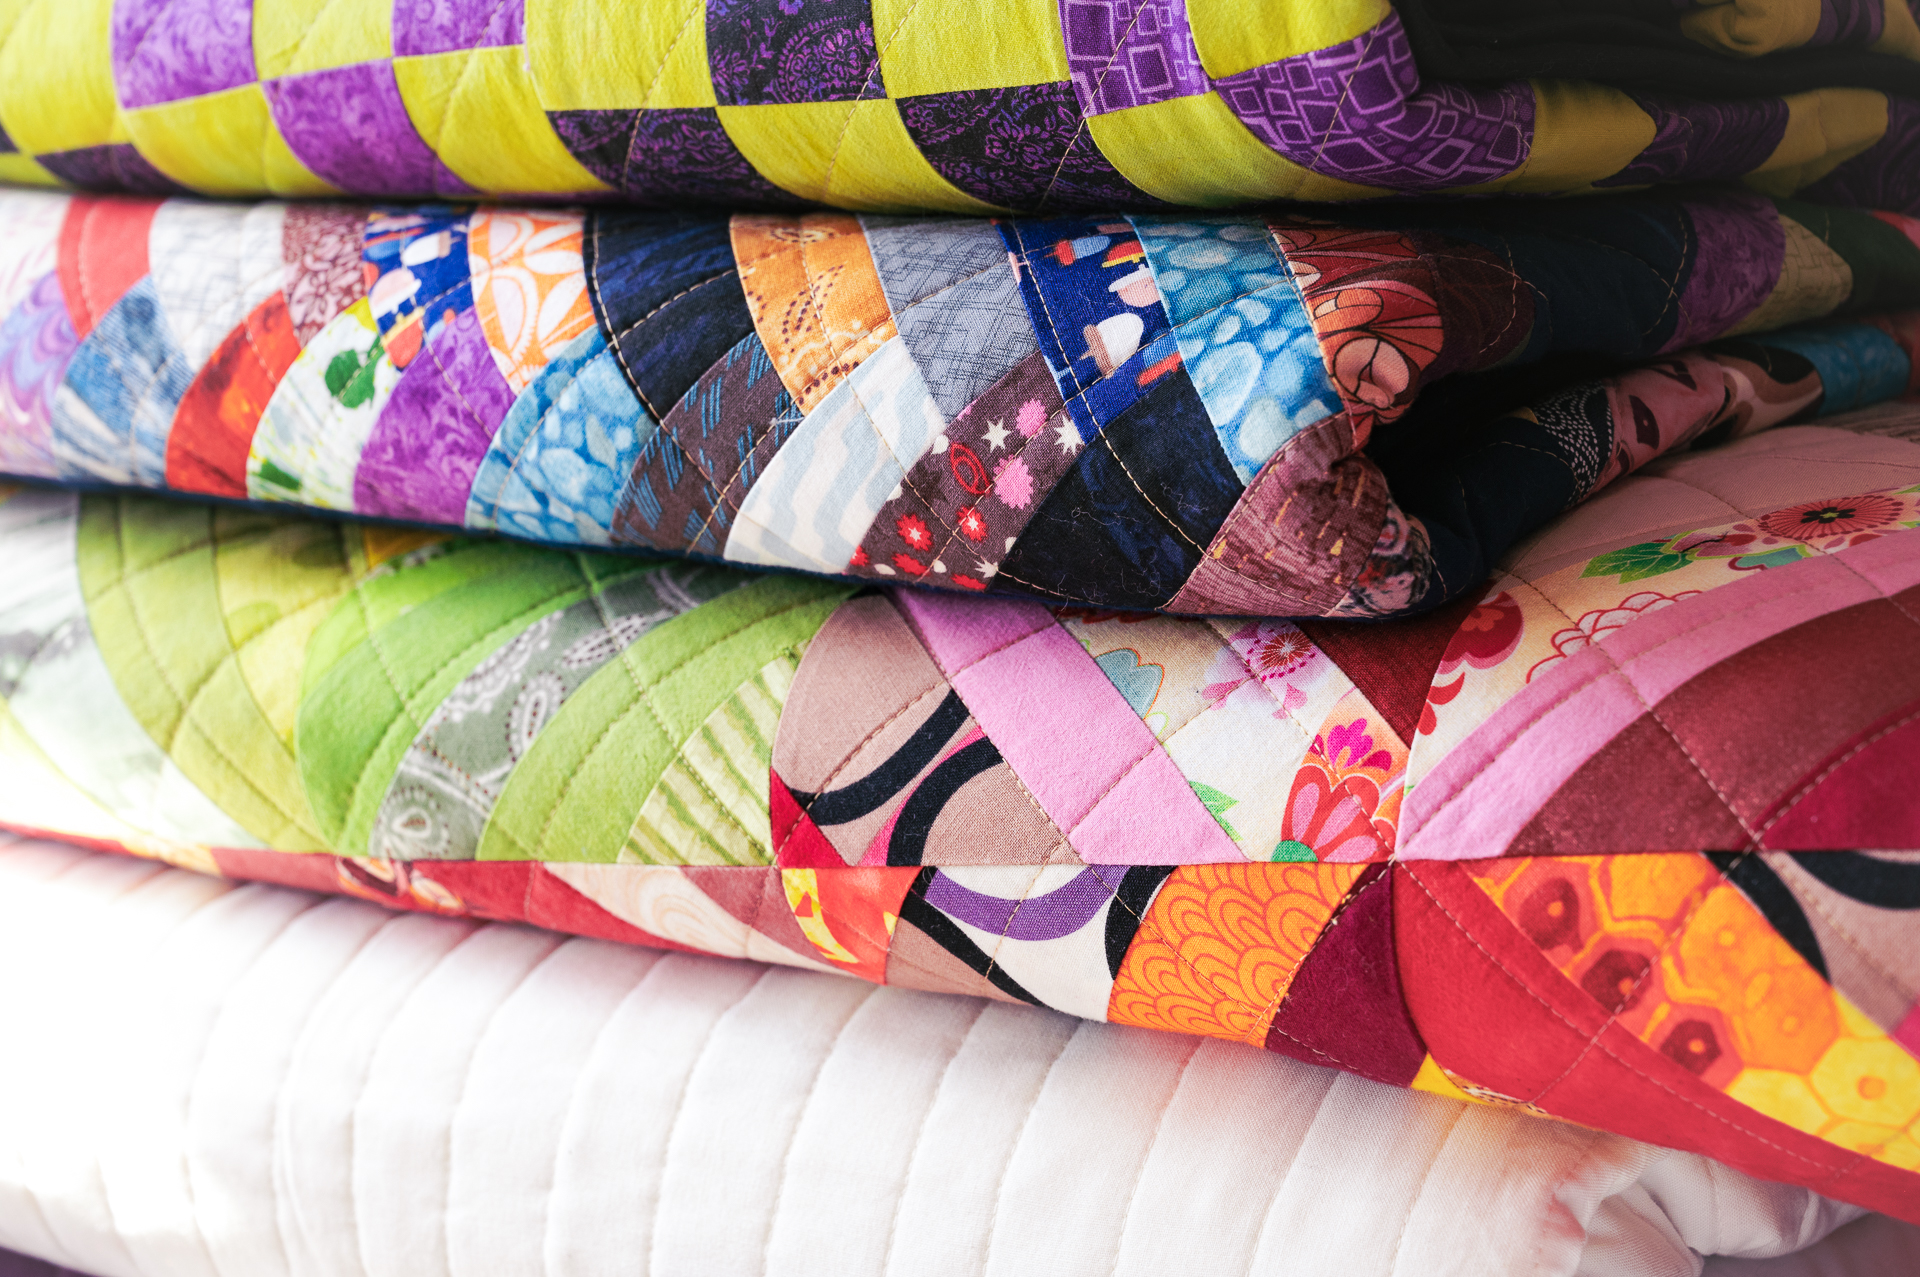
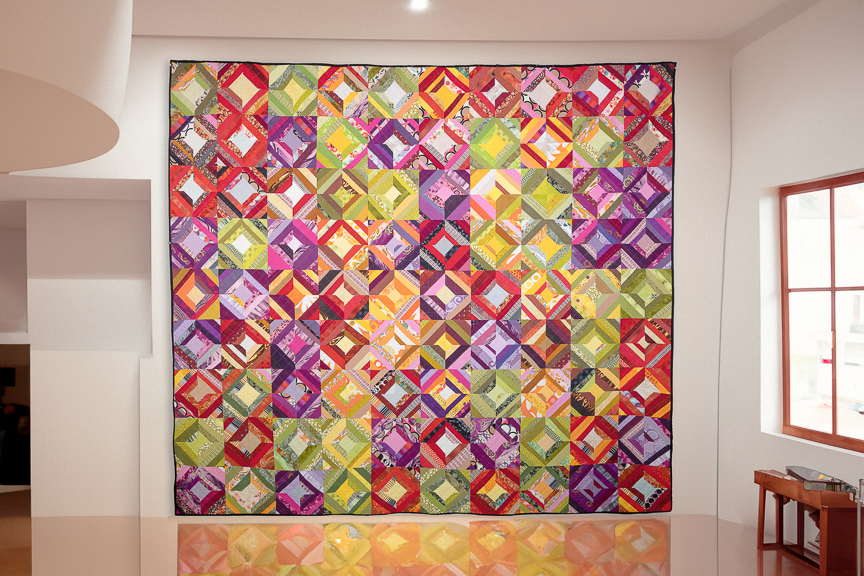
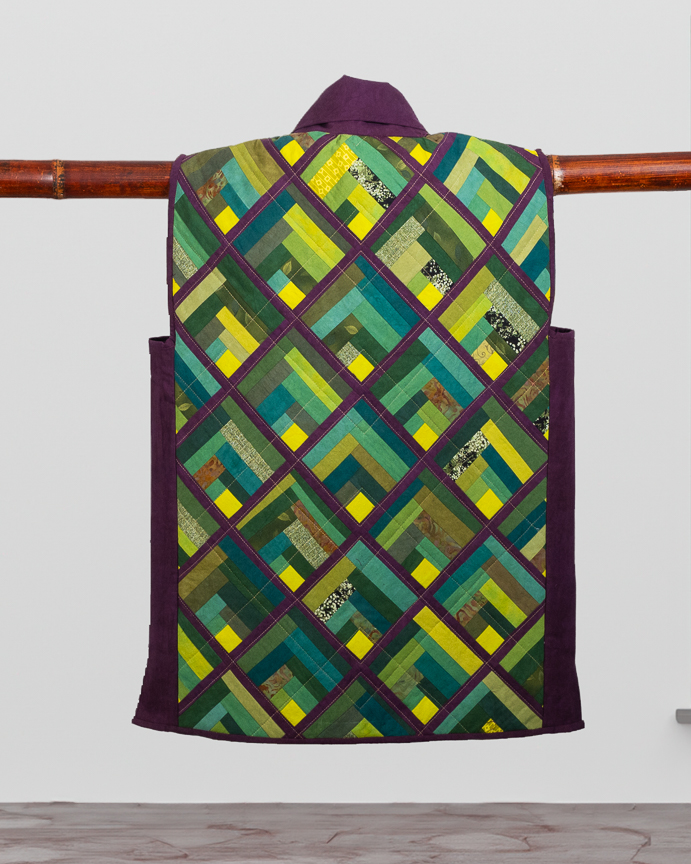
The thirteen projects begin simply and gain momentum slowly throughout. Each project builds on the experience gained from the previous project. The gentle succession of projects begins with a mug rug, placemat, pillow, tote bag, wall hanging, 6 quilts, and finally an open front jacket and vest.
coasters or mug rugsPlacematspillowstote bagwall hangingquiltsquiltsfun scrappy wonky quilt!so fun!jacketvest back
If you are a more experienced quilter, perhaps you are growing tired of following a pattern, and wish to explore more artsy endeavors and don’t know where to begin. The blocks and projects within this book would be a great start towards that goal.
Here’s a bit about the authors…
Shannon and Jason
Shannon Roudhán and Jason Bowlsby are the dynamic DIY duo from Seattle, Washington.Their award-winning designs have been featured in and on the covers of domestic and international publications and their craft, portrait, and fashion photography has appeared in books and magazines around the globe. Shannon & Jason have published 12 books including Complete Crochet Course – the Ultimate Reference Guide,Designer Crochet,Boro & Sashiko: Harmonious Imperfection and Contemporary Kogin-zashi: Modern Sashiko Beyond Filling in the Gaps. Their NEWEST book, Scrappy Wonky Quilt Block Extravaganza is available June 2024.
The duo has been married for 29 years and have been teaching adults for 20+ years. They have a mastery of subjects from boro & sashiko, crochet and knitting, sewing, quilting, photography, and embroidery. Their enthusiasm, quirky sense of humor, and relatable teaching style have made them sought after teachers in virtual, local, and national venues. Be sure to check out their selection of online classes on Craftsy, Creative Spark and through their own website at shannonandjason.com. The “edu-tainment” experience of a class with Shannon & Jason will leave you informed, empowered, and in stitches (see what we did there?).
Here’s where you can get your own copy of this just released book.
All children deserve a safe, comfortable place to lay their heads. Across the US, too many boys and girls go without a bed—or even a pillow—to sleep on. These children end up sleeping on couches, blankets, and even floors. This can affect their happiness and health. That’s where Sleep in Heavenly Peace comes in. A group of volunteers dedicated to building, assembling, and delivering top-notch bunk beds to children and families in need.
So many great charities provide clothing, meals, and toys to families in need. But as wonderful as this aid is, few organizations offer suitable beds and bedding to the kids in these families. Sleep in Heavenly Peace fully believes that a bed is a basic need for the proper physical, emotional, and mental support that a child needs. If a child needs a bed, Sleep in Heavenly Peace wants to make sure they get one. NO KID SLEEPS ON THE FLOOR IN OUR TOWN!
Quilts Across America is a program that relies on the generosity of quilters everywhere to provide a quilt with each bed that is delivered. Quilts Across America was initiated by Studio 180 Design and Tucker University in July 2023. Help make this the largest quilting project in America and complete the process of getting kids, Off the floor, Into a Bed, and Under a Quilt.
If you are interested in helping out, check out Shpbeds.org and note the requirements below.
Quilt Requirements
Size between 50” to 60” wide and 75” to 90” long.
Simple quilt designs.
Colors that appeal to kids and young adults from 2 to 17 years of age.
No religious or holiday themed fabrics.
Quilted, not tied.
Machine bound is preferred.
No buttons or glued on embellishments.
Simple allover quilting is recommended.
I was excited to join this cause and selected some pretty, uplifting colors of Island Batik fabrics. I opened Electric Quilt and designed a quilt that I could use my Studio 180 tools to make the blocks.
This is the design I settled on.
The lightest fabric I chose is Frosting by Island Batik, from the Foundation line available all year round. I also used it for the backing and binding. I absolutely love the subtle color changes within the design.
This is the Magic Wand. It is used to mark on either side of it to indicate the stitching lines. I used my Hera marker which creates a crease so you don’t have to worry about getting any chalk or other kinds of lines out later on. It’s one of my favorite tools.
Then I stitched on the creased lines.
After stitching both lines, I used my rotary cutter to cut down the middle between the two stitched lines, creating two pieces. I pressed those pieces and then placed another square, used my Magic Wand again and stitched on both creased lines.
Then cut between the two stitched lines.
Press and now you have a Flying Geese unit.
This is where the Wing Clipper comes in. Line up the seams with the lines on the tool and trim the excess.
Turn the unit upside down and trim on the other two sides.
The first few blocks on my new Felt Right design wall. Loving my blocks and the design wall as well! At this point I chose to name my quilt Looking Up because of the arrows pointing upwards.
The third Studio 180 tool I own is the Tucker Trimmer. It is used to trim down half square triangles, among other things.
I love the positivity in this quilt! The arrows pointing upwards, the plus signs, and the friendship stars. I hope it brings a young person endless snuggles and happiness.
This is a good picture of the backing, Island Batik Frosting and is available all year round. I love the very subtle color changes.
This is how I bind quilts by machine. I sew the binding to the back side of the quilt and then bring in to the front and sew using the serpentine stitch.
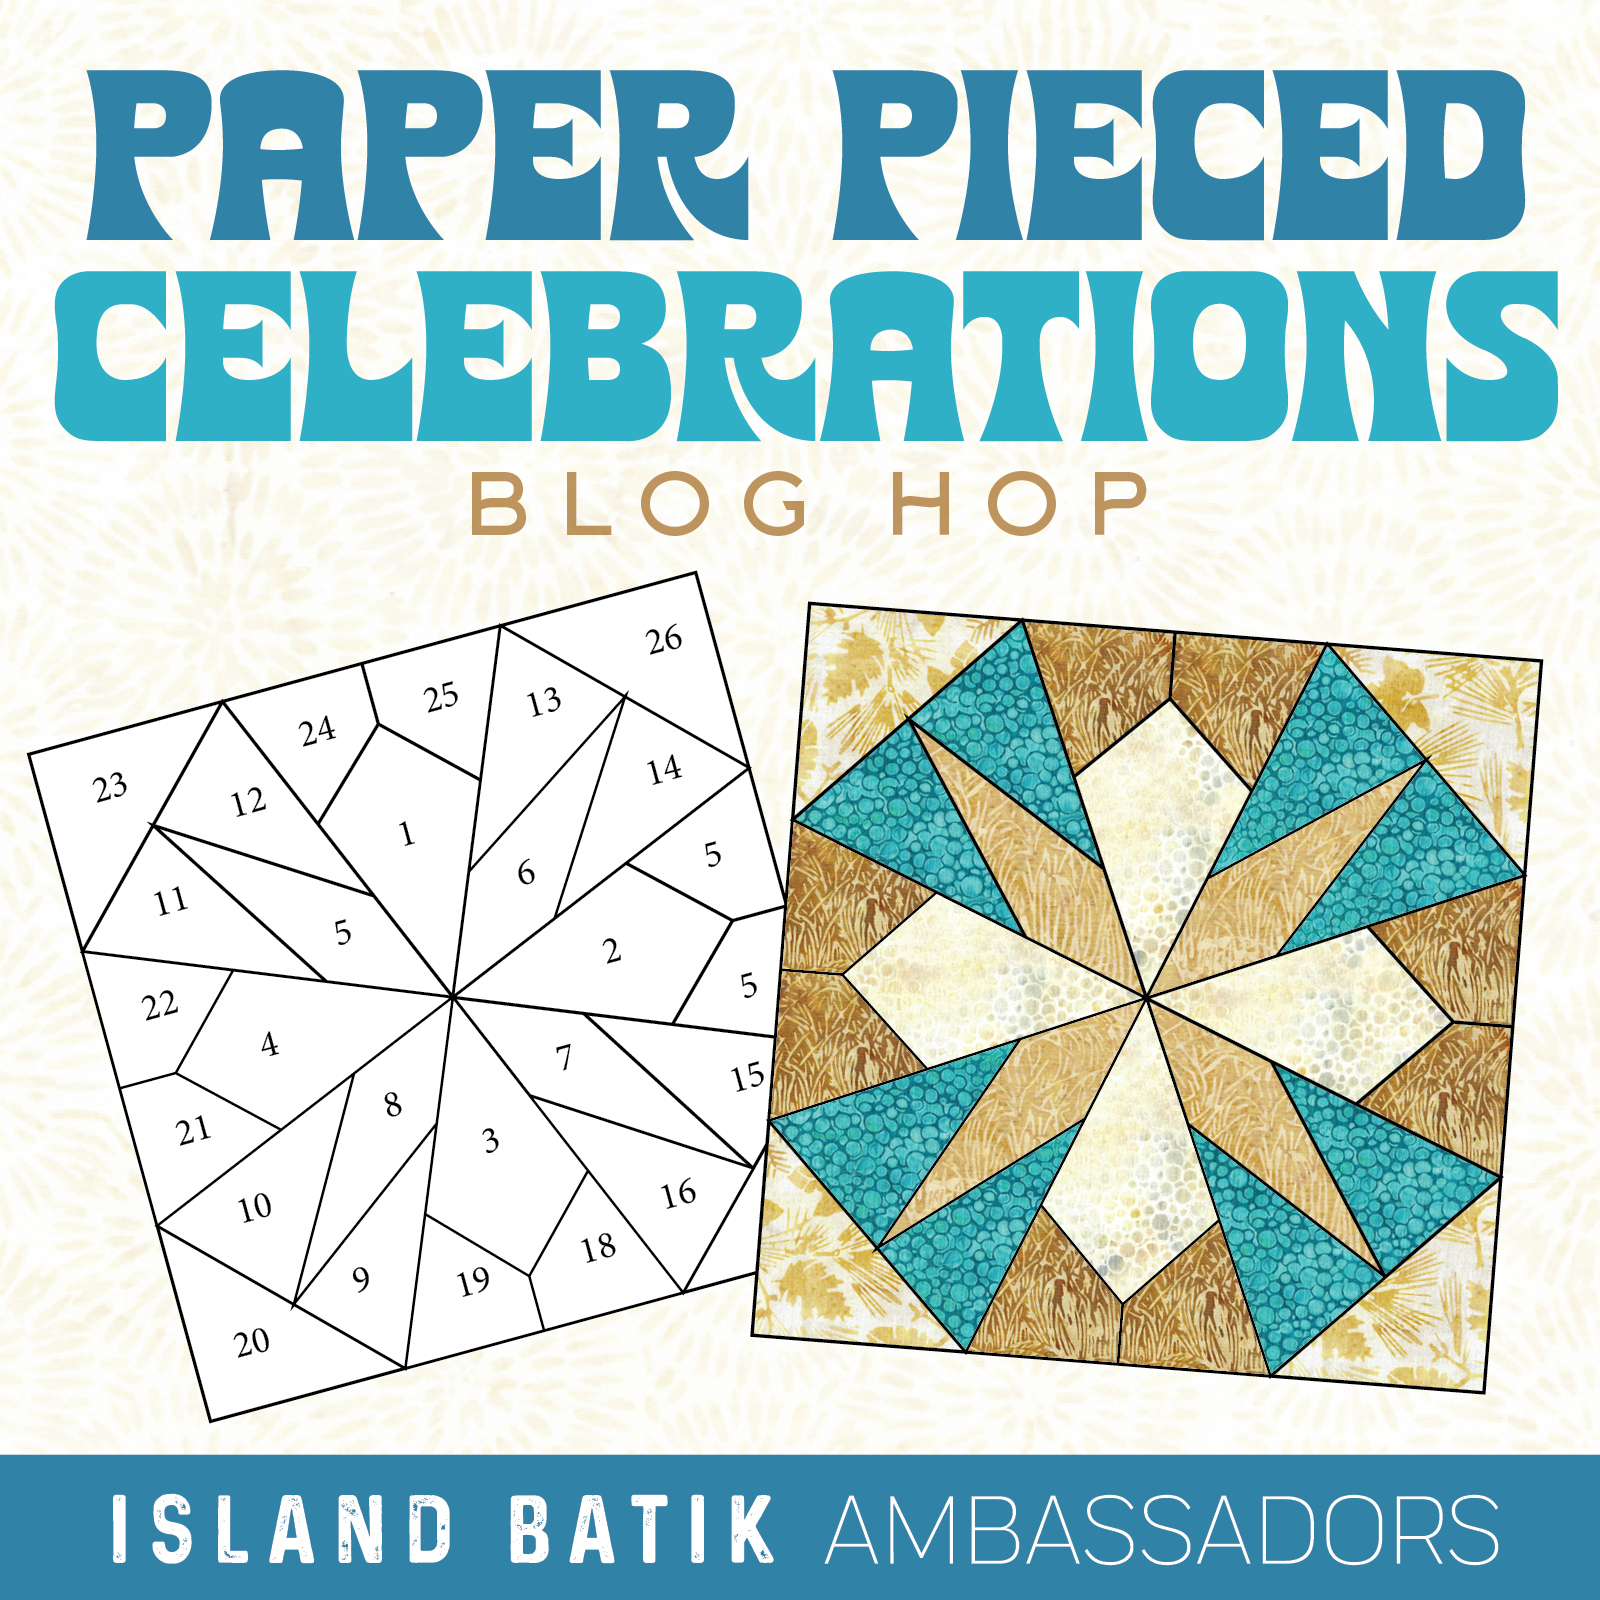
Our challenge this month was to make a paper pieced quilt, English or Foundation Paper Pieced, based on a holiday or celebration of our choice. The fabric I was supplied with by Island Batik for this project was Dots and Doodles by Carol Moellers Designs.
Ask for this collection at your local quilt shop. Shipping this month!
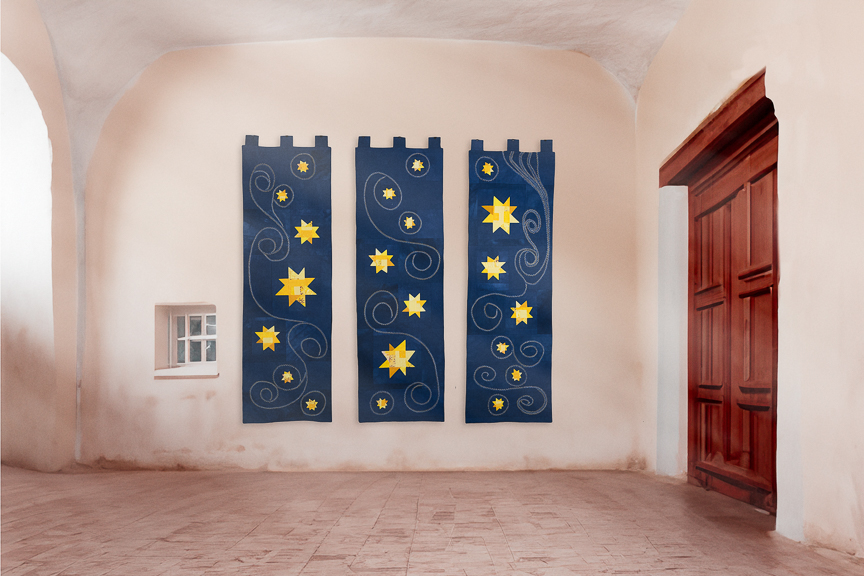
Many of these beautiful fabrics reminded me of fireworks and July 4 so I decided to make a quilt to hang at the top of my stair banister in July, much like I did last spring when I made the one below.
A good iron is a must for foundation paper piecing and I love my new Oliso iron provided by one of our Island Batik sponsors, Oliso. I prefer steam. but you can use it dry as well. It gets good and hot. And I love how I don’t have to set it up on it’s heel after each use.
Here are the pieces of one square. Any guesses what it will be??
Here it is, all laid out and ready to sew together, then quilt and bind. I used Aurifil thread for piecing and I will, of course, use Hobbs batting when I quilt it. This will go over the top of my stair rail to decorate for Independence Day, July 4.
Once again, I used this book for my inspiration and darling dog patterns.
I had an eventful April, to say the least, which set me back from my intended goals, one of which was to finish this quilt in time to post it today. I was ill most of the month, including a hospital stay for a week, with a diagnosis of Miller Fisher Syndrome, an autoimmune disease. It was a scary time for my family and I. I had a lot of numbness with muscle weakness and swallowing issues. After 4 infusions 24 hours apart, I was released, and the numbness eventually subsided along with the other issues. I am still dealing with some after effects, but am so thankful for the medical personnel who ordered ALL the tests and diagnosed me within 24 hours of checking into the Emergency Department. Time is of the essence with this syndrome. So thankful!
Check out what the other Island Batik Ambassadors have done or will do for this challenge.
Thanks for following along with my sewing and quilting adventures! And thanks to Island Batik, Oliso, Aurifil, Hobbs Batting, and Schmetz Needles for supplying products for us to use for our challenge this month.
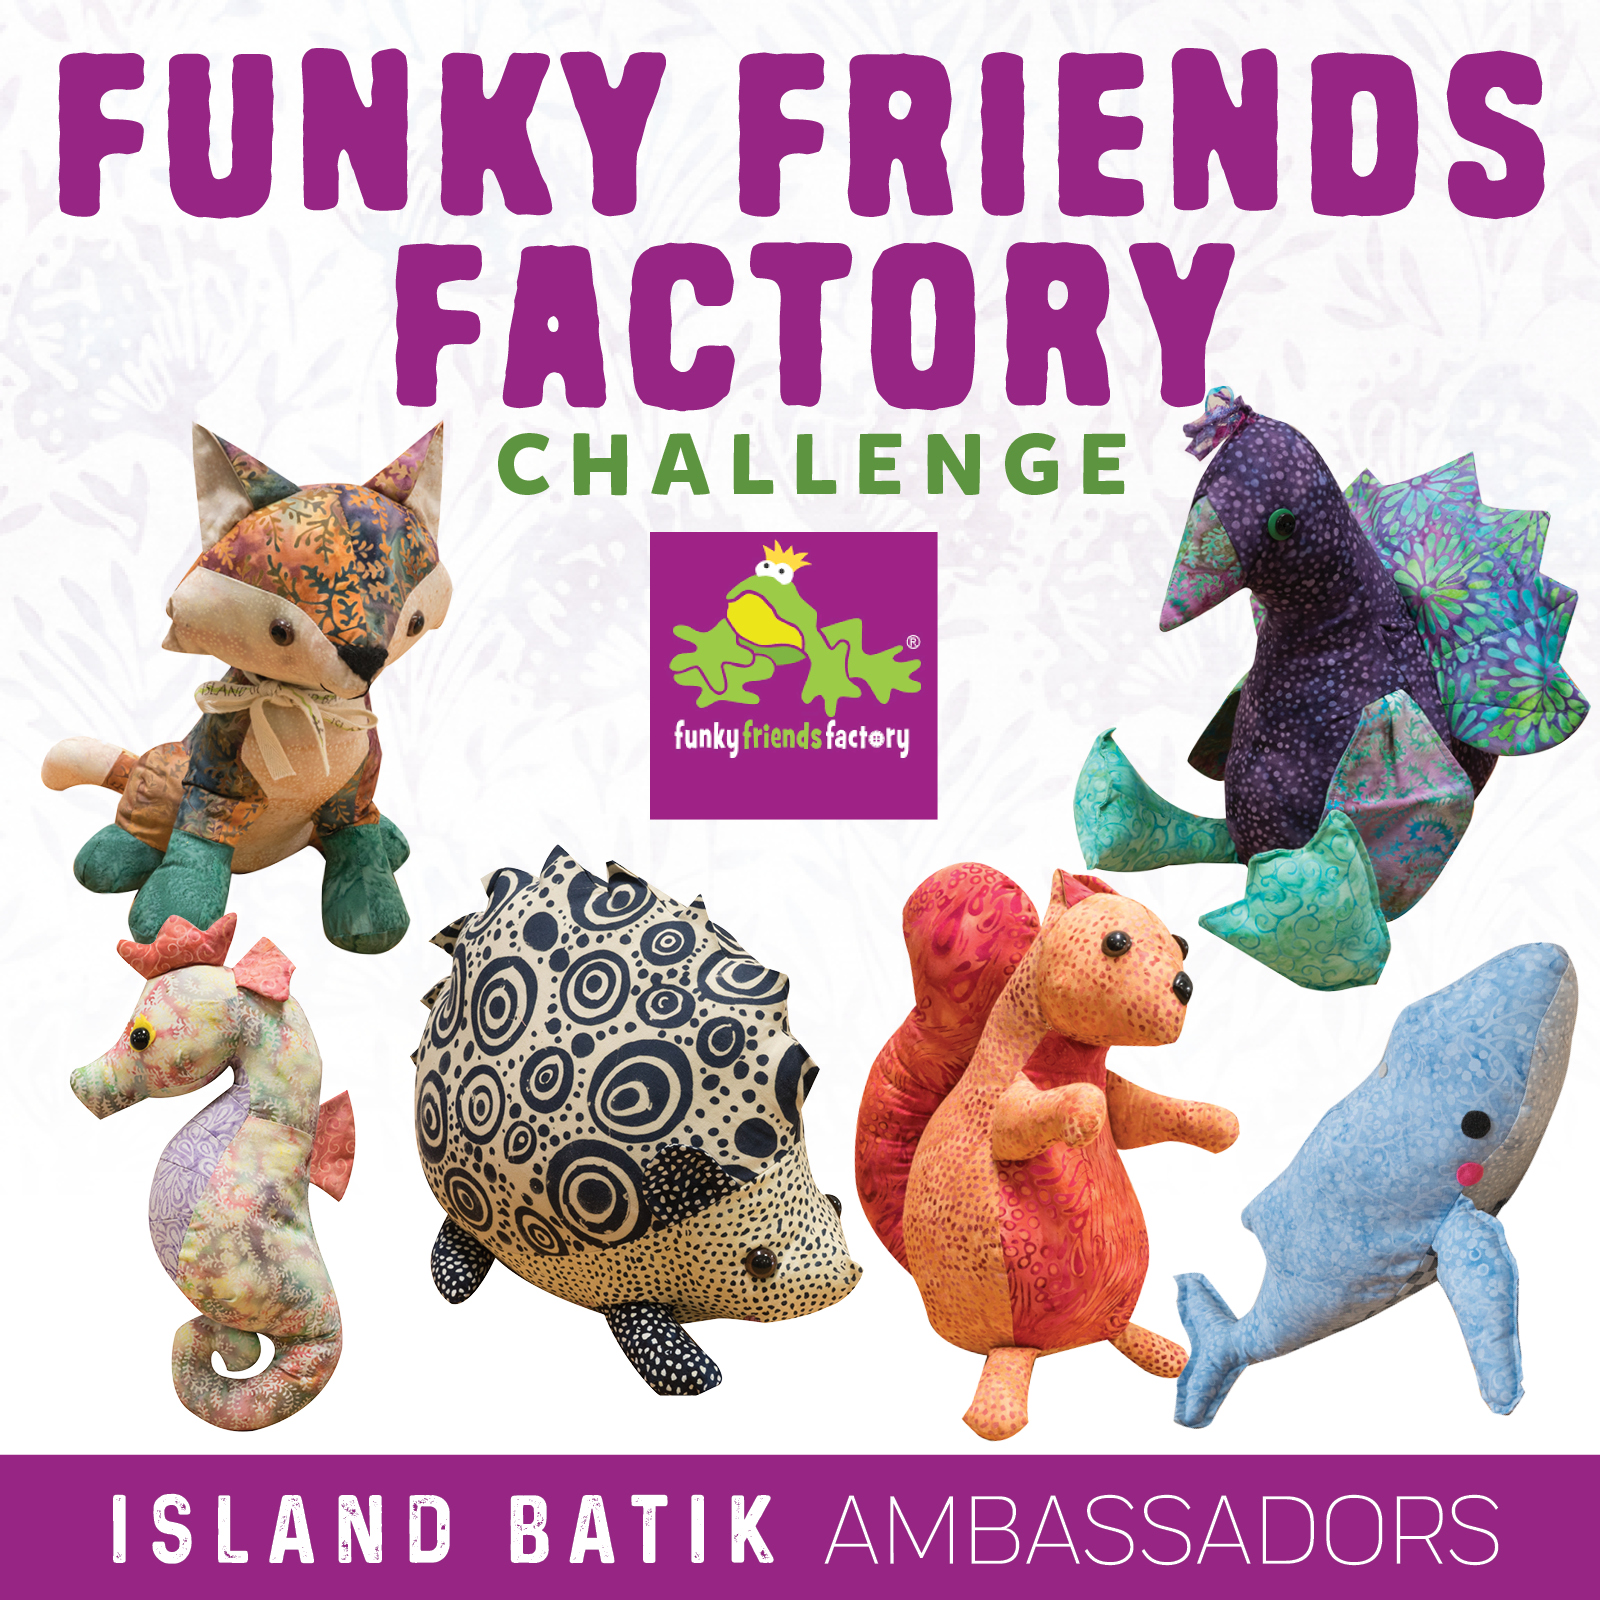
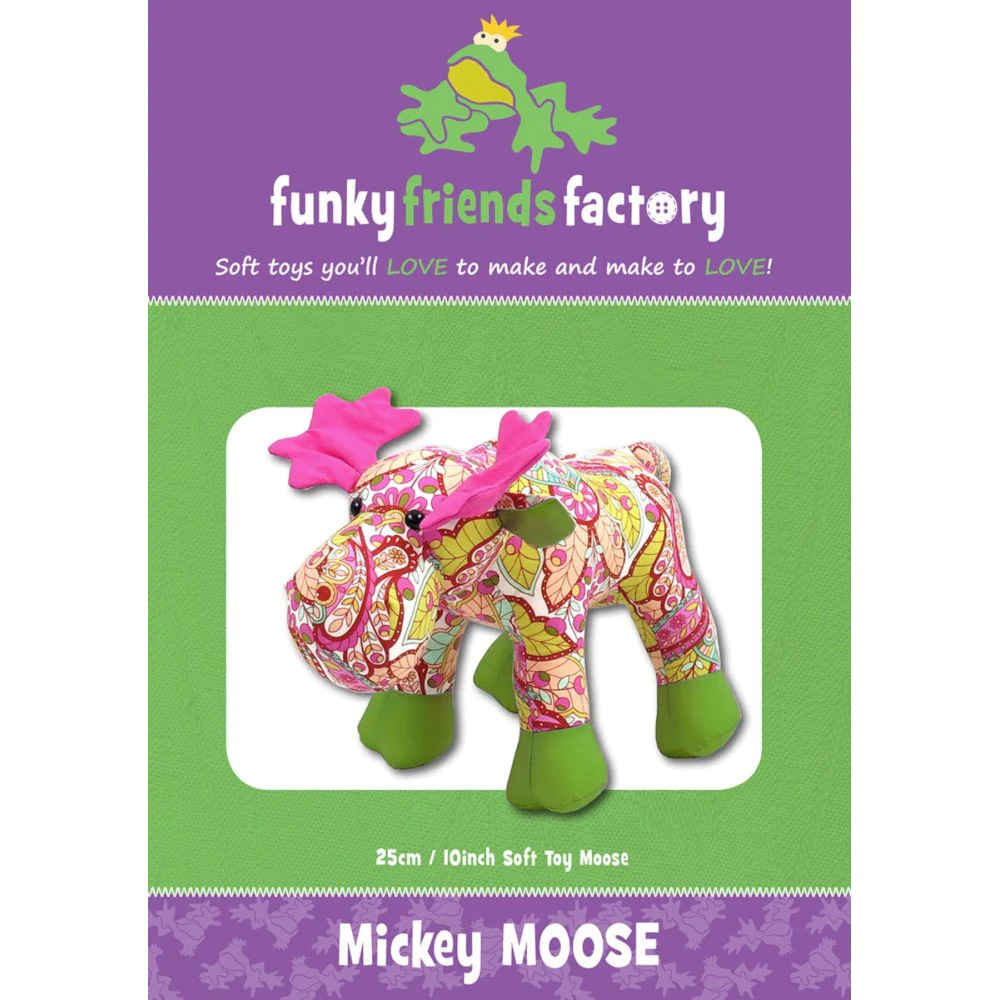
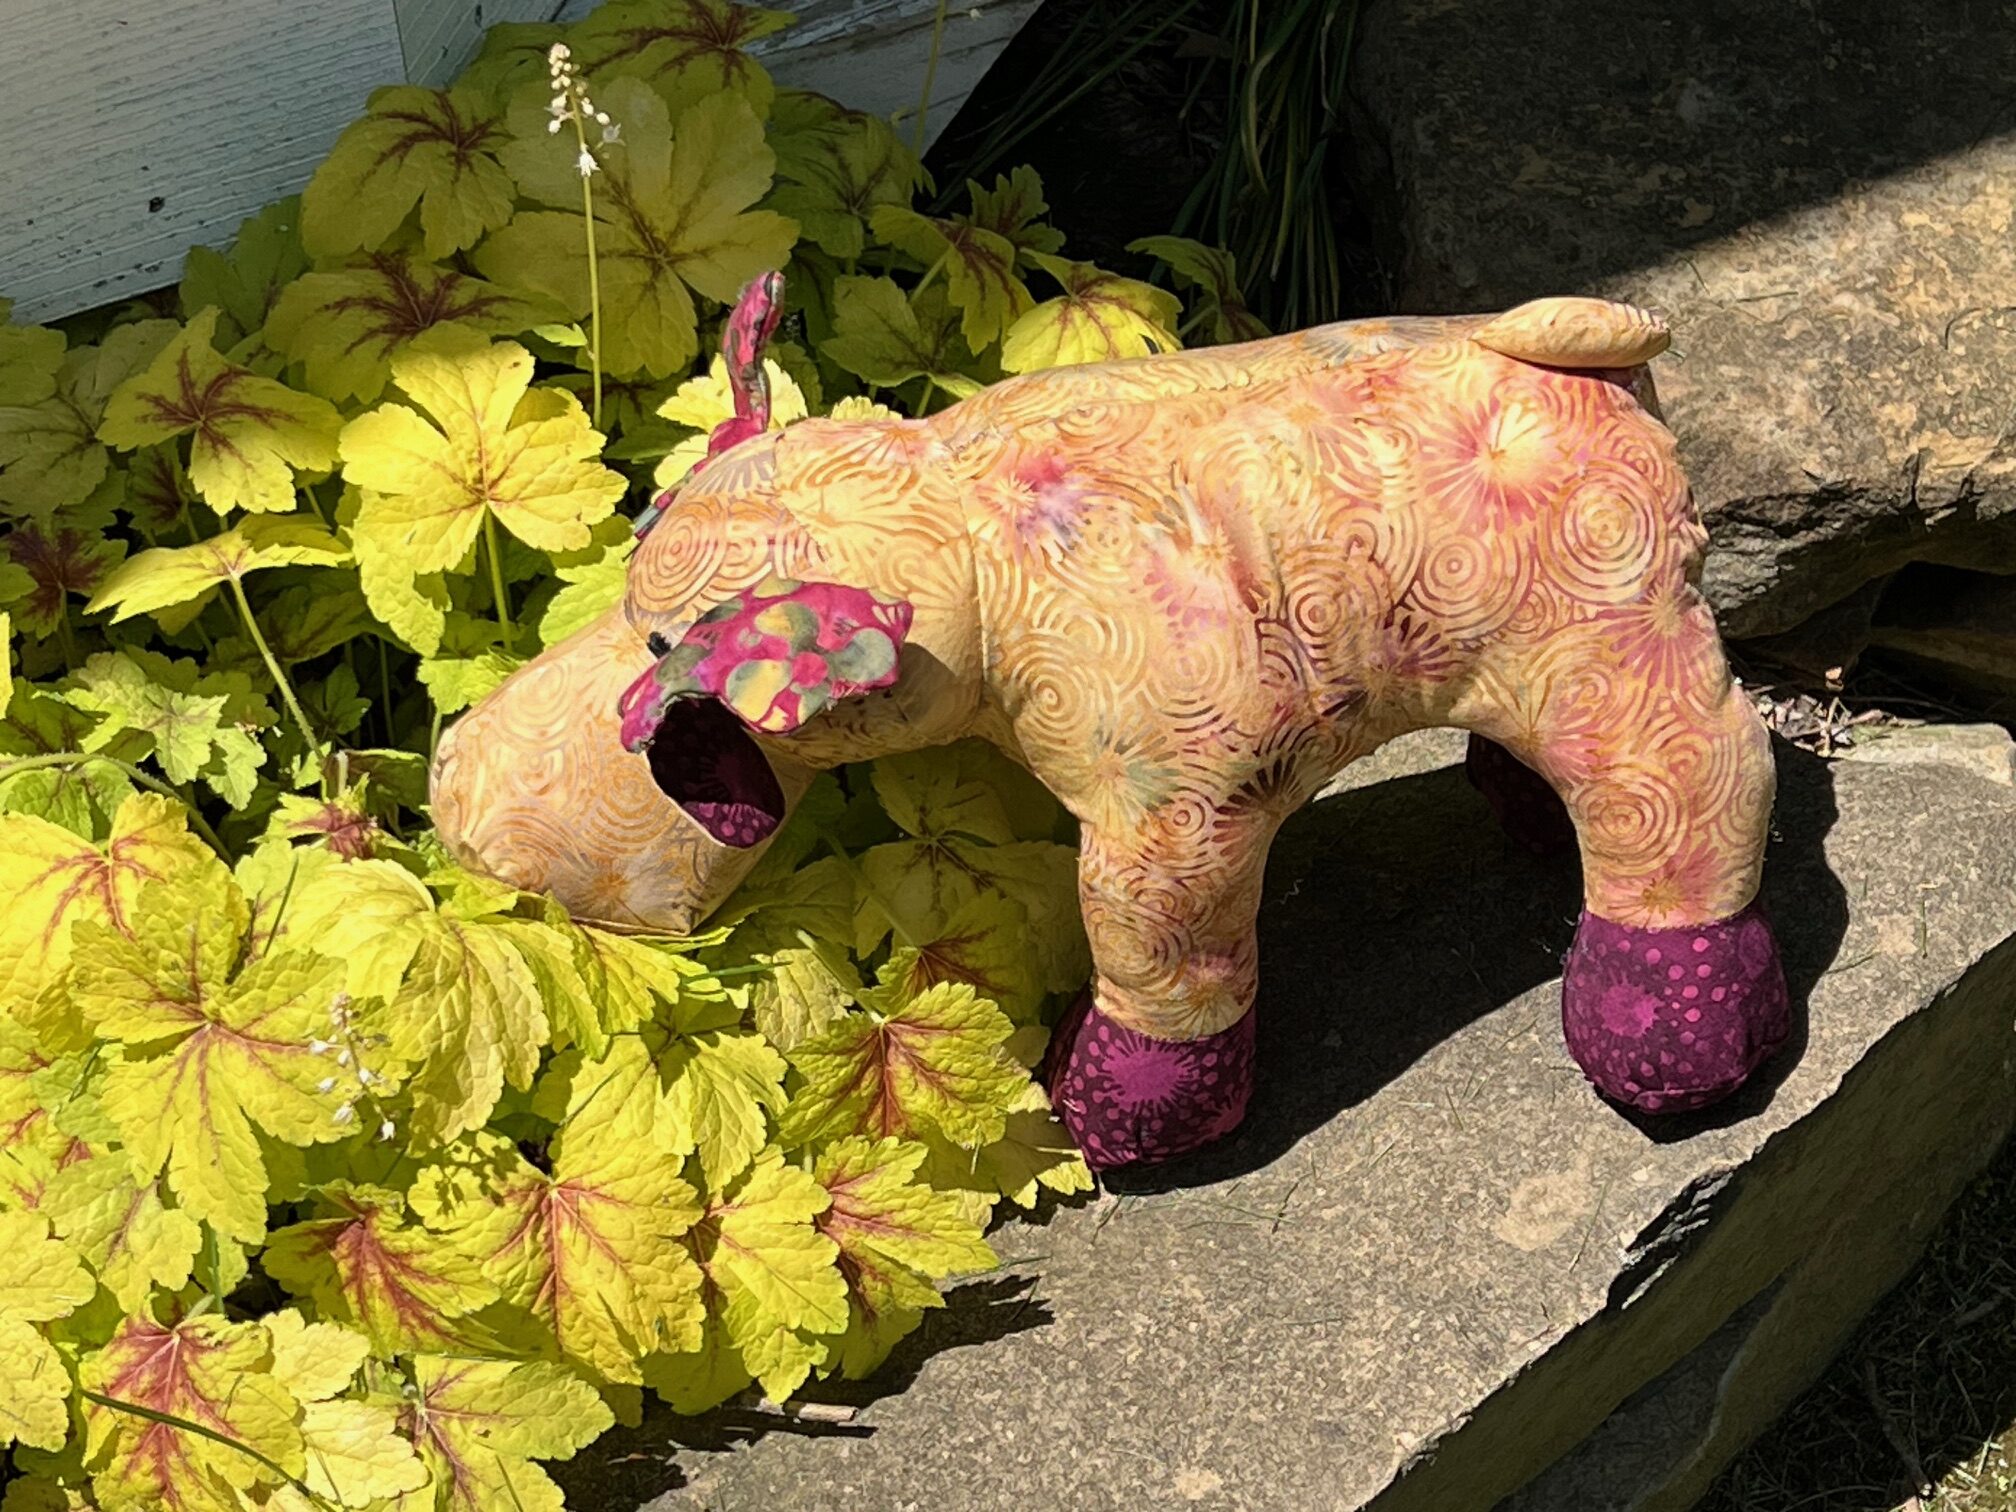
Funky Friends Factory is a new sponsor with Island Batik this year and what fun projects! We had our choice of stuffed friends to make and I chose Mickey Moose. I have this thing about moose. They are just so cute! I don’t know if it stems from the Rocky and Bullwinkle show as a child or just what, but I do realize they are not friendly creatures in the wild. But the cute factor is high on my barometer!
These are the fabrics I chose for my moose: Circle Dots Yellow and Optic Flower Yellow for the body, Fan Red Burgundy for the antlers, and Circle Dots Purple for the hooves and foot pads, and ear backs.
And here she is, born today, April 30, Mildred Moose, Milly for short. Love her.
She got loose!
More munching!
Here’s where I was able to nab her and bring her back home.
I used Aurifil 50 wt thread for piecing her together and Aurifil black 12 wt for hand embroidering her eyes.
I begin every project with an new Schmetz needle. I used a size 12 Microtex for this quilting fabric.
This being the last day of the month, be sure to check out the other Island Batik Ambassadors to see which Funky Friend they decided to craft.